Showing posts with label pie. Show all posts

Mini Lemon Pies


Mini Lemon Pies

These little mini lemon pies make a delightful dessert or sweet little snack any time. Made with lemon curd using fresh lemons from my cousin's Arizona backyard. 

Lemon curd is so easy to make and is the perfect balance of sweet and tart. Lemon curd can be stored in the refrigerator for 2 to 3 weeks.

There are many uses for lemon curd such as, filling for cupcakes and donuts, spread it between cake layers. Spread it on scones, crackers, pancakes, and waffles. 

Making lemon curd

I started by making the lemon curd. Using a double boiler I whisked together the sugar and egg yolks. Then, added the fresh lemon juice, zest of lemon, and butter. This requires continuous stirring. 

Homemade lemon curd

This finished lemon curd placed in a bowl to cool. The complete ingredients and direction for the lemon curd and the crust will be at the end of this post.

Muffin tin lemon pies

Next, I made the dough for the mini lemon pies. You can use a pie crust recipe or even buy the pie crust already made. I used the same recipe that I make for my Pecan Cup Cookies. 

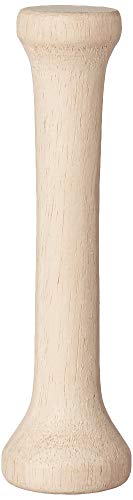
This dough is really easy to make using cream cheese, flour, and butter. I rolled the dough into one-inch balls and pressed them into the mini muffin tin using my handy Tart Tamper.

Mini lemon pie cups

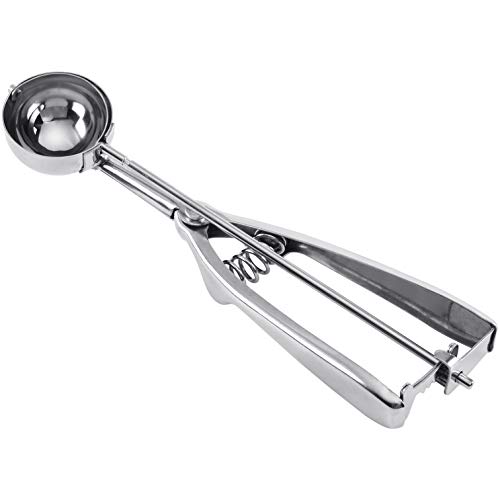
After baking the mini pie cups I placed them on a rack to cool. When the cups were finally cooled and the lemon curd was chilled I filled each cup with a scoop of lemon curd using my #70 cookie scoop. About one tablespoon in each cup.

Mini Muffin Tin Lemon Pies

Lemon Curd Ingredients:

1 cup of white sugar
1/2 cup of lemon juice (4 to 5 lemons)
5 large egg yolks
1/2 cup salted butter (cold and cut into tablespoons)
The zest of 2 lemons

Lemon Curd Instructions:
  1. Add some water to the double boiler and bring it to a boil.
  2. Whisk together the sugar and egg yolks and begin to stir.
  3. Add the lemon zest and lemon juice.
  4. Continue to stir, the mixture will begin to thicken.
  5. After 10 minutes remove from the heat.
  6. Add the butter one tablespoon at a time, continue stirring until all the butter is melted and the curd is thick.
  7. Transfer to a bowl and let it cool.
Pie cup Ingredients:

3 ounces Crean Cheese (Softened)
1/2 cup butter
1 cup all-purpose flour

Pie Cup Instructions:
  1. Blend the cream cheese and butter until smooth.
  2. Add flour and mix until dough forms.
  3. Wrap and refrigerate to chill for 30 minutes.
I sprayed a mini muffin tin with Bakers Joy to prevent the cups from sticking. Roll the dough into one-inch balls and press up the sides of the muffin tin with the tart tamper. Tip: Have a little bowl of flour handy to coat the end of the tamper so the dough doesn't stick to it.

Preheat the oven to 350 degrees and bake the cups for 18 to 20 minutes until golden brown. After the cups have cooled fill each of them with a tablespoon of cooled lemon curd and enjoy.

I yielded 20 little pie cups for the dough recipe and after filling them I still had some lemon curd leftover. If you want to you can double the dough recipe.

You might also like my Fresh Lemon Hand Pies made with the same lemon curd.

As always thanks for stopping by and I hope you enjoy it.

Wilton Stainless Steel Small Cookie Scoop, SilverWilton Stainless Steel Small Cookie Scoop, SilverWilton Stainless Steel Small Cookie Scoop, SilverGood Cook 04029 Mini Non-Stick Muffin Pan, Steel, 1-7/8 in Dia x 14.6 in L x 9.3 in W x 6.8 in HGood Cook 04029 Mini Non-Stick Muffin Pan, Steel, 1-7/8 in Dia x 14.6 in L x 9.3 in W x 6.8 in HGood Cook 04029 Mini Non-Stick Muffin Pan, Steel, 1-7/8 in Dia x 14.6 in L x 9.3 in W x 6.8 in HFox Run Tart Tamper, WoodFox Run Tart Tamper, WoodFox Run Tart Tamper, Wood


Quick Lemon Meringue Pie

Quick lemon meringue pie

Quick Lemon Meringue Pie

This quick lemon pie recipe is so easy and so good. Every time my mother made a lemon meringue pie it was a treat and I couldn't until it cooled so I could dig in.

My cousin Jimmy lives in Arizona and just happens to have lemon and grapefruit trees in his back yard. Last week my cousin sent us a box of lemons and grapefruits along with his recipe for lemon meringue pie.

There is nothing better than this basic lemon meringue pie recipe made with fresh lemons. When I opened the box I couldn't believe my eyes. These are the biggest lemons that I've ever seen.

basic lemon meringue pie recipe

Take a look for yourself, on the right is a lemon from our local grocery store and on the left is one of the lemons my cousin sent me. I used just one of these to make the lemon pie filling.

Make lemon meringue filling
Lemon Pie Filling:

1 cup sugar
1/4 cup cornstarch
1-1/2 cups cold water
3 egg yolks, slightly beaten
1/4 cup lemon juice
1 tablespoon butter
1 baked 9-inch pie crust
grated zest of one lemon


Easy lemon meringue pie
For the Meringue: 


1/3 cup sugar
1 teaspoon cornstarch or 1/4 Tsp. cream of tartar
3 egg whites


Here is how we made this: Simple Lemon Meringue Pie Recipe

Preheat the oven to 350 degrees and bake the pie crust for 12 to 15 minutes.

The Filling:

Combine 1 cup sugar and cornstarch in a medium saucepan. Gradually stir in water until smooth. Then stir in the egg yolks.

Bring this to a boil over medium heat, stirring constantly, and boil for one minute.

Remove from heat and stir in lemon zest, lemon juice, and butter. Continue stirring until the filling becomes thick. Then spoon the filling into the pie crust.

The Meringue:

Beat the egg whites on high speed with a mixer until foamy. I used my KitchenAid Stand Mixer for this it works the best.

Add the cornstarch and then add the sugar one tablespoon at a time. Continue mixing on high speed until stiff peaks form.

Spread the meringue over the filling, sealing the edges of the pie. Bake at 350 degrees for 15 to 20 minutes until the meringue is golden brown.

Cool the pie on a wire rack to room temperature, then refrigerate for 3 hours. Make sure the pie is room temperature before you refrigerate. I have made this mistake before the lemon filling will not set properly if you put it the refrigerator too soon.

I used a store-bought pie crust for this recipe. If you need a recipe for pie crust you can check out my Apple Pie Recipe here.

Big thanks to my cousins Jimmy and Carmie for sending me these beautiful fresh lemons and your quick lemon meringue pie recipe.

As always thanks for stopping by and I hope you enjoy

Below are some of the handy kitchen gadgets that I used to make this quick lemon meringue pie. The small hand grater was perfect for grating the lemon zest. The small strainer was a big help squeezing the lemon juice, it fits over my measuring cup and catches all of the seeds. And of course my 9-inch glass pie plate.

Sam's Apple Pie

apple pie on a plate

Every fall season I get an itch to bake an apple pie, so I decided to go ahead and bake one of my favorites. I call this one Sam's Apple Pie, actually, apple pie is great any time of the year, it just seems fitting when the apples are in season.

I started off by making the pie crust, and since I'm no expert I did this according to my KitchenAid instructions and recipes.

Here is what you need for the pie crust:

2-1/4 cups of all-purpose flour
3/4 teaspoon salt
1/2 cup shortening, well chilled
2 tablespoons of butter or margarine, again well chilled
5 to 6 tablespoons of cold water

I added the flour and salt into my mixing bowl, then attached the flat beater and turned it on low for about 10 seconds.
I cut the shortening and butter into small pieces, added them to the flour, turned on low speed for about one minute until I saw the mixture starting to form little clumps.
Keeping the mixer on low speed I added the cold water one tablespoon at a time until the pie crust formed into a ball.
I cut it into two equal pieces, wrapped it and put it in the refrigerator while I prepared the apples.
Pie crust
My pie crust ready to be cut in half
Now that my pie crust was made it was time to get the apples ready. I used five nice sized Granny Smith apples. I peeled, cored and sliced my apples and placed them in a large bowl. I'm not that particular, I sliced the apples thin but they didn't have to be all the same size. This is enough pie crust for a bottom and top of a 9-inch pie plate.

Once the apples are in the bowl here is what you need:

2 tablespoons lemon juice
3/4 cup of white sugar
1/4 cup brown sugar
1/4 teaspoon salt
2 tablespoons flour or cornstarch (I used flour)
1 teaspoon nutmeg
1 teaspoon cinnamon

Add all of these on top of the sliced apples and mix well using a large spoon. Now that the apples are mixed place them in the refrigerator while you roll out the pie crust.
apples mixed in a bowl
Mixed apples in the bowl


Next, I rolled out my pie crust between two pieces of wax paper and carefully lined the bottom of a 9-inch pie plate. Make sure you press it firmly to the bottom and sides, of the pie plate to work out any air bubbles.
pie crust lined in pie plate
Pie crust in pie plate
Next, I added 4 to 5 cups of the sliced seasoned apples into the pie plate, make sure you get the juice from the bottom of the bowl.
apples in pie plate
Now I added the top, and cut about a three-inch cross in the center, and one-inch cross at every point and one in between. This allows the steam to release.
top added to pie
I lightly brushed the top with milk and sprinkled sugar and cinnamon on top. Place the pie on a cookie sheet just in case there are any spills, and mine always does, so it's best to be safe.

Time for baking instructions:

Pre-heat oven to 450 degrees
Cover the top of the pie with tin foil, and bake at 450 degrees for 15 minutes
After 15 minutes remove the tin foil, lower the oven to 375 degrees
Continue to bake for another 45-50 minutes
pie out of the oven
 Just out of the oven
 I could have really got away with three Granny Apples for this pie, as I had some leftover. So enjoy my Apple Crisp that I made with the leftover apples.

Well, it may not be the prettiest pie or win any contests, but it is oh so good. As always thanks for stopping by and I hope you enjoy.

“ I earn money from purchases on affiliate links at no additionl cost to you.” Disclosure Statement

X