Caramel Cup Cookies

Caramel Cup Cookies

With the holidays soon approaching I thought that I should share one of my favorite cookies, of course, you certainly don’t have to wait for the Holiday season to make these.

 Caramel cup cookies are a sure thing any time of year; they are a perfect fit for any gathering or party.

They are not that difficult to make, so you don’t have to be a pastry chef to make these. We can now use these Kraft Caramel Bits, so you don't have to take the plastic wrap off of the caramels what great idea.

Let’s start off by making the pastry dough:

Here is what you need:
  • 1 (8oz. package) cream cheese
  • 1/2 lb. butter (2 sticks)
  • 3 cups flour
  1. Combine all of the above ingredients in a large mixing bowl
  2. You can use a hand mixer, your KitchenAid Stand Mixer, or mix it by hand. Mix until you have a nice smooth dough.
  3. Pinch off small portions of the dough and roll into a 1-inch ball. 
  4. Then set them into a mini muffin pan and gently flatten.
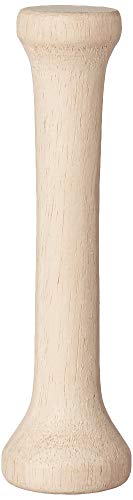
  5. We have a great little tool called the mini tart shaper to press the dough and form the cups
  6. Bake these at 350 degrees for about 12 to 15 minutes, and then set them aside to cool.

    This dough is really easy to work with. This mini tart shaper makes it easy to form the cups. I always make the pastry cups first and while they cool I melt the caramel.

    Now for the Filling:
    • 1 lb. caramels, we use Kraft (don’t forget to unwrap the caramels)
    • 1/2 cup of Carnation evaporated milk.
    1. Add the caramels and milk to a double boiler and melt over medium heat, or you could use your microwave.
    2. Add the caramel filling to the pastry cups and let cool.
    At this point there are some options:

    • You can sprinkle some coarse salt over the caramel to make a salted caramel cup.
    • Top them off with some whipped cream
    • You could also make a light frosting
    This year I decided to change it up a bit. I made half salted caramel and the other half I left plain so we could add some whipped cream on top later. Or, just enjoy these plain. If you would like to make a frosting for them the recipe is below.

    What you need to make the Frosting:

    • 1/2 cup white sugar
    • 1/3 cup evaporated milk
    • 1 cup of shortening
    • 1 tsp. vanilla extract
    1. Beat all of the above ingredients together until you have nice creamy frosting.
    2. Add the frosting using a pastry pouch.
    This should yield about 48 cookies, and that’s enough for me. We need to make a second batch for everybody else.

    As always thanks for stopping by and I hope you enjoyed my recipe.

    Wilton Perfect Results Premium Non-Stick Mini Muffin Pan & Mini Cupcake Pan, 24-Cavity, SteelWilton Perfect Results Premium Non-Stick Mini Muffin Pan & Mini Cupcake Pan, 24-Cavity, SteelWilton Perfect Results Premium Non-Stick Mini Muffin Pan & Mini Cupcake Pan, 24-Cavity, SteelFox Run Tart Tamper, WoodFox Run Tart Tamper, WoodFox Run Tart Tamper, Wood


    Have you heard of Yummly?


    I just signed up with this amazing recipe site, and I couldn’t be happier. I am so impressed with Yummly that I wanted to share it you all you.

    This is a powerful recipe site that has been around since 2010, maybe you already know about it, and all they can do. With this site you can find and store recipes that you and your whole family will love.

    Yummly has a powerful search tool that enables you to find whatever type of recipe you are looking for. You can search for a specific cooking technique, special diets, nutrition, recipes with specific ingredients, and much much more.

    You can personalize your recipes into collections by your preferences and store them just for whenever you need them. You can use the Yummly App while you’re shopping to pick all of the ingredients for that favorite recipe.

    Honestly I don’t know everything about the site, as I just got started, but I sure plan to learn fast.

    Visit the Yummly home page here

                           or

    You can visit my Yummly Publishers page here  

    You really don’t have to have a recipe blog to join Yummly, just join and take a look at all they have to offer. Start a collection of your favorite recipes. You can even tell them your preferences and they will find and recommend recipes for you.

    I have added the yum button to all of my pages so feel free to yum away.

    What are you waiting for start now and enjoy.

    Grilled Sweet Potatoes

    Grilled Sweet Potatoes


    Here is another one where you don’t have to turn on the oven. It’s still grilling season so why not get all you can get out of it before the weather turns on us.

    My daughter prepared these sweet potatoes and I grilled them for a great side dish for the evening. Apparently sweet potatoes are one of the healthiest foods that you can eat, Loaded with vitamin “A”. I’m not any kind of expert on the health benefits of sweet potatoes I just know that I do enjoy them.

    What you need:

    2 or 3 sweet potatoes
    Olive oil
    Cinnamon
    Nutmeg
    Sugar (optional)

    How to do this:

    • Peel and slice the sweet potatoes ¼” or ½ thick
    • Brush both sides lightly with olive oil
    • Sprinkle cinnamon and nutmeg over one side
    • Sugar is optional; you can add some if you like. We did not use sugar

    I set the grill on the medium setting and grilled on each side for about 2 minutes. Then I moved them to the upper rack of the grill, closed the lid, and cooked until the sweet potatoes were tender. I would say about 15 minutes.

    Sweet potatoes cooking on the grill
    Sweet Potatoes on the grill


    As always thanks for stopping by and I hope you enjoy

    Grilled Italian Sausage Sandwiches

    Italian Sausage Sandwiches
    The other night my wife and my daughter took a trip out of town, and I knew they were going to have a late lunch. That left me wondering what I was going to have for dinner when I got home from work.

    I had two Italian sausage links in the freezer; I took them out so they would be ready when I got home. I decided to fire up the grill for my sausage links, I set the grill to medium heat.

    While the links were grilling I sliced up some red and green bell peppers, along with some onions and then just for some extra flavor I added some diced up garlic.

    Cut up peppers and onions
    My Sliced peppers and onions with the garlic
    I simmered these in my cast iron skillet covered, on medium heat on the stove. My wife picked up a couple of sausage rolls for me before she left so I was all set for my Italian sausage sandwiches. 
    Sauted peppers and onions
    Simmered over medium heat until tender
    These are the kind of sausage sandwiches you love to buy when you go to the county fairs. There is always a vendor selling delicious sausage with peppers and onions. So just in case you missed the county fair with that favorite vendor, you can give this a try. These were quick and easy to make and Oh so good.

    What you need:
    2 Italian sausage links
    ½ of each red and green bell pepper sliced in strips
    ½ onions sliced
    1 clove of garlic diced
    2 nice sausage rolls

    As always thanks for stopping by and I hope you enjoy

    Crock Pot Country Ribs

    Country ribs with rice and veggies


    My wife picked up a package of country ribs the other day, and I had all intentions of cooking these on the grill.

    When I got home from work the house was filled with the smell of those country ribs cooking all day in the Slow Cooker. She decided to make them a Crock pot meal, and I’m so glad she did.

    No real recipe here just put your ribs in the slow cooker add a couple of bottles of your favorite barbecue sauce and set it to the low setting. These cooked for about four hours on the low setting and they were fall off the bone delicious.

    Served with sautéed vegetables and rice this made a nice meal for the both of us. The vegetables were simple, cut green and yellow peppers into slices, slice up an onion, and then add some spinach.

    Drizzle olive oil into a 10” pan then add the cut up vegetables and sauté over medium heat until the veggies are tender. This turned out to be a great side dish to go along with these country ribs.

    As always Thanks for stopping by and I hope you enjoyed :) 

    Calphalon Classic Hard-Anodized Nonstick Frying Pan Set, 8-Inch and 10-Inch Frying PansCalphalon Classic Hard-Anodized Nonstick Frying Pan Set, 8-Inch and 10-Inch Frying PansCalphalon Classic Hard-Anodized Nonstick Frying Pan Set, 8-Inch and 10-Inch Frying PansHamilton Beach 6-Quart Slow Cooker with 3 Cooking Settings, Dishwasher-Safe Stoneware Crock & Glass Lid, Silver (33665)Hamilton Beach 6-Quart Slow Cooker with 3 Cooking Settings, Dishwasher-Safe Stoneware Crock & Glass Lid, Silver (33665)Hamilton Beach 6-Quart Slow Cooker with 3 Cooking Settings, Dishwasher-Safe Stoneware Crock & Glass Lid, Silver (33665)


    Holiday Cranberry Sauce

    Holiday Cranberry Sauce Recipe


    This freshly made cranberry sauce has become a staple at our Thanksgiving dinner. I was never a big fan of cranberry sauce until I tried this one.

    Every Thanksgiving my dad had to have his cranberry sauce. The only problem was that he always bought the cranberry sauce in a can. I think this is why I never cared for it because to me it tasted like the can.

    For fifteen years now my daughter has been making this delicious cranberry sauce from a recipe she found in a Williams-Sonoma Thanksgiving Guide.

    I'm sure my dad would have loved this cranberry sauce, much better than out of a can, I know I do.

    Holiday Cranberry Sauce Recipe:

    Here is how you make it:
    1. In a medium to a large non-aluminum saucepan, combine the apple cider, sugar water, and cinnamon stick
    2. Place over medium heat and bring to a simmer a light boil, stirring to dissolve the sugar
    3. Add the 2 bags of cranberries; bring to a simmer, and cook, stirring occasionally, until most of the cranberries have burst (about 10 minutes)
    4. Remove the pan from the heat and let it cool to room temperature, transfer to a bowl, cover and refrigerate for a least 24 hours
    5. Remove the cinnamon stick and let the sauce come to room temperature before serving
    6. The sauce must be prepared at least 24 hours in advance and can be prepared up to 3 days in advance.
    As always Thanks for stopping by and hope you enjoy it.

    The Best of Thanksgiving (Williams-Sonoma)The Best of Thanksgiving (Williams-Sonoma)


    A Summer Salad

    A summer salad


    Sometimes it’s just too hot to cook inside even here in Western New York. We needed to come up with dinner the other night so we put together this salad with whatever we had on hand.

    Fran started off with a mixture of greens that were in the refrigerator, some romaine, leaf, and iceberg lettuce, and filled up a large bowl. Then she crumbled up four strips of crispy bacon on top.

    Next, she added some red onions, diced tomatoes, sliced fresh zucchini, and cucumber just picked from our friend’s garden, and to top it off shredded cheddar cheese.

    While she was doing all of that I fired up the grill and grilled a boneless chicken breast. We cut up the chicken breast, whipped up some ranch dressing and created a nice summer salad with whatever was on hand.

    I went a step further with my salad and added fresh ground black pepper, almonds and some raisins.

    This made for a nice meal for just the two of us. So if you’re stuck for a quick dinner just put together what you have.

    As always thanks for stopping by and I hope you enjoyed.

    Why I Love My KitchenAid Stand Mixer

    KitchenAid Stand Mixer

    In today’s busy world we need all the help we can muster, especially in the kitchen. My KitchenAid is a real time saver for me.

    I have a passion for making homemade pizza, bread, and homemade pasta. My mixer makes short work of the dough for any of these.

    Just add the ingredients attach the dough hook and turn it on. I have a nice batch of fresh dough for my homemade pizza in about 5 minutes.

    There is nothing like the smell of homemade baked goods coming from the oven. What did you say? You like homemade cookies; well this mixer will help cut the time to mix your favorite cookie dough or batter.

     With the time you save you could be helping the kids with their homework, or talking with a friend on phone. I love oatmeal raisin cookies, and mixing up a batch in the KitchenAid is really easy.

    Here is my quick and easy pizza dough recipe:

    5 1/2 to 6 cups of all-purpose flour
    2 package of dry yeast
    3 tablespoons of oil or Crisco
    1 teaspoon of salt
    2 1/4 cups of warm water

    All I have to do now is put all of these ingredients into my Kitchen Aid bowl, attach the dough hook and turn it on. In about 3 minutes I have enough dough to make 2 fresh homemade pizzas.


    Some Features of My Mixer

    I have the one pictured it's the 6-quart Professional Mixer, and it comes with a Flat Beater, Wire Wisk, and A Dough Hook. You'll find that these tools are able to take on many tasks to assist you in the kitchen.

    A batch of dough for cavatellis
    Here is a fresh batch of dough for my homemade Cavatelli.


    A video of the many attachments and their uses

    Baked Parmesan Zucchini


    Baked Parmesan Zucchini slices

    Garden season brings so many healthy and fresh vegetables, and if you plant zucchini you already know it grows in abundance.

    You can go online and find thousands of recipes for zucchini. This recipe my daughter cooked up just the other night, Baked Parmesan Zucchini Slices.

    This is so easy to make with so few ingredients, and they make a healthy tasty snack or a side for any meal. When you slice them thin they're more like oven baked parmesan zucchini chips.

    What you need:

    2 or 3 zucchini of course sliced into rounds
    Olive oil or our latest favorite coconut oil
    Parmesan cheese
    Italian seasoning
    Minced garlic or garlic powder (Optional)

    Here is all you have to do:

    Preheat the oven to 350 degrees

    Slice the zucchini into a bowl, (you can slice them to your desired thickness) I like the zucchini slices thin because they are so crispy right of the oven.

    Drizzle some oil into the bowl and toss until the zucchini are all coated

    Spread them out on a cookie sheet and add your seasonings, top off with a nice layer of Parmesan cheese

    Bake at 350 degrees for about 20 to 25 minutes, for extra crispy turn on the broiler for the last 5 minutes

    Serve and enjoy this oven baked parmesan zucchini.

    As always Thanks for stopping by and enjoy!

    “ I earn money from purchases on affiliate links at no additionl cost to you.” Disclosure Statement