Showing posts with label recipes. Show all posts

Peas and Meatballs Soup

 Looking for a hearty soup to warm you up on a chilly day? This tomato-based peas and meatball soup perfectly fits a cold day.

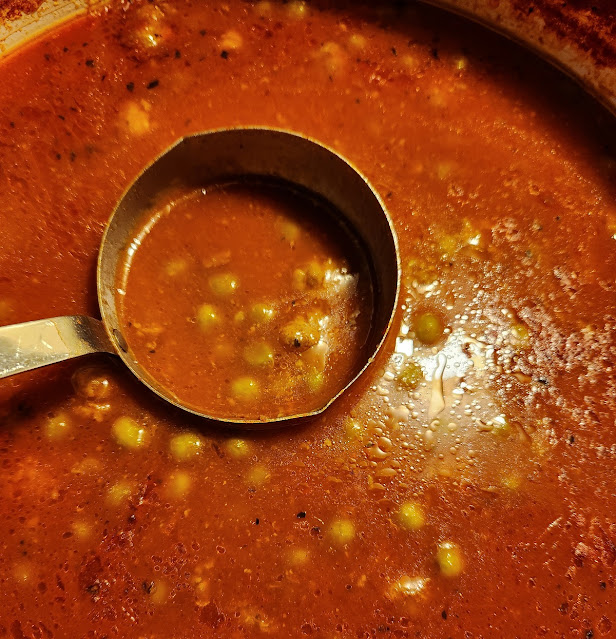
Peas and Meatballs soup

My cousin Jimmy and his wife Carmie are just as passionate about preserving old family recipes as I am.

My cousin sent me this recipe about a year ago, and honestly, I wasn't that impressed. But Jimmy was persistent and insisted that we try this soup. We finally gave in and gave this recipe a try, and we're so glad we did. 

It was so good especially served it with fresh Italian bread. This recipe makes a large enough pot of delicious soup to have leftovers for another day.

We come from an Italian family and have many favorite recipes from our parents and grandparents. I never remembered this soup from our family, but this is a recipe that Carmie grew up with. Carmie's mother Anne made this soup and Carmie carries on the family tradition of peas and meatballs soup.

Ingredients for Meatballs:

  • 1 lb. of ground beef
  • 1/4 cup seasoned bread crumbs (moistened with water or milk to form a paste)
  • 1 egg
  • 1 tablespoon parmesan cheese
  • 1/2 teaspoon of oregano
  • 1/2 teaspoon of basil
  • 1/2 teaspoon parsley
  • 3/4 teaspoon pepper
  • 3/4 teaspoon salt
  • 2 teaspoons chopped garlic
  • 1/4 cup oil for frying

Ingredients for Soup:

  • 2 (15-ounce) cans tomato sauce
  • 2 (15-ounce) cand of regular sweet peas undrained
  • 4 cups of water
  • Salt and pepper to taste
Directions:

  1. Moisten the bread crumbs then add to ground meat. Add the egg and mix well.
  2. Add the remaining seasonings (except the oil) and mix thoroughly.
  3. Form miniature meatballs (as for wedding soup) about the size of a marble.
  4. Fry the meatballs in the oil until they are brown and cooked through.
  5. In a large saucepan place the the meatballs with the oil they were cooked in and all other ingredients.
  6. Bring to a full boil, then reduce the heat to a slow simmer and cook until the sauce thickens. (About 1 and a half to 2 hours)
  7. Serve with fresh Italian bread.

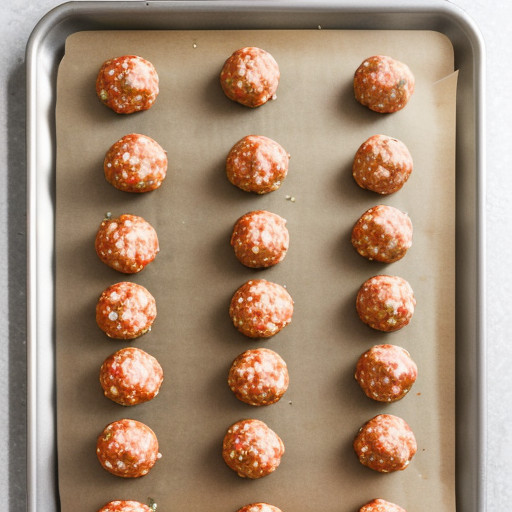
Measballs for soup

The photo above shows the size of the meatballs. You could make them a little smaller than this. You can also bake the meatballs in the oven, but you won't get the added flavor from frying them in the soup.

More recipes on my blog from my cousins Jimmy and Carmie:

Canning and Preserving EggplantsCanning and Preserving EggplantsHow to Make Roasted Red PeppersHow to Make Roasted Red Peppers
 

Instant Pot Blackberry Jam


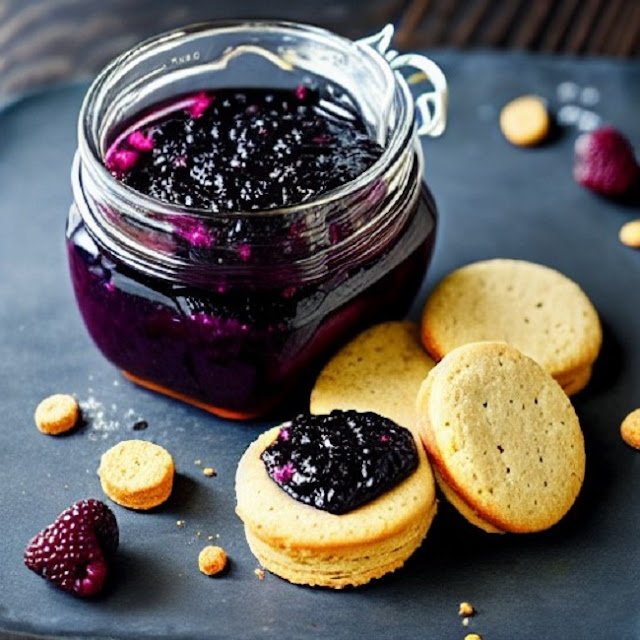
Instant Pot Blackberry Jam

This Instant Pot Blackberry Jam is so easy to make. This sweet and tangy treat is a perfect topping for biscuits, crackers, waffles, french toast, or pancakes. 

Where ever you like a sweet and tangy jam, this is the perfect fit. Try drizzling this jam over some vanilla ice cream.

All you need is an Instant Pot and a few ingredients and in about 30 minutes you'll have a sweet and tangy jam to enjoy.

Here in Western New York, blackberries are in season from the middle to the end of July. You don't have to wait until the blackberries are in season. You can find fresh blackberries at your local grocery store.

Blackberry Jam Ingredients:

  • 6 cups of fresh blackberries (rinsed and pat dry)
  • 1 1/2 cups white sugar
  • 1/4 cup fresh lemon juice (4 tablespoons)
  • 2 teaspoons vanilla extract
  • 3 tablespoons cornstarch
  • 2 tablespoons water
Directions:

  1. Place the blackberries in the Instant Pot, and cover them with sugar, lemon juice, and vanilla. Let them set for 10 minutes. Note: Step one is very important.
  2. Place the lid on and lock it into place, and make sure sure the release valve is set on the seal.
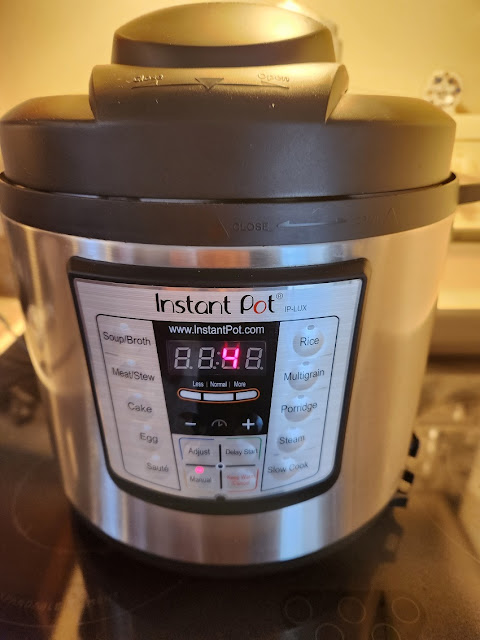
  3. Cook on manual pressure for 4 minutes.
  4. While the blackberries are cooking, mix the cornstarch and water in a small bowl. Set this aside.
  5. After the 4 minutes let the instant pot naturally release the pressure for about 10 minutes.
  6. Then carefully release the remaining pressure with the release valve.
  7. Open the lid and stir in the cornstarch and water.
  8. Continue to stir until all of the cornstarch is dissolved. 
  9. Let cool for a while and transfer to jars.
  10. Refrigerate after the jam has completely cooled.

Preparing blackberry jam

This is step one, after covering the berries with sugar, lemon juice, and vanilla wait 10 minutes. This step starts to break down the fruit and release the natural pectin in the blackberries.

Instant Pot

This only needs 4 minutes on the manual pressure setting in the Instant Pot.

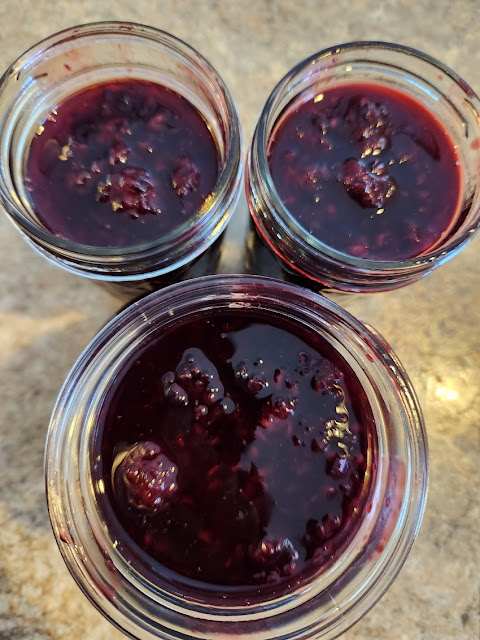
Blackberry Jam

This recipe yielded about 32 ounces of blackberry jam. I gave half of it to my daughter and grandsons. 

This jam will last about two weeks in the refrigerator. If this is too much, just cut all of the ingredients in half, but leave the cooking time at 4 minutes. You will get about 14 to 16 ounces of jam.

If you don't have an Instant Pot you can do this on the stovetop. In a covered saucepan bring the berries to a boil on high heat. Remove the lid when it starts to boil and cook for 40 to 50 minutes.

If you would like a smoother jam, use an immersion blender or potato masher to blend the jam to your desired consistency.

Thanks for stopping by and I hope you enjoy it.

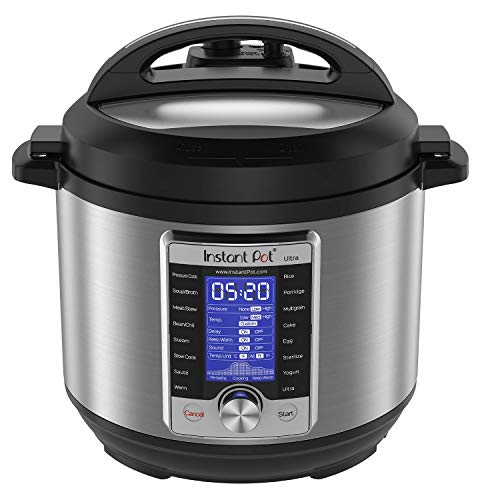
Instant Pot Ultra, 10-in-1 Pressure Cooker, Slow Cooker, Rice Cooker, Yogurt Maker, Cake Maker, Egg Cooker, Sauté, and more, Includes App With Over 800 Recipes, Stainless Steel, 6 QuartInstant Pot Ultra, 10-in-1 Pressure Cooker, Slow Cooker, Rice Cooker, Yogurt Maker, Cake Maker, Egg Cooker, Sauté, and more, Includes App With Over 800 Recipes, Stainless Steel, 6 QuartCheck Price


Cast Iron Skillet Garlic Butter Pork Chops

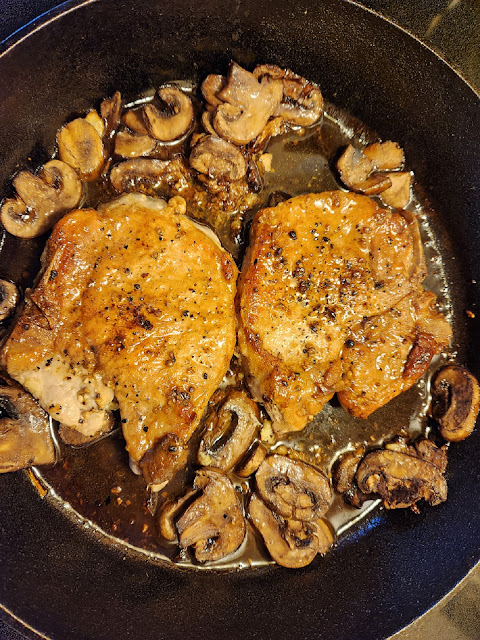
 These garlic butter pork chops are so easy to make with so much flavor. They are so tender and will melt in your mouth, your family will love this easy-to-make meal.

Cast Iron Skillet Garlic Butter Pork Chops

It's no secret that I love cooking in my cast iron skillets. These pork chops are so easy to make, you can have a meal on the table in about 30 minutes. I used my Lodge 12-inch cast iron skillet for this delicious recipe. Browned on the stovetop and then oven baked with the garlic butter.

What I used for Garlic Butter Pork Chops:

2 pork chops 3/4 to 1-inch thick
2 tablespoons olive oil
3 tablespoons butter (Melted)
4 cloves garlic (3 cloves pressed into butter 1 clove minced in pan)
2 cups sliced mushrooms (Optional)
Salt and Pepper to taste.

Directions for Garlic Butter Pork Chops:
  1. Melt the 3 tablespoons of butter in the microwave, and using a garlic press add 3 cloves of garlic and give it a good stir. Set aside for later.
  2. Add the olive oil to the bottom of the skillet and let heat up over medium heat.
  3. Salt and pepper the pork chops to taste.
  4. Preheat your oven to 400 degrees.
  5. Add the clove of minced garlic to the pan and then the pork chops.
  6. Brown the pork chops for about 2 to 4 minutes per side.
  7. Add the mushrooms after the 1st side is browned. 
  8. Pour the garlic butter over the pork chops and place the pan in the oven.
  9. Bake until the internal temperature of the pork chops is at least 145 to 150 degrees.
I love mushrooms, but if you are not a fan of mushrooms try using fresh green beans or even brussel sprouts. I served the pork chops with mushrooms and baked potatoes. Click here for my Air Fryer Baked Potatoes.

As always thanks for stopping by and I hope you enjoy it.

If you don't have a cast iron skillet you will find a great selection of Lodge Cast Iron skillets on Amazon.

Lodge Seasoned Cast Iron Skillet with Scrub Brush- 12 inch Cast Iron Frying Pan With 10 inch Bristle BrushLodge Seasoned Cast Iron Skillet with Scrub Brush- 12 inch Cast Iron Frying Pan With 10 inch Bristle BrushCheck the Price


Air Fryer Pumpkin Seed Recipes


Air Fryer Pumpkin Seed Recipes

Every year when it comes time to carve the pumpkins it turns into a real event at our house. While my daughter and grandsons are competing to see who carves the best pumpkin, I'm collecting and cleaning all of those beautiful pumpkin seeds.

Did you know? That pumpkin seeds are packed with healthy nutrients. Pumpkin seeds contain healthy fats, magnesium, and zinc. Click here for some science-based health benefits of pumpkin seeds.

While everyone was busy carving, I'm busy preparing the seeds. This year I made the pumpkin seeds in our Air Fryer, it was so quick and easy and they were so delicious.

After cleaning the pumpkin seeds I spread them out on a cookie sheet. You can let them dry overnight or do what I did. I placed each of the cookie sheets in the oven at 200 degrees for 10 minutes to dry them out.

We made four flavors of pumpkin seeds this next instruction applies to all four or whatever seasoning you use.

Place the pumpkin seeds in a bowl add a tablespoon of oil and mix well or you can spray them with cooking spray and mix.

Add your seasoning and mix well. Set your air fryer to 400 degrees and timer for 7 minutes. Turn them with a spoon halfway through at 3 and a half minutes. The first batch: Sea Salt, I used one tablespoon of sea salt for this one. 

Cajun Style Pumpkin Seeds:

Simple pumpkin seed recipes

1 tablespoon Smoked Paprika
1 tablespoon sea salt
1/2 teaspoon cayenne pepper
1/2 teaspoon cajun seasoning


Mix well, air fry at 400 degrees for 7 minutes turning them with a spoon halfway through.


Italian Style Pumpkin Seeds:


Easy pumpkin seed recipes

1 tablespoon Italian Seasoning
1 tablespoon garlic powder
1 tablespoon sea salt
1/2 teaspoon black pepper


Mix well, air fry at 400 degrees for 7 minutes turning them with a spoon halfway through.


Cinnamon and Sugar Pumpkin Seeds:


Air fryer pumpkin seeds

1 tablespoon cinnamon

Mix well, air fry at 400 degrees for 7 minutes turning them with a spoon halfway through.

Note: Do not add sugar before air frying. Mix sugar and cinnamon in a bowl and toss hot pumpkin seeds after they air fry, stir well and enjoy.


Drying the pumpkin seeds in the oven at 200 degrees for 10 minutes and using your air fryer is a great way to enjoy this healthy snack right away. You can adjust the amounts of seasoning to your liking in any of these recipes.

We used our Ninja Foodi Grill and Air fryer to make our pumpkin seeds. Click here to read my review of the Ninja Foodi Grill.

   As always thanks for stopping by and I hope you enjoy it.

Ninja AG301 Foodi 5-in-1 Indoor Grill with Air Fry, Roast, Bake & Dehydrate, Black/SilverNinja AG301 Foodi 5-in-1 Indoor Grill with Air Fry, Roast, Bake & Dehydrate, Black/SilverNinja AG301 Foodi 5-in-1 Indoor Grill with Air Fry, Roast, Bake & Dehydrate, Black/Silver


Spicy Smoked Chicken Wings


Spicy Smoked Chicken Wings

I have been wanting to try my hand at smoked chicken wings. I picked up a package of wings at our local grocery store. These spicy smoked chicken wings were a hit with the family.

They turned out to be juicy and full of flavor with just the right amount of heat. I smoked these wings the same day that I smoked 2 racks of Honey Bourbon Smoked Ribs.

I used the 3-2-1 method for the ribs and added the wings to my Char-Griller Smokin Champ in the last 90 minutes of the smoke. While the ribs were smoking I prepared the wings.

First I made a marinade for the wings. I placed the wings in 2 one-gallon zip lock bags and poured in the marinade, closed the bags, and mixed. I placed these in the refrigerator for at least 3 hours.

Spicy Smoked Chicken Wing Marinade: 

1/4 cup extra virgin olive oil
3 cloves garlic minced
1 tablespoon lemon juice
1 teaspoon black pepper
1 teaspoon sea salt
1 teaspoon cayenne pepper
1 teaspoon Penzeys Galena Street Rib and Chicken Rub (can be omitted)

Honey Bourbon ribs with chicken wings

I smoked the wings between 250 to 290 degrees for 90 minutes. I used hickory wood splits as my heat source. The internal temperature of the wings was 165 to 170 degrees. These were whole wings, I could have split them but I didn't bother. After they were smoked they pulled apart easily.

Before serving I made a hot sauce to toss them in.  In a large bowl, I melted 1/2 cup butter (one stick), mixed it with 1 cup of Frank's Hot Sauce, and 1 teaspoon of Cayenne pepper. I placed the wings in the bowl covered them and tossed them until they were coated.

These wings turned out great, they were spicy, juicy inside with just the right amount of heat. If you don't like medium or hot wings just skip the last step.

As always thanks for stopping by and I hope you enjoyed it.


Arugula Pizza with Balsamic Glaze

Arugula Pizza with Balsamic Glaze

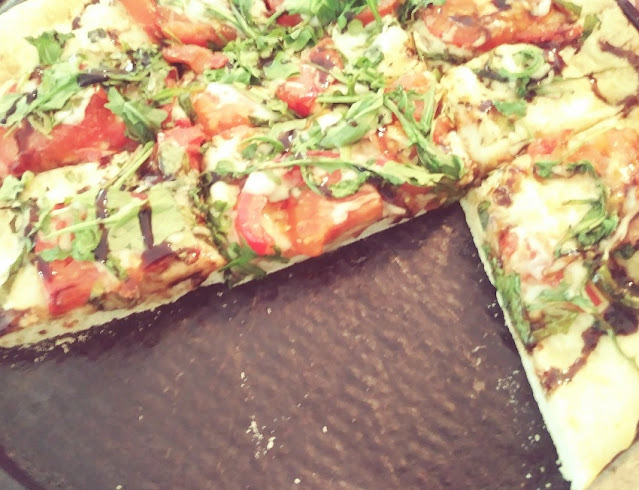
 Now that the weather is a little cooler it's time to turn on the oven for some homemade pizza. This Arugula Pizza with Balsamic Glaze was the highlight of the day.

Pizza is just so versatile, you can top it with whatever you like. I started the morning by making two batches of pizza dough. I used Fleischmann's RapidRise Instant Yeast, with the rapid rise yeast your dough will be ready in about 30 minutes.

Ingredients for the Pizza Dough:

2 packages of RapidRise Yeast
6 to 7 cups all-purpose flour
2-1/2 cups lukewarm water
1/8 teaspoon salt
3 tablespoons of light olive oil

To mix the dough I used my KitchenAid Stand Mixer with the dough hook. Add the water, yeast, salt, and oil into the mixing bowl. Begin adding the flour one cup at a time. Continue mixing until the dough forms. Then, Roll out on a floured surface, cover with a kitchen towel for about 30 minutes. This recipe will easily make three pizzas.

Arugula Pizza


Lightly grease the pizza pan and roll out the dough. I made several tomato pizzas and Jamie made this Arugula Pizza with fresh tomatoes and balsamic glaze.

Start with spreading olive oil over the top of the rolled out dough. Add fresh oregano leaves, Italian seasoning, one clove of minced garlic, and some shredded mozzarella cheese. The fresh oregano is from Jamie's herb garden.

Arugula Tomato Pizza Recipe


Now, add fresh sliced tomatoes and fresh arugula. You can slice the tomatoes to your liking thick or thin. Add some more shredded mozzarella cheese over top and bake at 450 degrees for 10 to 12 minutes until the crust is golden brown.

Arugula Tomato Pizza


Remove the pizza from the oven and drizzle the top with Cento Italian Glaze. This is a sweet and tart glaze made from balsamic vinegar and works well with meat, roasted vegetables, cheese plates, and fruits. Now, it's time to slice and enjoy your pizza.

As always thanks for stopping by and I hope you enjoy it!

Norpro Wood Pastry/Pizza RollerNorpro Wood Pastry/Pizza RollerNorpro Wood Pastry/Pizza RollerKitchenAid Gourmet Pizza Wheel, One Size, Matte RedKitchenAid Gourmet Pizza Wheel, One Size, Matte RedKitchenAid Gourmet Pizza Wheel, One Size, Matte Red


Charcoal Grilled Chicken Breasts


Charcoal Grilled Chicken Breasts

I treasure the times when our whole family can get together. It has been a difficult year for gatherings. This year for Father's Day we had everybody together.

So, it was time to celebrate with some charcoal-grilled chicken breasts. There is no doubt that the best grilling is done over charcoal. Well, that's my opinion anyway.

I picked up 8 large bone-in chicken breasts at our local grocery store. The first step was to marinate the chicken. We marinated the chicken breasts overnight in Chiavetta's Barbeque Marinade. This is a great marinade for both flavor and tenderizing the meat. 

Charcoal Grilled Chicken Breasts

Seasoning chicken breasts

We fired up the charcoal in the Weber Charcoal Chimney. To me, using the chimney is the best way to fire up your charcoal. There is no chance of getting that charcoal fluid after taste on your food.

 While the charcoal was heating up I seasoned the chicken breasts with Penzeys Galena Street Rib and Chicken Rub. This is a traditional southern-style barbeque rub.

I seasoned the breast meat by lifting up the skin on the chicken breasts and pouring in the seasoning with a small spoon. Then I worked the seasoning onto the meat with my finger. 

Bone Grilled Chicken Breasts

Then, I rubbed the seasoning all over the top and bottom of the chicken breasts. As you can see these beauties are now ready for the grill.

I grilled these for 7 to 8 minutes per side flipping them twice in the process for a total of 30 minutes. The cooking time may vary based on the size of the chicken breasts. These were large breasts with the ribs.

 I grilled them until the internal temperature was 165 degrees. It's best to have an instant-read thermometer on hand so you know when they are cooked.

As always thanks for stopping by and I hope you enjoy it!

You might also like these chicken recipes

Smoked Bone in Chicken BreastsSmoked Bone-in Chicken BreastsGrilled Southwestern Chicken BreastsGrilled Southwestern Chicken Breasts


Baked Stuffed Portabella Mushrooms

Baked Stuffed Portabella Mushrooms

If you're looking for a great meal for any meatless day of the week, these baked stuffed portabella mushrooms will be a family delight.

Portabella mushrooms or also spelled (Portobella) is a large cremini mushroom. These large mushrooms have a firm fleshy texture, which makes them perfect for stuffing.

I started by, removing the stems, rinsing the mushrooms with cold water and patting them dry with a paper towel. I diced the stems and added them into the stuffing ingredients.

recipe baked portabella mushrooms


Baked Stuffed Portabella Mushrooms: Stuffing Ingredients


1 cup seasoned breadcrumbs
1 tablespoon Italian seasoning
1 clove garlic minced
1/4 cup Romano or Parmesan Cheese
1 tablespoon olive oil
2 eggs
Diced mushroom stems
Mozzarella Cheese for the topping

This is so easy to make. Just combine all of the ingredients into a mixing bowl. Mix well until you have sort of a sticky ball of stuffing.

baked portabella mushroom caps

I had three portabella mushrooms I placed them on a cookie sheet lined with parchment paper. Then, filled each one with the stuffing.

Bake these at 350 degrees for 15 minutes. Remove from the oven and top them off with the mozzarella cheese.

 Place them back in the oven for 10 more minutes until the cheese melts. And, That's all there is to it, now, you have a perfect meatless meal for you and your family.

As always thanks for stopping by and I hope you enjoy it!

You may also like some of our other mushroom recipes:


Steak and Shrimp Salad

Steak and Shrimp Salad

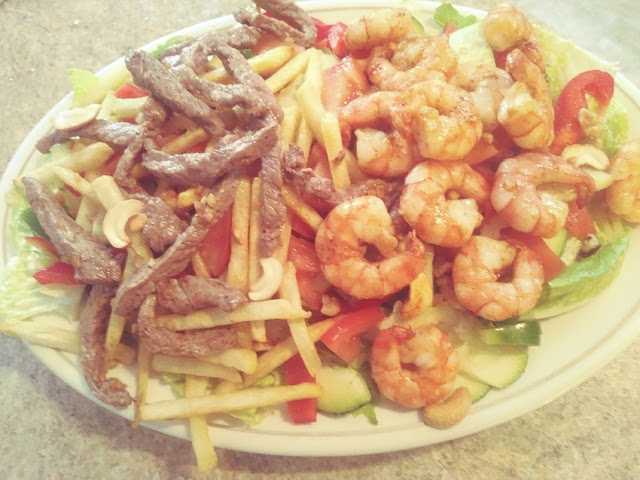
If you're looking for something easy, quick, and delicious to serve your family for dinner, this steak and shrimp salad is it.

Fresh crisp greens combined with tender strips of steak and hot french fries for the steak salad. On the other side, the greens are topped off with succulent shrimp.

Fran and I were looking for something a little different for dinner the other night and this was it. We put this together with everything we had on hand.

steak shrimp salad recipe

We started off with a huge plate of fresh greens. Romaine lettuce, tomatoes, cucumbers, red, and green peppers.

steak shrimp salad

We cut a thin strip steak into small strips. then, covered the bottom of our 10-inch non-stick skillet with olive oil (about 2 tablespoons). Added a clove of diced garlic and cooked over medium heat.

easy shrimp salad recipes

We thawed the frozen shrimp by running it under cold water. Cooking this in the same skillet as the steak until it was done. (about 5 minutes turning once).

While all of this was going on we had some shoestring french fries cooking in the oven. We assembled everything together and topped off with our favorite dressing.

I used ranch dressing for the steak salad, and Fran used a vinegarette for the shrimp salad. This salad was quick, easy, and made the perfect dinner for both of us.

As always thanks for stopping by and I hope you enjoy it!

You might also like some of our other favorite salads

Slow Roasted Prime Rib Roast

Slow Roasted Prime Rib Roast

Slow roasted prime rib roast cooked to a perfect medium-rare. With simple seasonings of salt, pepper, fresh garlic, and Penzeys English Prime Rib Rub. This is all you need to make this a perfect feast for your family and friends.

Slow Roasted Prime Rib Roast Recipe

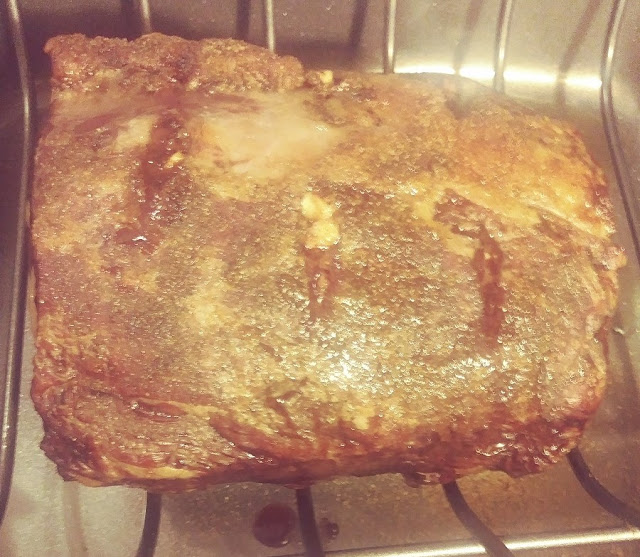
Oh, and of course you need to start with a nice prime rib roast.  I started with this 5.5-pound boneless prime rib roast. Prime rib is a very expensive cut of meat. Many people tell me that they don't attempt making prime rib roast in fear of ruining it. 

I'm here to tell you that making this is so easy, and you'll be so happy with the results. Once your family and friends taste this prime rib you'll be a hero.

I used 3 cloves of fresh garlic cut in half. I made six small cuts on both sides of the top and stuffed the garlic in. Then I seasoned the roast with salt, pepper, and Penzeys English Prime Rib Rub.

Slow Roast Prime Rib Roast

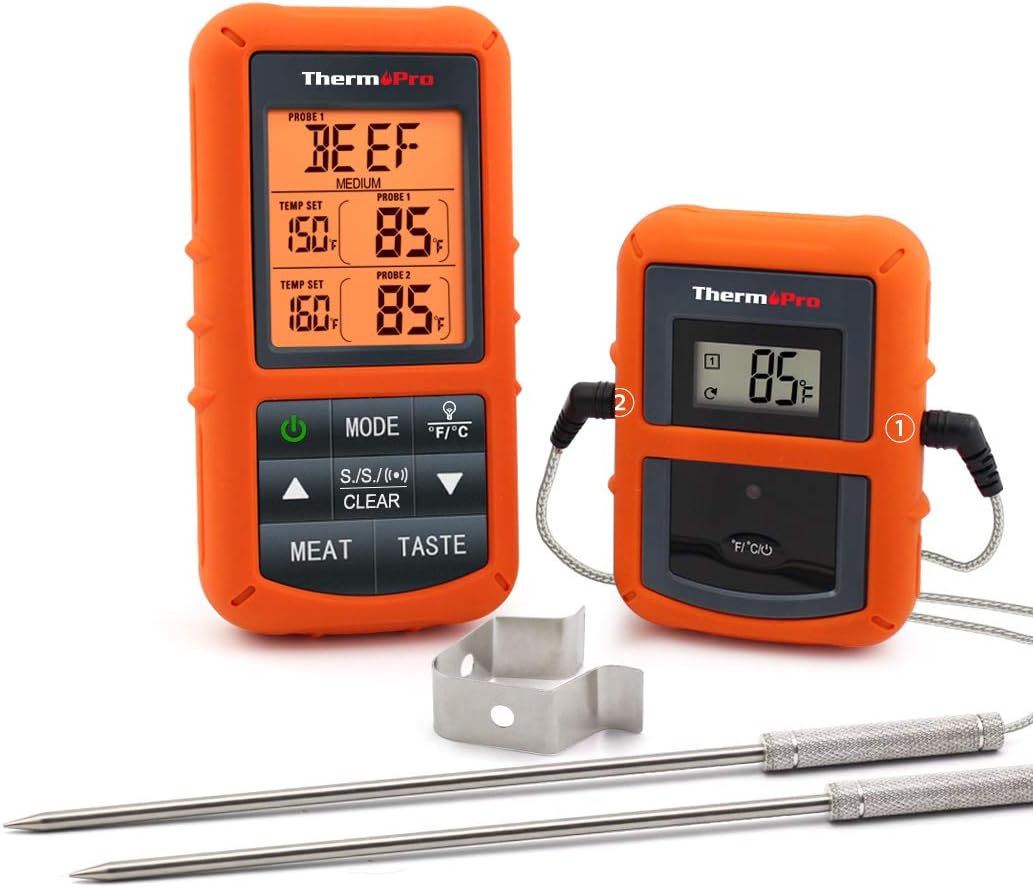
I  left the prime rib out for a couple of hours to reach room temperature.  I inserted the probe of my ThermoPro TP-20 Thermometer. Then, place it in the oven at 275 degrees until the internal temperature is 130 degrees, about 2.5 hours.

Out of the oven, I covered the roast to let it rest for 30 minutes before cutting. While resting the roast will continue to cook to 135  degrees, a perfect medium-rare. The outside was a nice dark tasty crust while the inside was a perfect medium-rare. 

The rule of thumb is about 15 minutes per pound. If you don't have a probe to monitor the internal temperature, use an instant-read thermometer and check the internal temperature after 2 hours.

As always thanks for stopping by and I hope you enjoy it.


“ I earn money from purchases on affiliate links at no additionl cost to you.” Disclosure Statement

X