Showing posts with label snack. Show all posts

Instant Pot Blackberry Jam


Instant Pot Blackberry Jam

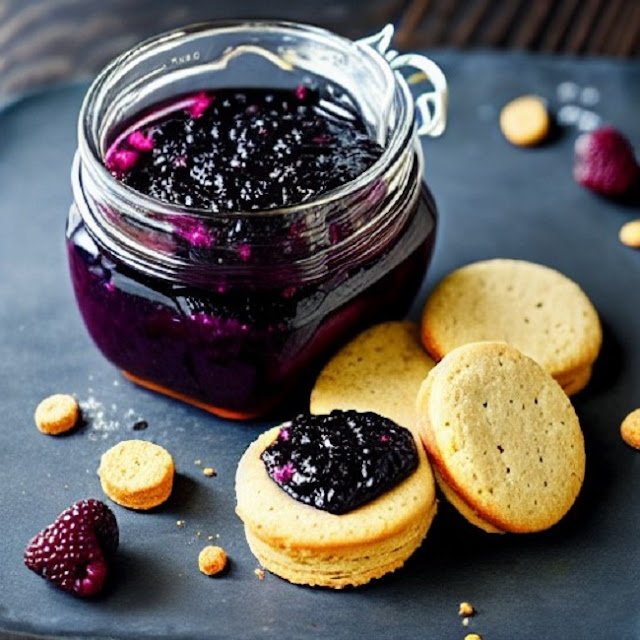
This Instant Pot Blackberry Jam is so easy to make. This sweet and tangy treat is a perfect topping for biscuits, crackers, waffles, french toast, or pancakes. 

Where ever you like a sweet and tangy jam, this is the perfect fit. Try drizzling this jam over some vanilla ice cream.

All you need is an Instant Pot and a few ingredients and in about 30 minutes you'll have a sweet and tangy jam to enjoy.

Here in Western New York, blackberries are in season from the middle to the end of July. You don't have to wait until the blackberries are in season. You can find fresh blackberries at your local grocery store.

Blackberry Jam Ingredients:

  • 6 cups of fresh blackberries (rinsed and pat dry)
  • 1 1/2 cups white sugar
  • 1/4 cup fresh lemon juice (4 tablespoons)
  • 2 teaspoons vanilla extract
  • 3 tablespoons cornstarch
  • 2 tablespoons water
Directions:

  1. Place the blackberries in the Instant Pot, and cover them with sugar, lemon juice, and vanilla. Let them set for 10 minutes. Note: Step one is very important.
  2. Place the lid on and lock it into place, and make sure sure the release valve is set on the seal.
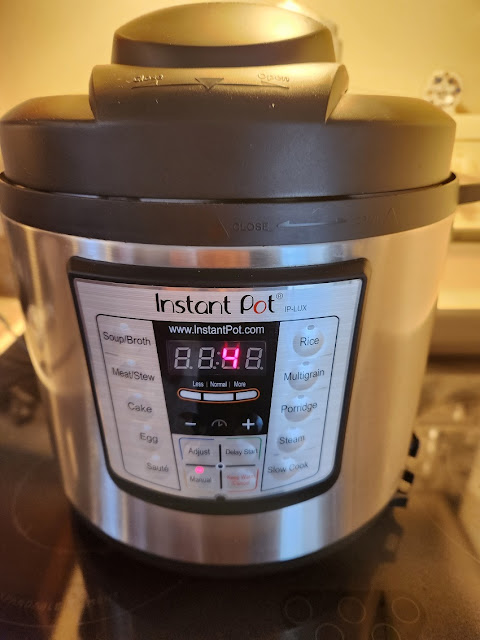
  3. Cook on manual pressure for 4 minutes.
  4. While the blackberries are cooking, mix the cornstarch and water in a small bowl. Set this aside.
  5. After the 4 minutes let the instant pot naturally release the pressure for about 10 minutes.
  6. Then carefully release the remaining pressure with the release valve.
  7. Open the lid and stir in the cornstarch and water.
  8. Continue to stir until all of the cornstarch is dissolved. 
  9. Let cool for a while and transfer to jars.
  10. Refrigerate after the jam has completely cooled.

Preparing blackberry jam

This is step one, after covering the berries with sugar, lemon juice, and vanilla wait 10 minutes. This step starts to break down the fruit and release the natural pectin in the blackberries.

Instant Pot

This only needs 4 minutes on the manual pressure setting in the Instant Pot.

Blackberry Jam

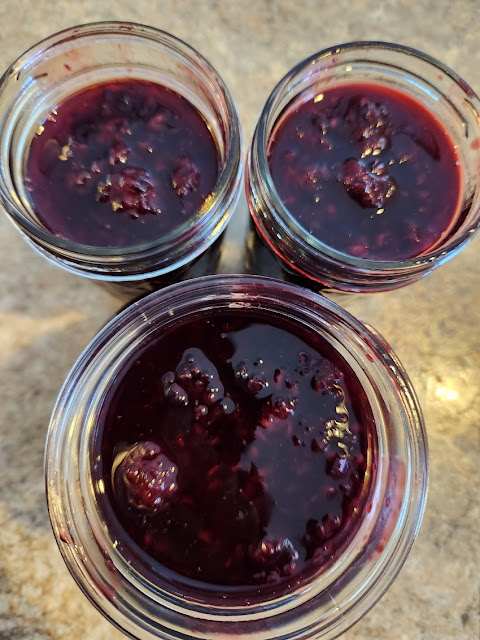
This recipe yielded about 32 ounces of blackberry jam. I gave half of it to my daughter and grandsons. 

This jam will last about two weeks in the refrigerator. If this is too much, just cut all of the ingredients in half, but leave the cooking time at 4 minutes. You will get about 14 to 16 ounces of jam.

If you don't have an Instant Pot you can do this on the stovetop. In a covered saucepan bring the berries to a boil on high heat. Remove the lid when it starts to boil and cook for 40 to 50 minutes.

If you would like a smoother jam, use an immersion blender or potato masher to blend the jam to your desired consistency.

Thanks for stopping by and I hope you enjoy it.

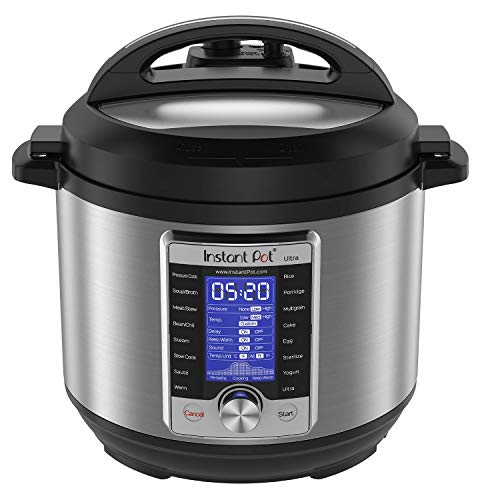
Instant Pot Ultra, 10-in-1 Pressure Cooker, Slow Cooker, Rice Cooker, Yogurt Maker, Cake Maker, Egg Cooker, Sauté, and more, Includes App With Over 800 Recipes, Stainless Steel, 6 QuartInstant Pot Ultra, 10-in-1 Pressure Cooker, Slow Cooker, Rice Cooker, Yogurt Maker, Cake Maker, Egg Cooker, Sauté, and more, Includes App With Over 800 Recipes, Stainless Steel, 6 QuartCheck Price


Ideas for Charcuterie Board


Ideas for Charcuterie Board

Some of you might be thinking, what is a charcuterie board? Well, a charcuterie board is an assortment of cured meats, cheeses crackers, and so much more.

It's easy to impress your family, friends, and guests by preparing a charcuterie board for your next party or event. 

So, now the next question is, how do you pronounce charcuterie? I found this easy one online, (Shar-Koo-ta-Ree).

Many people think charcuterie is an Italian term, but actually, it is a French term meaning "Pork Butcher".

Our son Sammy and his wife Tricia created the board you see in the photo on our last visit to their house. They created this board in about 15 minutes. They were like watching two artists create a masterpiece.

What is on a Charcuterie Board?

  • Cured Meats
  • Cheeses (Sharp and Mild)
  • Fruits and Nuts
  • Crackers and pieces of bread
  • Soft Cheeses and dips
  • Olives
  • Jelly and Jams
  • Small pieces of bread
  • Candies
  • Veggies

You can use one board or several boards or just use plates and platters. To me, it is all bout the food. 

Charcuterie boards are very popular around the Holidays but are perfect for any party or family gathering where you need to have some delicious appetizers.

As always thanks for stopping by and I hope you enjoy it.

These Charcuterie Boards are a perfect Gift Idea

Bamboo Cheese Board with Knife & Fork Set, Wood Charcuterie Platter & Food Serving Tray for Wine Glasses, Bowls, House Warming Gift, Misoph Collection by PandPal…Bamboo Cheese Board with Knife & Fork Set, Wood Charcuterie Platter & Food Serving Tray for Wine Glasses, Bowls, House Warming Gift, Misoph Collection by PandPal…Bamboo Cheese Board with Knife & Fork Set, Wood Charcuterie Platter & Food Serving Tray for Wine Glasses, Bowls, House Warming Gift, Misoph Collection by PandPal…ROYAMY Bamboo Cheese Board Set with 3 Stainless Steel Knife, Meat Charcuterie Platter Serving Tray, Perfect Choice for Wedding Birthdays Christmas Anniversary Housewarming Kitchen Personalized GiftROYAMY Bamboo Cheese Board Set with 3 Stainless Steel Knife, Meat Charcuterie Platter Serving Tray, Perfect Choice for Wedding Birthdays Christmas Anniversary Housewarming Kitchen Personalized GiftROYAMY Bamboo Cheese Board Set with 3 Stainless Steel Knife, Meat Charcuterie Platter Serving Tray, Perfect Choice for Wedding Birthdays Christmas Anniversary Housewarming Kitchen Personalized GiftCheese Board and Knife Set - Charcuterie Board Set Unique Bamboo Cheese Board, Charcuterie Platter & Serving Tray (17.5Cheese Board and Knife Set - Charcuterie Board Set Unique Bamboo Cheese Board, Charcuterie Platter & Serving Tray (17.5Cheese Board and Knife Set - Charcuterie Board Set Unique Bamboo Cheese Board, Charcuterie Platter & Serving Tray (17.5Unique Bamboo Cheese Board, Charcuterie Platter and Serving Tray for Wine, Crackers, Brie and Meat. Large and Thick Natural Wooden Server - Fancy House Warming Gift & Perfect Choice for GourmetsUnique Bamboo Cheese Board, Charcuterie Platter and Serving Tray for Wine, Crackers, Brie and Meat. Large and Thick Natural Wooden Server - Fancy House Warming Gift & Perfect Choice for GourmetsUnique Bamboo Cheese Board, Charcuterie Platter and Serving Tray for Wine, Crackers, Brie and Meat. Large and Thick Natural Wooden Server - Fancy House Warming Gift & Perfect Choice for Gourmets


Pepperoni Bread a Family Favorite

Pepperoni Bread on the cutting board


I enjoy family recipes passed down from generation to generation. Pepperoni Bread is another family recipe from my grandmother’s kitchen that we all loved when we were kids.

 She always used sliced pimento cheese to make this, but today I have a hard time finding pimento cheese, so you can really use any cheese that you like (slices or shredded).

This bread is really easy to make and makes a great snack or serve it with a nice salad before your main dish.

Okay let’s make some dough first; here is how you do it.

Ingredients:

·         5 to 6 cups of all-purpose flour
·         3 tbs. of Crisco or light olive oil
·         2 packages of dry yeast
·         2 ¼ cups of warm water (Not too Hot)
·         1 tsp. of salt
·         1 tsp of sugar (optional)

Instructions:  
 
1.      Dissolve the yeast in the warm water
2.      While you’re waiting add the flour, oil, salt, and sugar to a large bowl
3.      Add the water and yeast to the bowl and begin to mix. (I hope you washed your hand first)
4.      Knead until the dough is smooth and forms a ball, cover the bowl with a cloth, and let this rise for about one hour.

This dough recipe will make at least 3 Pepperoni Breads.

I use my Kitchen-Aid Stand mixer it makes the job really easy. Just add everything and attach the dough hook, and mix on low speed until the dough forms a ball.

Now get the ingredients ready to make that pepperoni bread. Here is what you need.

Ingredients:

· 1 or 2 eggs
· 1 package of sliced pepperoni (7oz. will make more than one)
· A package of sliced pimento cheese cut into 1/2-inch stripes
· A Sprinkle of paprika.

Instructions:  

  1. Crack the egg in a bowl, and beat the egg until mixed. Set this aside for later
  2. Spread the dough in a pizza pan (you don't have to go all the way to the edges)
  3. Brush the dough lightly with the beaten egg
  4. On of the dough place your slices of pepperoni, and cheese (not too much, just enough to cover)
  5. Fold the dough over 3 or 4 times, until you have a loaf.
  6. Be sure to pinch the ends of the loaf and the seam to minimize the ingredients from running out.
  7. Lightly brush the top of the loaf with the beaten egg
  8. Sprinkle some paprika on the top of the loaf.
  9. Bake at 400 degrees for 20 to 25 minutes (until golden brown)
I hope you enjoyed another family recipe, and give it a try. As always Thanks for stopping by.

KitchenAid 5-Qt. Tilt-Head Stand Mixer KSM150PSBM Artisan Series, 5 Quart, Black MatteKitchenAid 5-Qt. Tilt-Head Stand Mixer KSM150PSBM Artisan Series, 5 Quart, Black MatteKitchenAid 5-Qt. Tilt-Head Stand Mixer KSM150PSBM Artisan Series, 5 Quart, Black MatteBaking Sheet Set, 2-Piece Cookie Sheet Set with Silicone Handles, Steel Baking Pans Set, Durable Baking Sheets for Oven, BPA Free Cookie Sheets for Baking Nonstick Set, Sheet Pan - Black Baking TrayBaking Sheet Set, 2-Piece Cookie Sheet Set with Silicone Handles, Steel Baking Pans Set, Durable Baking Sheets for Oven, BPA Free Cookie Sheets for Baking Nonstick Set, Sheet Pan - Black Baking TrayBaking Sheet Set, 2-Piece Cookie Sheet Set with Silicone Handles, Steel Baking Pans Set, Durable Baking Sheets for Oven, BPA Free Cookie Sheets for Baking Nonstick Set, Sheet Pan - Black Baking Tray


“ I earn money from purchases on affiliate links at no additionl cost to you.” Disclosure Statement

X