Easy Chocolate Crinkle Cookies

Easy Chocolate Crinkle Cookies

We haven't made these easy chocolate crinkle cookies for a couple of years. So, this year Fran found the recipe and we decided to add this one to our Holiday cookie list.

These are so easy to make and oh-so-good. They're crisp on the outside and soft and chewy on the inside. Who doesn't love chocolate? The chocolate flavor is to die for.

You can find many recipes to make these easy chocolate crinkle cookies using a cake mix or brownie mix. We prefer this easy-to-make homemade recipe.

Here is what you need: 


2 cups white sugar
4 eggs
2 teaspoons vanilla
2 teaspoons baking powder
1/2 teaspoon salt

How to make easy chocolate crinkle cookies:

We always use our KitchenAid Stand Mixer. But, you can mix this in a medium bowl using a hand mixer.

First mix together the cocoa powder, white sugar, and vegetable oil. Then beat in the eggs one at a time then, mix in the vanilla.

Add the flour, salt, and baking powder to the cocoa mixture. Mix this until a dough is formed. Then cover and refrigerate for four hours.

make chocolate crinkle cookies

Roll the dough into one-inch balls and coat with powdered sugar.

Place them on a cookie sheet lined with parchment paper. I'm not so perfect so some of mine were a little bigger. 

I preheated the oven to 350 degrees and placed them on the center rake. Bake for 10 to 12 minutes.

Since I made some a little larger than one inch I baked for about 14 minutes.

Leave these on the cookie sheet for a minute or more then you can move them to a rack to cool.


As always thanks for stopping by and I hope you enjoy it.

KitchenAid Artisan Series 5-Qt. Stand Mixer with Pouring Shield - Imperial BlackKitchenAid Artisan Series 5-Qt. Stand Mixer with Pouring Shield - Imperial BlackKitchenAid Artisan Series 5-Qt. Stand Mixer with Pouring Shield - Imperial BlackWilton Stainless Steel Small Cookie Scoop, SilverWilton Stainless Steel Small Cookie Scoop, SilverWilton Stainless Steel Small Cookie Scoop, SilverBaking Sheet Set, 3-Piece Cookie Sheet Set with Silicone Handles, Steel Baking Pans Set, Durable Baking Sheets for Oven, BPA Free Cookie Sheets for Baking Nonstick Set, Sheet Pan - Black Baking PanBaking Sheet Set, 3-Piece Cookie Sheet Set with Silicone Handles, Steel Baking Pans Set, Durable Baking Sheets for Oven, BPA Free Cookie Sheets for Baking Nonstick Set, Sheet Pan - Black Baking PanBaking Sheet Set, 3-Piece Cookie Sheet Set with Silicone Handles, Steel Baking Pans Set, Durable Baking Sheets for Oven, BPA Free Cookie Sheets for Baking Nonstick Set, Sheet Pan - Black Baking Pan


Pineapple Bow Tie Cookies

Pineapple Bow Tie Cookies

These pineapple bow-tie cookies have been on our Holiday cookie list since I was a little guy. And, that was a long time ago. I found my mother's old handwritten recipe for these and just had make them this year.

We made the dough according to her recipe but it turned out to be a failure. I just could not work with the dough. So, Fran suggested a cream cheese dough and it worked beautifully.

Pineapple Bow Tie Cookies: Dough

8 oz cream cheese (softened)
8 oz butter (softened)
1/2 teaspoon Vanilla
3/4 cup powdered sugar
2-1/2 cups flour

In my KitchenAid stand mixer, I mixed the cream cheese and butter starting at low speed and then switching to high speed to make sure the two ingredients were creamed together.

Turning the mixer to medium speed add the powdered sugar and vanilla. Then, add the flour and mix until the dough is formed. Divide the dough into two equal sections, wrap, and refrigerate for one hour.

Pineapple Bow Tie Cookies: Filling

20 oz can crushed pineapple
1/4 cup white sugar
2 tablespoons cornstarch

Combine in a medium saucepan. Cook over medium heat while stirring until the pineapple thickens. Then remove from heat.


Roll the dough to 1/8-inch thick and cut into 2-inch squares. Place 1/2 teaspoon of pineapple in the middle of each square. Fold opposite corners together and press.

Tip:  To make sure the cookies don't open up while baking use some of the pineapple juice or just a little water to hold corners together.

Place them on a cookie sheet lined with parchment paper about 2 inches apart. Sprinkle a little sugar over them and bake at 375 degrees for 8-10 minutes. Dust with powdered sugar right out of the oven.

These cookies are fun and easy to make. They're also very versatile because you can use any fruit filling that you like.

We made some with raspberry jam right out of the jar. This recipe yielded us about 60 or more cookies. Perfect to dress up your Holiday table.

Raspberry Bow Tie Cookies

As always thanks for stopping by and I hope you enjoy it.

KitchenAid Artisan Series 5-Qt. Stand Mixer with Pouring Shield - Imperial BlackKitchenAid Artisan Series 5-Qt. Stand Mixer with Pouring Shield - Imperial BlackKitchenAid Artisan Series 5-Qt. Stand Mixer with Pouring Shield - Imperial BlackBaking Sheet Set, 3-Piece Cookie Sheet Set with Silicone Handles, Steel Baking Pans Set, Durable Baking Sheets for Oven, BPA Free Cookie Sheets for Baking Nonstick Set, Sheet Pan - Black Baking PanBaking Sheet Set, 3-Piece Cookie Sheet Set with Silicone Handles, Steel Baking Pans Set, Durable Baking Sheets for Oven, BPA Free Cookie Sheets for Baking Nonstick Set, Sheet Pan - Black Baking PanBaking Sheet Set, 3-Piece Cookie Sheet Set with Silicone Handles, Steel Baking Pans Set, Durable Baking Sheets for Oven, BPA Free Cookie Sheets for Baking Nonstick Set, Sheet Pan - Black Baking Pan


Healthy Banana Strawberry Smoothie

Healthy banana strawberry smoothie

This healthy banana strawberry smoothie is just one of the many you can enjoy for breakfast, lunch, or a snack during the day.

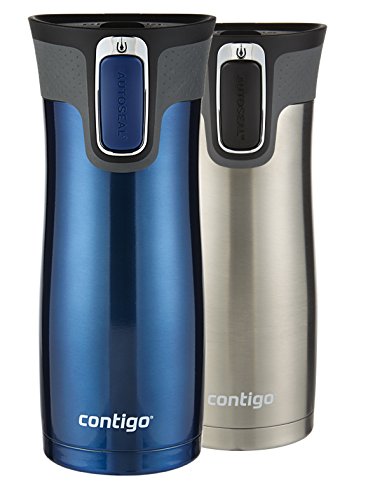
This is a great way to start your day if you want an easy and quick breakfast. And, if you happen to be in a hurry just pour it into a travel mug and take it with you.

If you're looking for an easy way to improve your health and nutrition without giving up all the flavorers you enjoy. Consider trying some easy fruit and vegetable smoothies.

You can achieve more energy, better sleep, and even weight loss by making juices and smoothies a part of your everyday life.


What is the difference between juicing and smoothies?

Let's start with Juicing: Juicing extracts the juice or liquid from the fruits and vegetables, thus leaving the peels and pulp behind. There are many types of juicers or extractors on the market today. Full disclosure here, I don't own a juicer or extractor so I can't tell you how delicious the juices are.

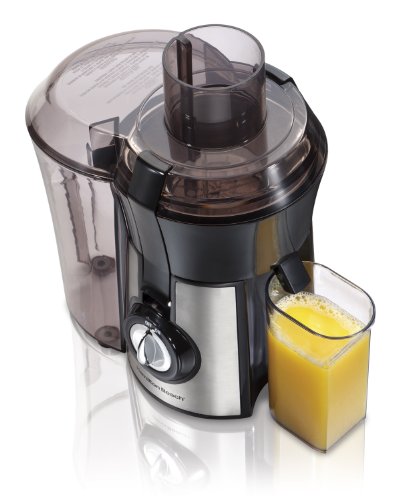
If you're looking for a juicer extractor here are some popular choices.

 Smoothies: You can easily make delicious smoothies using a high-speed blender. So, when you make a smoothie you're drinking all of the pulp and fiber contained in the fruit or vegetable.

 Juicing and smoothies are both healthy and good for you. But. if you want more fiber in your diet then smoothies are certainly the better choice.

For healthy and delicious smoothies here are some high-speed blender choices.

Now, I'm not a health expert or a nutritionist by any means. This information is easily found with a little research.

We own and use the Nutri Bullet High-Speed Blender to make so many different types of delicious and healthy Smoothies. Smoothies are always made with a base. It might be water, milk, or yogurt.

Healthy Banana Strawberry Smoothie
Fruit smoothie recipe

This is one that I made for Tyler a couple of weeks ago as he was home sick from school and spending the day with me.

Jamie asked to make sure that he was drinking plenty of liquids. So I asked him if he wanted a fruit smoothie.

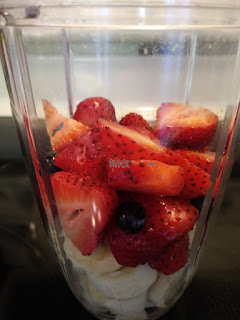
I cut up one banana, and five strawberries, and as a bonus, I added about 10 blueberries.

For the base, I used Almond Milk. After adding the fruit I poured the almond milk to the max line on the cup.

Then I added the blending attachment set it into the Nutri Bullet and turned it on for about 15 seconds or more.

Tyler drank to the whole smoothie and then ate some more strawberries just for good measure.

As always thanks for stopping by and I hope you enjoy.

Take your breakfast on the go with a travel mug

Crescent Roll Pizza Bites

Crescent Roll Pizza Bites

Last week Jamie brought the boys down to the village to have their pictures taken for the Holidays. The studio just happens to be right around the corner from our house.

So, while Jamie stayed at the studio to pick out the best pictures, the boys took a walk to our house. Being the grandparent that I am I, of course, want to feed the kids.

I like as much homemade as possible but, sometimes you just have to be creative. We had some Pillsbury Crescent Rolls in the refrigerator. I asked the boys if they wanted to me make some crescent roll pizza bites.

We had everything we needed the crescent rolls, a small jar of pizza sauce, black olives, pepperoni, and some mozzarella cheese.


I rolled out the crescent rolls on the counter while Bobby sliced the black olives.

Tyler broke up the mozzarella into smaller pieces since it was in slices.

Then, we added a tablespoon of pizza sauce on each crescent roll.

There were eight altogether so we made four with olives and cheese and the other four with pepperoni and cheese.

Then we rolled them up and tucked them in the corners. Place them on a cookie sheet and bake at 350 degrees for about 10 minutes.

These crescent roll pizza appetizers make a perfect quick treat if you have some guests stopping in for lunch or a quick snack. The kids enjoyed them down to every last one.

As always thanks for stopping by and I hope you enjoy

Caramel Apple Pizza Recipe

Caramel Apple Pizza Recipe

I just love trying new recipes and, I love pizza so, so I thought, why not try a fruit pizza. I know that fruit pizza is nothing new but, this is the first time I've ever made it.

I had a couple of fresh Granny Smithe apples in the refrigerator so I decided to make this caramel apple pizza. And, what a wonderful sweet treat it is. This is perfect hot out of the oven with a scoop of vanilla ice cream. Oh! doesn't that sound good?

First I made my standard pizza dough. While the dough was rising I peeled and cubed two Ganny Smith apples.

cinnamon apple pizza

 The recipe and measurements are all below. I melted the butter in a medium saucepan. 

Then add the apples and all other ingredients into the pan.

Stir together until it comes to a slight boil then you can remove it from the heat. 


Apple Caramel Pizza

Next, I greased an 11-inch x 17-inch pizza pan. 

Spread the dough and brush it with 1 tablespoon of melted butter before pouring the apple mixture.


I baked this at 450 degrees on the center rack of the oven for 15 minutes. I melted Kraft Caramel Bits and drizzled it over the top. Then mixed my white icing made with powdered sugar and milk and drizzled it over the caramel.

Here is what I used for the dough:

3-1/2 cups all-purpose flour
1-1/2 tablespoons Crisco or vegetable oil
1-1/4 cup lukewarm water
1 package dry yeast

Add the warm water into a mixing bowl then add the yeast. When the mixture begins to bubble add the oil.

Now, add the flour and begin mixing until you have a nice firm ball of dough. I always use my KitchenAid Stand mixer for this part. Cover and set the dough aside to let it rise. About one hour until it doubles in size.

For the Apple Topping:

2 Granny Smith Apples (peeled and cubed)
4 tablespoons butter melted
1/4 cup brown sugar
1/4 cup white sugar
2 tablespoons cinnamon
1/2 teaspoon All Spice
1/2 Teaspoon Nutmeg
1 tablespoon vanilla
1/4 cup milk

Melt the butter in a medium saucepan, add the apples and the remaining ingredients. Stir over medium heat until it boils then remove it from the heat.

The Caramel:

1/4 cup Kraft Caramel Bits
1 tablespoon Milk

In a microwave-safe bowl melt for 30 seconds at a time. Stirring in between, I did this three times for a total of 90 seconds. This gave me a nice smooth caramel to drizzle.

The White Icing:

2 cups powdered sugar
4 tablespoons milk

I whisked this in a small bowl until it was nice and creamy. Then drizzle it over the caramel.

Vietnamese Cinnamon Ground By Penzeys Spices 1.7 oz 1/2 cupVietnamese Cinnamon Ground By Penzeys Spices 1.7 oz 1/2 cup

This Penzeys Vietnamese Cinnamon is the best we've ever used. It is extremely aromatic and so flavorful and sweet. You only need to use about 2/3 of what any recipe calls for.

Mix this with some white sugar and enjoy it on your toast, hot cereal, or waffles. For amazing pancakes add some of this to the batter. This also is a perfect addition to your coffee or hot chocolate.


Kraft, Caramel Bits, 11oz Bag (Pack of 3)Kraft, Caramel Bits, 11oz Bag (Pack of 3)


Here is another favorite we like to use when baking. These Kraft Caramel Bits really come in handy during the Holidays.

 No need to unwrap your caramels anymore these are perfect for baking and ready to use right out of the bag.

Norpro Wood Pastry/Pizza RollerNorpro Wood Pastry/Pizza Roller

And, let's remember one of my favorites. The Norpro Pastry and Dough Roller. This little kitchen gadget works wonders with pastry and pizza dough.

I've had this little tool for years and, it makes rolling out the dough so easy. Especially pizza dough. The small end is contoured which really helps get to dough right to the edge of the pan.

As always thanks for stopping by and I hope you enjoy.

Oven Roasted Pumpkin Seeds

Oven roasted pumpkin seeds

Well, It's that time of year again and the fall season is once again here. This means that I get to make and enjoy one of my favorites once a year snacks, oven roasted pumpkin seeds.

Jamie and boys came over last night for our annual pumpkin carving night of fun. We carved up four pumpkins and reaped a whole lot of pumpkin seeds.

Do you know? There is plenty of nutrition in roasted pumpkin seeds? They are high in fiber, contain heart-healthy magnesium, rich in Zinc to support your immune system, helps improve blood sugar levels, increase your HDL good cholesterol, and so much more.

Every year I take the extra time to save and roast our pumpkin seeds. These make such a wonderful snack and can be flavored so many different ways. I like my pumpkin seeds lightly coated with olive oil and sea salt.

Easy Roasted Pumpkin Seeds: Here is how I make them
  1. First, rinse and clean off the excess pulp from the seeds. I use a colander and cold water.
  2. Spread them out on cookie sheets and let them dry overnight. (Don't load too many on one cookie sheet).
  3. The next day transfer the seeds to a mixing bowl, and add 2 tablespoons of olive oil and mix with a spoon.
  4. Spread the seeds out on a cookie sheet again and season them with sea salt to your taste.
  5. Bake on the center rack at 350 degrees for 20 to 25 minutes until they are golden brown.
Let the pumpkin seeds cool for about 10 minutes and then enjoy a healthy snack. Oh! I just love this time of year.

As always thanks for stopping by and I hope you enjoy.

Two Simple Ingredients for Perfect Roasted Pumpkin Seeds

“ I earn money from purchases on affiliate links at no additionl cost to you.” Disclosure Statement

X