Cast Iron Skillet Apple Pie

Cast Iron Skillet Apple Pie

We are now into the fall season and here in Western New York, we have plenty of beautiful colors all over the trees. It's time to fill the house with those wonderful aromas of cinnamon and spice. Baking this cast iron skillet apple pie did just that.

I love cooking with my cast iron skillet. This iron skillet apple pie is so easy to make, and I'm sure it will be a family favorite.

With pie crust made from scratch and, a layer of brown sugar and melted butter on the bottom of the skillet that bakes into the pie crust, makes this one a fall favorite.

Cast Iron Skillet Apple Pie: Crust 

2-2/3 cups all-purpose flour
1/2 teaspoon salt
1 cup Crisco (Cold)
6 to 8 tablespoons of Ice Water

Pie crust

You can make your own pie crust or buy it already made. I made my own by adding the flour, and the Crisco (Cold and cut into small pieces) into my KitchenAid mixing bowl.

Using the flat bar I turned it on low speed and began adding the cold water one tablespoon at a time until the dough was formed.

Then, I divided the dough into two equal pieces. I wrapped them and set them in the refrigerator while I prepared the apples.

Cast Iron Skillet Apple Pie: Filling

4 large Granny Smith Apples (Peeled, cored, and sliced)
3/4 cup white sugar
1/4 cup brown sugar
1/4 teaspoon salt
2 tablespoons flour or cornstarch
1 teaspoon nutmeg
1 teaspoon cinnamon
2 tablespoons fresh lemon juice

iron skillet apple pie

I mixed all of the ingredients in a large mixing bowl. Then, placed it in the refrigerator while I prepared my cast iron skillet and the pie crust.

For the bottom of the cast iron skillet:

1/2 cup butter
1 cup brown sugar

Melt the butter over medium heat. Stir in and spread the brown sugar until it is absorbed and covers the bottom of a 10-inch cast-iron skillet. 
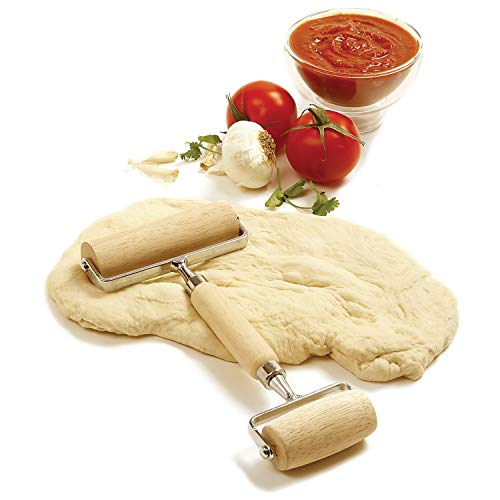
Remove it from the heat and roll out your dough. It's best to roll out the pie crust between wax paper or parchment paper.

Place the bottom pie crust over the brown sugar mixture in the skillet. Fill the skillet with the apple mixture. Then place the top crust and form the edges together. 

Cut 4 to 6 slits in the top of the pie crust. I brushed the top with 2 tablespoons of melted butter. Then sprinkled some sugar and cinnamon on top. Bake at 350 degrees for one hour.

cast iron skillet apple pie recipe

The crust was flakey and tender and the filling was sweet, with a nice buttery, brown sugar bottom. If you like your apple pie on the tart side, cut back on the sugar or eliminate the brown sugar in the filling.

As always thanks for stopping by and I hope you enjoy it!


Long Smoke Pulled Pork

Long Smoke Pulled Pork

I have been having a blast with my new Char-Griller Off-Set Smoker. Last weekend I did a long smoke pulled pork, and it was so good.

I started by picking up a 5.5-pound Boston butt. I mixed my own rub with the help of David Farrell's book The Old Fat Guy's Guide to Smoking meat for Beginners.

You'll find many amazing recipes on his blog oldfatguy.ca.

David calls this Rub a Do Anything Rub, which you can find in his book or on his blog. I didn't use all of his ingredients for this but, I did add a few of my own.

Rub I used for this Long Smoke Pulled Pork:

1/4 cup brown sugar
1/4 cup paprika
2 tablespoons Sea Salt
2 tablespoons black pepper
2 tablespoons garlic powder
2 tablespoons onion powder
1 teaspoon cayenne
1 tablespoon smoked paprika
3 tablespoons Carolina Seasoning (Rub Some Butt)

My Process for Long Smoke Pulled Pork:

After mixing the rub. I rubbed both sides of the pork butt, then covered it and set in the refrigerator overnight.

Early the next morning I fired up my smoker using charcoal, and then added oak and hickory wood splits. When the smoker temperature reached 250 degrees I placed the pork butt in the smoker.

I kept the smoker temperature between 250 and 300 degrees by adding wood splits every 30 to 45 minutes.  After 3 and a half hours I opened the smoker and inserted my probe to monitor the internal temperature of the pork butt. The internal temperature was 160 degrees at his time.

This was the only time I opened the smoker through the whole process. I needed to reach an internal temperature of 205 degrees.

smoked pulled pork butt

After 8 hours and 15 minutes, we finally reached 205 degrees. We removed the pork butt from the smoker, covered it to let it rest for about 40 minutes before shredding it.

The outside had a beautiful tasty bark on it, while the inside was juicy and tender. The total cook time equaled 90 minutes per pound.

We made delicious sandwiches using my homemade barbeque sauce you find the recipe here. 
This pulled pork made the best game-day sandwiches. We had a house full of happy people.


As always thanks for stopping by and I hope you enjoy!


Simple Fried Green Tomatoes

Simple Fried Green Tomatoes

Fall is such a beautiful time of the year, and also the end of our garden season. There are always green tomatoes left on the vines of our plants. Don't let them go to waste, make these simple fried green tomatoes.

These fried green tomatoes make a perfect appetizer, snack or delicious side dish to go with any meal. I don't think my fried green tomatoes are going to win any awards, but they sure are tasty and easy to make.

Fried green tomato recipe

The first thing was to slice the tomatoes. Then, I poured about 1/8-inch of peanut oil into the bottom of my Cast Iron Skillet and set it on medium.

Fried green tomatoes

While the oil was heating up, I prepared a dredging station with one cup flour, 2 beaten eggs, and two cups of Seasoned Panko Bread Crumbs.

Once the oil was ready I dredged one slice of tomato at a time. First in the flour, then the egg and last the bread crumbs. Placing them in the hot oil for only about 10 seconds per side until golden brown.
Then place them on a plate with lined with paper towels. 

This is my simple method for fried green tomatoes. As always thanks for stopping by and I hope you enjoy it.

Easy Pepperoni Roll Recipe

Easy Pepperoni Roll Recipe

This easy pepperoni roll recipe is so quick and easy to make.

 Serve these as a snack, lunch or even have them for dinner.

These pepperoni rolls are a smaller version of our Pepperoni Bread.

Many times when our grandmother made pizza, she would make some pepperoni bread. This was always a treat for the family.

You can make your own dough or pick up some fresh dough at the grocery store.

Here is our recipe for Easy All-Purpose Dough.  


For the pepperoni rolls, I made today I just picked up 2lbs. of fresh pizza dough from Wal-Mart. I already have pepperoni and cheese in the refrigerator at home.

Easy Pepperoni Roll Recipe:


Easy Pepperoni Rolls

I started off by peeling the skin from the pepperoni and slicing the whole stick. Of course, you can buy the pepperoni already sliced. I like to use the sticks and slice it myself.

Pepperoni roll recipe


I used Yellow cheese, but you can use whatever kind of cheese you like. I cut about 6 slices of cheese into strips. Then, I cut the pepperoni in half.

Best pepperoni roll recipe

I rolled some dough out on a floured surface to about 8-inches around. Place some pepperoni and then some cheese. Fold over 2 opposite ends about 1/2-inch and then roll them up into a small loaf. They don't have to be the same size or perfect. Oh, I almost forgot to tell you to make sure you seal ends by pressing the dough together.

Easy Pepperoni Roll Recipe: Ingredients

2 lbs. of Dough
1 Stick pepperoni
6 or 7 slices of your favorite cheese

I yielded 8 pepperoni rolls from the 2 lbs. of dough. I placed them on a greased cookie sheet and baked them at 400 degrees for 20 minutes or until they are light brown.

As always thanks for stopping by and I hope you enjoy it.


Easy Homemade Barbecue Sauce Recipe

Easy Homemade Barbecue Sauce Recipe

I smoked some ribs on my new offset smoker last weekend.  After I prepared everything and had them on the smoker, I realized that I didn't have barbecue sauce.

If you're looking for an easy homemade barbecue sauce recipe, this is it. I'm sure you'll have all of these ingredients in your pantry, as I did.

This is a sweet and spicy barbecue sauce and will work very well with beef, pork, and chicken. I added some hot sauce to give it a little kick. The hot sauce is optional if you don't want the heat.

Easy Homemade Barbecue Recipe Ingredients:

2 cups Ketchup
1/2 cup Apple Cider Vinegar
1/4 cup Brown Sugar
1 tablespoon Lemon Juice
1 tablespoon Worcestershire sauce
2 tablespoons Penzeys Galena Street Rib & Chicken Rub (Or Your Favorite Rub)
2 tablespoons Honey
2 tablespoons Maple Syrup
1 teaspoon Hot Sauce (Optional)

I mixed all of the ingredients in a medium-size mixing bowl. Then, I poured the sauce into a large wide-mouth Mason Jar and gave it a few good shakes.

This turned out to be a nice sweet and tangy barbecue sauce for my ribs. I have the remaining sauce in the refrigerator for the next time.

Here is a great method for Slow Smoked Ribs to try out this Barbecue Sauce

As always thanks for stopping by and I hope you enjoy.

Smoked Bone in Chicken Breasts

Smoked Bone in Chicken Breasts

When it comes to chicken you mostly see skinless, boneless chicken breasts in the grocery stores. Since I got a new Char-Griller offset Smoker for Father's day. I've been grilling and smoking a few different things. I wanted to try some Smoked bone-in chicken breasts.

Fran picked up two nice size bone-in chicken breasts so I could try my hand at smoking them. Wow!! I'm so glad we did. This was the juiciest chicken we have ever made.

The first thing we did was marinate the chicken in Italian salad dressing for a couple hours in the refrigerator.

I fired up the charcoal for the fuel in my Weber Charcoal Chimney. Then put it the smoker chamber of the grill. While I waited to get the temperature up to 230 degrees, I prepared the chicken with Penzeys Galena Street Rib and Chicken Rub.

I placed the chicken breasts in the smoker bone side down for 15 minutes. Then added some applewood chunks, this brought the temperature up to between 250 to 300 degrees. I smoked them for another 30 minutes and checked the internal temperature of the meat. I was looking for 165 degrees in the meat.

I wasn't quite there yet so I turned the chicken over, added some more applewood chunks and smoked for another 20 minutes. After 20 minutes the internal temperature reached 165 degrees. I removed them to rest for 5 minutes.

Smoked Bone-in Chicken Breasts:

2 large bone-in chicken breasts
1 cup Italian salad dressing (For Marinating only)
4 tablespoons of your favorite rub (I rubbed both sides of the chicken breasts)

You can archive the same juicy chicken in your oven. Bake at 350 degrees for 40 to 45 minutes or until you reach 165 degrees internal temperature of the meat. You just won't have the smoked flavor by doing it in the oven.

As always thanks for stopping by and I hope you enjoy.


Instant Pot Corn on the Cob

Instant Pot Corn on the Cob

It is certainly corn on the cob season. We just love local fresh corn on the cob. This Instant Pot Corn on the Cob is just so easy to make.

There is no need to boil a huge pot of water and wait. Then boil it for 7 to 10 minutes. This Instant pot method is really easy. But you'll need an Instant Pot to do it.

We will never boil water again to make our corn on the cob. This is so tasty, your whole family is going to love it.

Instant Pot Corn on the Cob:

This is all you have to do if you have an Instant Pot:
  1. Remove the husks and silk. from the corn
  2. Place your vegetable steamer tray in the bottom of the pot.
  3. Add 2 cups of water
  4. Add 2 tablespoons of butter.
  5. Place as much corn in as you can fit in the pot.
  6. Set the pot to 3 minutes and press the steam button.
  7. Release the Steam when the cycle is complete, and that's it.
Enjoy your hot buttery corn on the cob.


You might also like our Camp Fire Corn on the Cob

As always thanks for stopping by and I hope you enjoy


Slow Smoke Pork Ribs

Slow Smoke Pork Ribs

We had a house full of family and friends for the 4th of July week. This gave me the perfect opportunity to try out my new Char-Griller Offset Smoker. These Slow Smoke Pork Ribs were a perfect fit for the weekend.

My new grill is a combination of charcoal grill and smoker. On the 4th of July, we grilled two of our favorites. Grilled leg of lamb and Rosemary Ranch Chicken.

You'll find both of these delicious recipes below

On Saturday we made these slow-smoked pork ribs for the crowd. We picked out two racks of nice side spare ribs. We then removed the silver skin from the backside of the ribs. Bobby and I seasoned the ribs with a combination of Penzeys Galena Street Rib & Chicken Rub and Carolina Seasoning Rub Some Butt.

Slow Smoked Pork Ribs
 We then put them in the refrigerator for about 2 hours.

We fired up the smoker using charcoal as the fuel and Hickory wood chunks for the smoke. We inserted the meat probes from our ThermoPro TP20 into the meaty part of the ribs and set it for 190 degrees internal temperature.  

We sprayed the ribs with apple juice every hour and brushed on barbecue sauce twice in the last hour of smoking.

After 5 hours of maintaining our smoker temperature of between 225 to 260 degrees, we reached our ribs internal temperature of 190 degrees. 

These Slow Smoke Pork Ribs were a real crowd-pleaser. They were seasoned just right and had a nice Hickory smoked flavor.

This is my first smoke in my new offset smoker. I would not succeded if not for David Farrell and his book The Old Fat Guy's Guide to Smoking Meat For Beginners. I have been following David's blog oldfatguy.ca for some time now. He has been a true inspiration to me to getting started on smoking foods. I followed David's method for these ribs outlined in his blog and his book and I succeded. 

If you're a beginner or have been smoking meats for a while this book is for you.
This book is packed with information from David's years of experience.

The Old Fat Guy's Guide to Smoking Meat for BeginnersThe Old Fat Guy's Guide to Smoking Meat for BeginnersThe Old Fat Guy's Guide to Smoking Meat for Beginners


As always thanks for stopping by and I hope you enjoy

Delicious Crab Cakes Recipe

Delicious Crab Cakes Recipe

Whenever you're in the mood for some tasty seafood, this delicious crab cakes recipe is what you'll want to have on hand.

We have to credit our grandson Bobby for this one. Bobby experimented with several different recipes. Then, he added his own spices until he was satisfied with the texture and taste that he wanted in these delicious crab cakes.

These crab cakes are full of flavor and can be served as a snack, appetizer or even a main dish. Did I mention that they are really easy to make? This recipe will make about 8 to10 crab cakes.

Delicious Crab Cake Recipe 

Ingredients

2 cloves garlic minced
1 shallot minced
2 tablespoons Old Bay Seasoning
2 tablespoons butter
32 oz. lump crab meat
3 tablespoons fresh chives chopped
1/2 teaspoon Tabasco Sauce
6 tablespoons Mayonnaise
Zest from 1-1/2 lemons

Needed for Cooking

2 oz. olive oil
3 large eggs
9 tablespoons Panko Bread Crumbs
salt and pepper to taste

Directions

  1. In a saute pan over medium heat sweat the garlic and shallots together with butter until the garlic is fragrant and the shallots are tender.
  2. Remove the pan from the heat and allow to cool.
  3. In a large mixing bowl add the crab meat, garlic, and shallots, and then add the remaining ingredients. Mix until all ingredients are combined.
  4. Season to taste and form 3 oz. patties.
  5. In a separate bowl add the bread crumbs. In another bowl whisk together the eggs. 
  6. Add the olive oil to a saute pan and heat over medium heat.
  7. Dip the crab cakes in the egg mixture and the coat with the bread crumbs.
  8. Cook over medium heat until crab cakes are golden brown on both sides.

Delicious Crab Cake Recipe

Mix all ingredients together in a large mixing bowl. Then form 3 oz. patties.


Dip the crab cakes in the egg mixture and then coat with the bread crumbs.

Crab Cakes Recipe

Cook on both sides until the crab cakes are golden brown. Then serve and enjoy.

While Bobby cooked the crab cakes, I whipped up a quick dipping sauce. Following is what I used:

3/4 cup Mayonnaise
2 tablespoons fresh chopped chives
2 teaspoons fresh lemon
3 teaspoons chipotle chili powder
3 teaspoons Dijon Mustard

Mix all of these together in a small mixing bowl until combined and you have a nice creamy dipping sauce. 

As always thanks for stopping by and I hope you enjoy


Broiled Walleye Fillets

Broiled Walleye Fillets

It's that time of year again. My good friend George is out on Lake Chautauqua in Western New York fishing for walleye. It's February but that doesn't stop George he's out there on the ice fishing away.

And, that's always good for me because George always shares his good fortune of fishing with me. Just the other day he gave me these fresh walleye fillets.

The last time I beer battered and fried the walleye fillets. This time I decided to broil them. And, oh my gosh were they delicious.

Broiled Walleye Fillets:

First I lined a cookie sheet with tin foil and sprayed it with Pam Non-Stick Spray.  Next, I placed the fresh walleye on the cookie sheet and brushed with melted butter.

I seasoned the fillets with the following Penzeys Spices:

2 tablespoons Italian Herb Mix
2 tablespoons Roasted Garlic
2 tablespoons Chesapeake Bay Seafood Seasoning
2 tablespoons Smoked Paprika
1 tablespoon Cajun Seasoning
1/2 tablespoon Salt and Pepper

I had four nice walleye fillets the amounts are approximately what I used. I just seasoned to my liking.

I placed the cookie sheet on the highest rack in the oven, about 6 inches away from the burner. Set the oven to broil. I broiled the fillets about 7 minutes per side. Until they flacked apart with a fork.

I squeezed the juice of one whole lemon over the broiled walleye as soon as they came out of the broiler and served.

As always thanks for stopping by and I hope you enjoy!


We always keep Penzeys Seasonings on hand. We love the fresh flavor of each and every one of them. 

“ I earn money from purchases on affiliate links at no additionl cost to you.” Disclosure Statement