Festive Butterball Cookies


Festive Butterball Cookies

These festive butterball cookies are the same classic ones made with walnuts that my mother and aunts always made for the Holidays. Also known as snowball cookies, these are always a favorite for the Holidays or served at weddings.

We make all of the Holiday cookies at our house, our 10-year-old grandson, Tyler made these cookies from start to finish.

The traditional butterball cookies would be made with walnuts. But, Tyler had some other festive options, which turned out to be delicious.

Festive Butterball Ingredients:

1-1/2 cup butter softened
3/4 cups powdered sugar
1/2 teaspoon salt
1 teaspoon vanilla extract
3 cups all-purpose flour
1 cup white chocolate chips (Mini)
1/2 cup green cookie sprinkles
1/2 cup red cookie sprinkles

Instructions for Festive Butterball Cookies:

  1. In a large bowl, beat the butter and sugar. Tyler used our KitchenAid Stand Mixer.
  2. Add the vanilla and continue to mix well.
  3. Add in the salt, flour, white chips, and sprinkles.
  4. Continue to mix until the dough becomes thick.
  5. Preheat oven to 375 degrees
  6. Line a cookie sheet with parchment paper.
  7. Roll into 1-inch balls and place on a cookie sheet about 2 inches apart.
  8. Bake for 10-12 minutes or until they turn brown.
  9. Remove and place on a cooling rack for 10 minutes.
  10. Roll in powdered sugar and enjoy.
Christmas Butterball Cookies
Festive Butterball Cookies are ready for the oven

Make these cookies any time of the year. Just omit the festive sprinkles and white chocolate chips and add 1 cup of chopped walnuts.

As always thanks for stopping by and we hope you enjoy it

Baking Sheet Set, 3-Piece Cookie Sheet Set with Silicone Handles, Steel Baking Pans Set, Durable Baking Sheets for Oven, BPA Free Cookie Sheets for Baking Nonstick Set, Sheet Pan - Black Baking PanBaking Sheet Set, 3-Piece Cookie Sheet Set with Silicone Handles, Steel Baking Pans Set, Durable Baking Sheets for Oven, BPA Free Cookie Sheets for Baking Nonstick Set, Sheet Pan - Black Baking PanBaking Sheet Set, 3-Piece Cookie Sheet Set with Silicone Handles, Steel Baking Pans Set, Durable Baking Sheets for Oven, BPA Free Cookie Sheets for Baking Nonstick Set, Sheet Pan - Black Baking PanKitchenAid NEW 7 Quart Bowl Lift Stand Mixer with Double Flex Edge Beater KSM70SK, Empire RedKitchenAid NEW 7 Quart Bowl Lift Stand Mixer with Double Flex Edge Beater KSM70SK, Empire RedKitchenAid NEW 7 Quart Bowl Lift Stand Mixer with Double Flex Edge Beater KSM70SK, Empire Red

 

Air Fryer Pumpkin Seed Recipes


Air Fryer Pumpkin Seed Recipes

Every year when it comes time to carve the pumpkins it turns into a real event at our house. While my daughter and grandsons are competing to see who carves the best pumpkin, I'm collecting and cleaning all of those beautiful pumpkin seeds.

Did you know? That pumpkin seeds are packed with healthy nutrients. Pumpkin seeds contain healthy fats, magnesium, and zinc. Click here for some science-based health benefits of pumpkin seeds.

While everyone was busy carving, I'm busy preparing the seeds. This year I made the pumpkin seeds in our Air Fryer, it was so quick and easy and they were so delicious.

After cleaning the pumpkin seeds I spread them out on a cookie sheet. You can let them dry overnight or do what I did. I placed each of the cookie sheets in the oven at 200 degrees for 10 minutes to dry them out.

We made four flavors of pumpkin seeds this next instruction applies to all four or whatever seasoning you use.

Place the pumpkin seeds in a bowl add a tablespoon of oil and mix well or you can spray them with cooking spray and mix.

Add your seasoning and mix well. Set your air fryer to 400 degrees and timer for 7 minutes. Turn them with a spoon halfway through at 3 and a half minutes. The first batch: Sea Salt, I used one tablespoon of sea salt for this one. 

Cajun Style Pumpkin Seeds:

Simple pumpkin seed recipes

1 tablespoon Smoked Paprika
1 tablespoon sea salt
1/2 teaspoon cayenne pepper
1/2 teaspoon cajun seasoning


Mix well, air fry at 400 degrees for 7 minutes turning them with a spoon halfway through.


Italian Style Pumpkin Seeds:


Easy pumpkin seed recipes

1 tablespoon Italian Seasoning
1 tablespoon garlic powder
1 tablespoon sea salt
1/2 teaspoon black pepper


Mix well, air fry at 400 degrees for 7 minutes turning them with a spoon halfway through.


Cinnamon and Sugar Pumpkin Seeds:


Air fryer pumpkin seeds

1 tablespoon cinnamon

Mix well, air fry at 400 degrees for 7 minutes turning them with a spoon halfway through.

Note: Do not add sugar before air frying. Mix sugar and cinnamon in a bowl and toss hot pumpkin seeds after they air fry, stir well and enjoy.


Drying the pumpkin seeds in the oven at 200 degrees for 10 minutes and using your air fryer is a great way to enjoy this healthy snack right away. You can adjust the amounts of seasoning to your liking in any of these recipes.

We used our Ninja Foodi Grill and Air fryer to make our pumpkin seeds. Click here to read my review of the Ninja Foodi Grill.

   As always thanks for stopping by and I hope you enjoy it.

Ninja AG301 Foodi 5-in-1 Indoor Grill with Air Fry, Roast, Bake & Dehydrate, Black/SilverNinja AG301 Foodi 5-in-1 Indoor Grill with Air Fry, Roast, Bake & Dehydrate, Black/SilverNinja AG301 Foodi 5-in-1 Indoor Grill with Air Fry, Roast, Bake & Dehydrate, Black/Silver


Little Neck Clams and Linguine


Little Neck Clams and Linguine

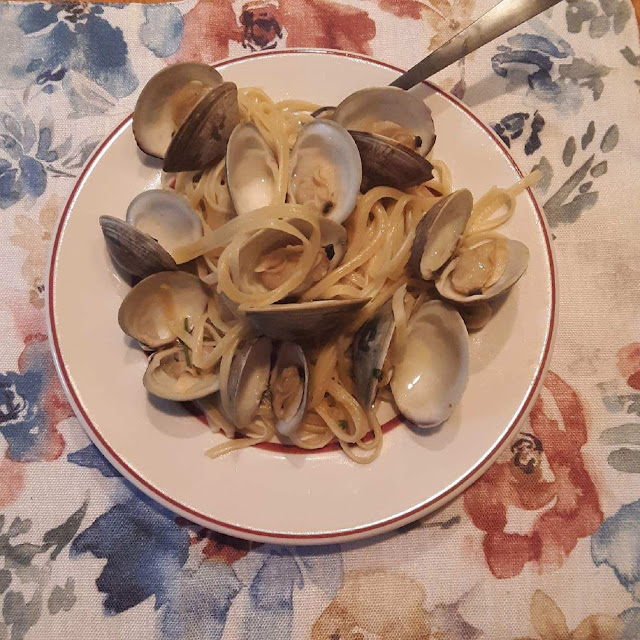
Enjoy this fine dining dish of Littleneck clams and Linguine right in your own home. Most people would think you can only enjoy this dish in a fine Italian restaurant. Well, that is not true, this is so easy to make at home, I know you can do it.

This elegant dish is made with creamy garlic, and white wine sauce, you'll wonder what took you so long to try it.

Little Neck Clams

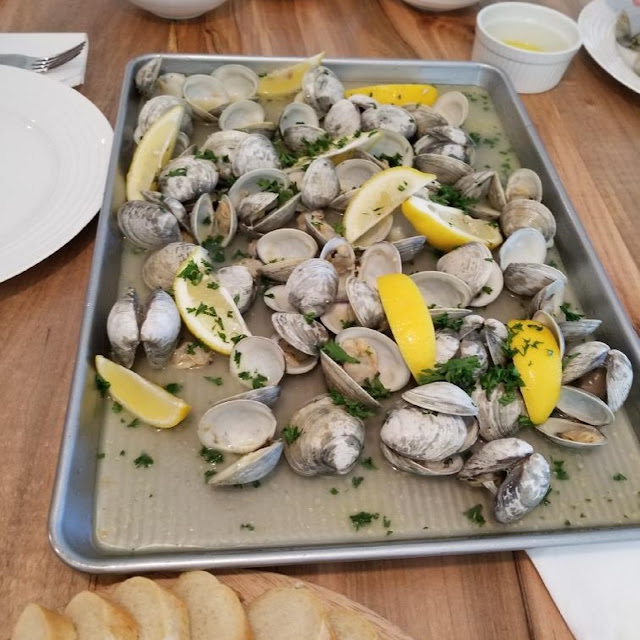
We recently vacationed in Folly Beach South Carolina. In Folly Beach you will find Crosby's Fish and Shrimp Co.  We stopped there one day and picked up six dozen fresh littleneck clams. We steamed them with white wine, butter, and garlic. We served these with butter and crusty bread, and they were so delicious.

After our vacation, I couldn't wait to pick up some littleneck clams and serve them with linguine. You can find littleneck clams at your local grocery store.

Preparing the Clams:

I bought 100 littleneck clams, we severed half of them with the linguine and the other half with just butter and some hot sauce.

The first thing you need to do is rinse the clams to remove any sand. Discard any of the calms that are opened or cracked. Then, soak them in a large bowl with tap water and some sea salt for 20 minutes.

Ingredients for Linguine and Clams:

1 lb. of linguine
2 shallots chopped
4 cloves garlic minced
3 tablespoon olive oil
4 tablespoon butter divided
1 cup white wine
1 tablespoon lemon juice
1/4 cup fresh chopped parsley
40 to 50 littleneck clams

Instructions:

   Start the water for the linguine.
  1. In a large skillet ( with a lid) I used my 12-inch cast-iron skillet. Heat the olive oil and 2 tablespoons of butter, add the shallots and garlic. Cook this for about one minute until tender.
  2. Add the wine and lemon juice. Bring to a boil.
  3. Add the clams and top with parsley and cover.  Steam for about 8 to 10 minutes until the clams open.
  4. Drain the pasta (do not rinse the pasta) and add it to the skillet. If the skillet is too crowded remove some of the clams. Add the remaining butter and mix. Discard any clams that do not open.
Little Neck Clams and white wine


The buttery garlic and wine sauce was a perfect choice for this Little Neck Clams and Linguine dish. This recipe easily satisfied four people and is so easy to prepare.

As always thanks for stopping by and I hope you enjoy it!

Lodge 12Lodge 12Lodge 12


Spicy Smoked Chicken Wings


Spicy Smoked Chicken Wings

I have been wanting to try my hand at smoked chicken wings. I picked up a package of wings at our local grocery store. These spicy smoked chicken wings were a hit with the family.

They turned out to be juicy and full of flavor with just the right amount of heat. I smoked these wings the same day that I smoked 2 racks of Honey Bourbon Smoked Ribs.

I used the 3-2-1 method for the ribs and added the wings to my Char-Griller Smokin Champ in the last 90 minutes of the smoke. While the ribs were smoking I prepared the wings.

First I made a marinade for the wings. I placed the wings in 2 one-gallon zip lock bags and poured in the marinade, closed the bags, and mixed. I placed these in the refrigerator for at least 3 hours.

Spicy Smoked Chicken Wing Marinade: 

1/4 cup extra virgin olive oil
3 cloves garlic minced
1 tablespoon lemon juice
1 teaspoon black pepper
1 teaspoon sea salt
1 teaspoon cayenne pepper
1 teaspoon Penzeys Galena Street Rib and Chicken Rub (can be omitted)

Honey Bourbon ribs with chicken wings

I smoked the wings between 250 to 290 degrees for 90 minutes. I used hickory wood splits as my heat source. The internal temperature of the wings was 165 to 170 degrees. These were whole wings, I could have split them but I didn't bother. After they were smoked they pulled apart easily.

Before serving I made a hot sauce to toss them in.  In a large bowl, I melted 1/2 cup butter (one stick), mixed it with 1 cup of Frank's Hot Sauce, and 1 teaspoon of Cayenne pepper. I placed the wings in the bowl covered them and tossed them until they were coated.

These wings turned out great, they were spicy, juicy inside with just the right amount of heat. If you don't like medium or hot wings just skip the last step.

As always thanks for stopping by and I hope you enjoyed it.


Honey Bourbon Smoked Ribs


Honey Bourbon Smoked Ribs

These honey bourbon smoked ribs were fall off the bone delicious. I also smoked some chicken legs and wings, but that will be another post.

I started with two racks of center-cut ribs that I picked up from our local grocery store. After removing the silver skin from the backside, I seasoned them with sugar-free Rib Rack BBQ Rub on both sides then, put them in the refrigerator for at least three hours.

I fired up my Char-Griller Smokin Champ off-set smoker and brought the temperature up to about 250 degrees. I used the 3-2-1 method to smoke these ribs. I find that this is the best method for juicy fall off the bone ribs.

ThermoPro Temperatue Monitor

The 3-2-1 Rib Smoking Method:

I set the ribs in the smoker and monitored the temperature with my ThremoPro TP-20. Keeping the temperature between 225 and 290 degrees using charcoal and hickory wood splits as my heat source. They remained in the smoker for 3 hours only opening the lid to spray apple juice every hour.

Honey and brown sugar ribs

After 3 hours I removed the ribs from the smoker to wrap them in tin foil. Tearing off two sheets of tin foil long enough to make sure there is plenty of room to wrap. I made a line in the center of the foil, with generous amounts of brown sugar, honey, butter, and last but not least bourbon. I placed them meat side down and then repeated the same ingredients on the backside of the ribs.

Carefully wrapping them to create a packet so the juice does not leak, I placed them back in the smoker meat side down for 2 hours.

After 2 hours I removed them from the foil. Placed them back in the smoker meat side up for the last hour. I bushed on Sweet Baby Ray's Barbecue Sauce twice in the last hour.

The results were amazing, the meat was juicy and fall off the bone and that is just the way I like them. 

As always thanks for stopping by and I hope you enjoy it!

Mini Lemon Pies


Mini Lemon Pies

These little mini lemon pies make a delightful dessert or sweet little snack any time. Made with lemon curd using fresh lemons from my cousin's Arizona backyard. 

Lemon curd is so easy to make and is the perfect balance of sweet and tart. Lemon curd can be stored in the refrigerator for 2 to 3 weeks.

There are many uses for lemon curd such as, filling for cupcakes and donuts, spread it between cake layers. Spread it on scones, crackers, pancakes, and waffles. 

Making lemon curd

I started by making the lemon curd. Using a double boiler I whisked together the sugar and egg yolks. Then, added the fresh lemon juice, zest of lemon, and butter. This requires continuous stirring. 

Homemade lemon curd

This finished lemon curd placed in a bowl to cool. The complete ingredients and direction for the lemon curd and the crust will be at the end of this post.

Muffin tin lemon pies

Next, I made the dough for the mini lemon pies. You can use a pie crust recipe or even buy the pie crust already made. I used the same recipe that I make for my Pecan Cup Cookies. 

This dough is really easy to make using cream cheese, flour, and butter. I rolled the dough into one-inch balls and pressed them into the mini muffin tin using my handy Tart Tamper.

Mini lemon pie cups

After baking the mini pie cups I placed them on a rack to cool. When the cups were finally cooled and the lemon curd was chilled I filled each cup with a scoop of lemon curd using my #70 cookie scoop. About one tablespoon in each cup.

Mini Muffin Tin Lemon Pies

Lemon Curd Ingredients:

1 cup of white sugar
1/2 cup of lemon juice (4 to 5 lemons)
5 large egg yolks
1/2 cup salted butter (cold and cut into tablespoons)
The zest of 2 lemons

Lemon Curd Instructions:
  1. Add some water to the double boiler and bring it to a boil.
  2. Whisk together the sugar and egg yolks and begin to stir.
  3. Add the lemon zest and lemon juice.
  4. Continue to stir, the mixture will begin to thicken.
  5. After 10 minutes remove from the heat.
  6. Add the butter one tablespoon at a time, continue stirring until all the butter is melted and the curd is thick.
  7. Transfer to a bowl and let it cool.
Pie cup Ingredients:

3 ounces Crean Cheese (Softened)
1/2 cup butter
1 cup all-purpose flour

Pie Cup Instructions:
  1. Blend the cream cheese and butter until smooth.
  2. Add flour and mix until dough forms.
  3. Wrap and refrigerate to chill for 30 minutes.
I sprayed a mini muffin tin with Bakers Joy to prevent the cups from sticking. Roll the dough into one-inch balls and press up the sides of the muffin tin with the tart tamper. Tip: Have a little bowl of flour handy to coat the end of the tamper so the dough doesn't stick to it.

Preheat the oven to 350 degrees and bake the cups for 18 to 20 minutes until golden brown. After the cups have cooled fill each of them with a tablespoon of cooled lemon curd and enjoy.

I yielded 20 little pie cups for the dough recipe and after filling them I still had some lemon curd leftover. If you want to you can double the dough recipe.

You might also like my Fresh Lemon Hand Pies made with the same lemon curd.

As always thanks for stopping by and I hope you enjoy it.

Wilton Stainless Steel Small Cookie Scoop, SilverWilton Stainless Steel Small Cookie Scoop, SilverWilton Stainless Steel Small Cookie Scoop, SilverGood Cook 04029 Mini Non-Stick Muffin Pan, Steel, 1-7/8 in Dia x 14.6 in L x 9.3 in W x 6.8 in HGood Cook 04029 Mini Non-Stick Muffin Pan, Steel, 1-7/8 in Dia x 14.6 in L x 9.3 in W x 6.8 in HGood Cook 04029 Mini Non-Stick Muffin Pan, Steel, 1-7/8 in Dia x 14.6 in L x 9.3 in W x 6.8 in HFox Run Tart Tamper, WoodFox Run Tart Tamper, WoodFox Run Tart Tamper, Wood


Yummy Chewy Oatmeal Raisin Cookies


Yummy Chewy Oatmeal Raisin Cookies

Everyone in my family knows that oatmeal raisin cookies are my favorite cookie. Many years ago Jamie made these yummy chewy oatmeal raisin cookies for me and I just couldn't stop eating them. These cookies for sure lived up to the name, yummy and chewy.

These were so good that I had to have the recipe. Jamie wrote it all down for me and I tucked away and never made them. After digging through some old recipes I came across this recipe and knew that I had to make these again.

Many people don't like raisins. Well, I happen to like them, especially in these soft chewy cookies. These cookies are made with brown sugar, cinnamon, and vanilla. They are soft chewy and bursting with flavor.

Oatmeal cookie mixture

The complete ingredients and instructions will be below, but the first thing to do is to make this mixture. Mix the eggs, vanilla, and raisins in a medium bowl. Cover and put this in the refrigerator for at least one hour.

Yummy Chewy Oatmeal Raisin Cookies Ingredients:

3 eggs beaten
1 teaspoon vanilla
1 cup raisins
2-1/2 cups flour
2 teaspoons baking soda
1 teaspoon cinnamon
1 teaspoon salt
1 cup butter (softened)
1 cup white sugar
1 cup brown sugar
2 cups oatmeal

Instructions:
  1. In a medium bowl beat the eggs, add the vanilla, and raisins cover, and refrigerate for one hour.
  2. In another bowl, beat and cream together the butter, white sugar, and brown sugar.
  3. In a third bowl mix the flour, baking soda, cinnamon, and salt.
  4. Add the dry ingredients to the creamed butter and sugar mixture. Mix until all of the flour is absorbed.
  5. Stir in the egg and raisin mixture, then add the 2 cups of oats.
  6. The mixture will be stiff. Drop onto a cookie sheet lined with parchment paper with a tablespoon. I used a #70 cookie scoop for this.
  7. Bake at 350 degrees for 8 to 10 minutes until cookies are brown around the edges.
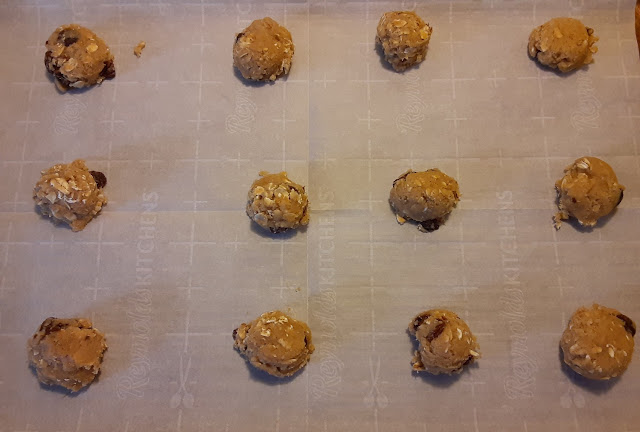
Oatmeal cookies ready for the oven

Yummy chewy oatmeal raisin cookies ready for the oven. I'm so glad that I found this recipe, these are the best oatmeal raisin cookies that I've ever had. I yielded 60 cookies from this recipe. These are easy to freeze for a nice sweet treat any time. 

As always thanks for stopping by and I hope you enjoy it!

Wilton Stainless Steel Small Cookie Scoop, SilverWilton Stainless Steel Small Cookie Scoop, SilverWilton Stainless Steel Small Cookie Scoop, SilverKitchenAid RRK150BK 5 Qt. Artisan Series Stand Mixer - Imperial Black (Renewed)KitchenAid RRK150BK 5 Qt. Artisan Series Stand Mixer - Imperial Black (Renewed)KitchenAid RRK150BK 5 Qt. Artisan Series Stand Mixer - Imperial Black (Renewed)Baking Sheet Set, 2-Piece Cookie Sheet Set with Silicone Handles, Steel Baking Pans Set, Durable Baking Sheets for Oven, BPA Free Cookie Sheets for Baking Nonstick Set, Sheet Pan - Black Baking TrayBaking Sheet Set, 2-Piece Cookie Sheet Set with Silicone Handles, Steel Baking Pans Set, Durable Baking Sheets for Oven, BPA Free Cookie Sheets for Baking Nonstick Set, Sheet Pan - Black Baking TrayBaking Sheet Set, 2-Piece Cookie Sheet Set with Silicone Handles, Steel Baking Pans Set, Durable Baking Sheets for Oven, BPA Free Cookie Sheets for Baking Nonstick Set, Sheet Pan - Black Baking Tray


Creamy Parmesan Lemon Risotto


Creamy parmesan Lemon Risotto

This creamy parmesan lemon risotto is delightful. You would expect to find risotto in a fancy Italian restaurant. Or, you could make risotto yourself.

Risotto is a rice dish from Northern Italy and can be served as an appetizer, side dish, or even a main dish. It is made from short-grain starchy rice that you can buy at your local grocery store. 

We used Arborio Rice the starch in this rice gives the Risotto that creamy consistency. Risotto is cooked in broth and you can add all kinds of your favorites like mushrooms, and veggies.

Bobby prepared a saucepan and added six cups of chicken broth to simmer while I diced the onion. In a separate pan, we started to cook the onions using extra virgin olive oil and seasoned rice vinegar. you can use white wine in place of the vinegar.

Cheesy Lemon Risotto

After the broth has simmered and onions are tender add one cup of the rice to the onions and stir in the warm broth one cup at a time continually stirring until the broth is absorbed for each cup of broth you add. 

Creamy Parmesan Lemon Risotto Ingredients:

6 cups Chicken Broth
1/3 cup seasoned rice vinegar or white wine
2 teaspoons lemon juice plus zest of one lemon
1/2 of medium Spanish onion diced
1 cup Arborio Rice
2 tablespoons extra virgin olive oil
2 tablespoons unsalted butter
1 cup of grated Parmesan cheese plus 1/4 cup for garnish

Instructions:
  1. Simmer the chicken broth in a saucepan. 
  2. In a separate pan add the olive oil, butter, vinegar, and onions.
  3. Stir and cook the onions until tender. If you are adding mushrooms or veggies add them now.
  4. Add the rice to the onions and then add one cup of broth at a time.
  5. Continue to stir until each cup of broth is absorbed before you add the next one.
  6. Continue to stir and cook the risotto until soft on the outside but firm on the inside.
Note: You may not use all of the broth. We ended up using 4 cups of the broth before our risotto was finished. This takes a little time and work but is so well worth it in the end. We yielded four servings from this recipe.

As always thanks for stopping by and I hope you enjoy it.


Easy Cast Iron Skillet Pizza


Easy Cast Iron Skillet Pizza

We love cooking new things in our cast iron skillets and pizza is no exception. This easy cast iron skillet pizza turned out to be amazing and it disappeared in minutes. 

We spend several evenings baking cookies for the Holidays with our daughter and grandsons. On one of these evenings, we needed something quick to eat before we started baking our cookies.

Our grandson Bobby, showed up with pizza dough, sauce, and his favorite topping, olives. Bobby decided to use one of our cast iron skillets to make our pizza.

Cast Iron Skillet Recipe
Ready for the oven

How to make Easy Cast Iron Skillet Pizza:

  1. The first thing Bobby did was preheat the oven to 500 degrees.
  2. Spread the dough on a floured surface to the size of the skillet, we used our 12-inch cast-iron skillet.
  3. Place the cast-iron skillet in the 500-degree oven for 5 or 10 minutes.
  4. Carefully remove the skillet from the oven using heavy potholders.
  5. Place the shaped dough in the skillet and add your sauce, favorite toppings, and shredded mozzarella.
  6. Place it back in the oven and bake for 10 minutes until the crust is golden brown.
  7. Again carefully remove the skillet from the oven and using a spatula transfer the pizza to a cooling rack.
  8. After a couple of minutes slide it onto a pizza pan slice it and enjoy.
What makes this so easy is you can pick up fresh pizza dough at your local grocery store and have fresh hot pizza in 20 minutes.

If you prefer to make your own dough try my All-purpose dough recipe here. This recipe will make 3 nice sized pizzas, so if you're only making one pizza divide the ingredients accordingly.

As always thanks for stopping by and I hope you enjoy it.

Try some of our other pizza recipes

Cast Iron Skillet Deep Dish PizzaCast Iron Skillet Deep Dish PizzaHomemade Mozzarella Tomato and Basil PizzaHomemade Mozzarella Tomato and Basil Pizza


Find all of your Cast Iron Skillet needs here: 

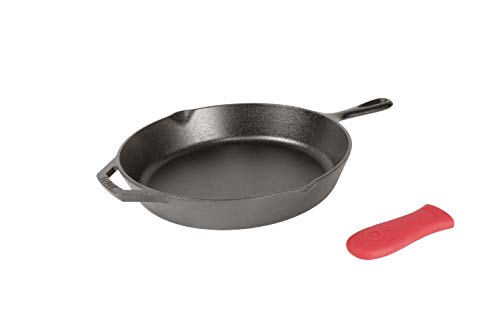
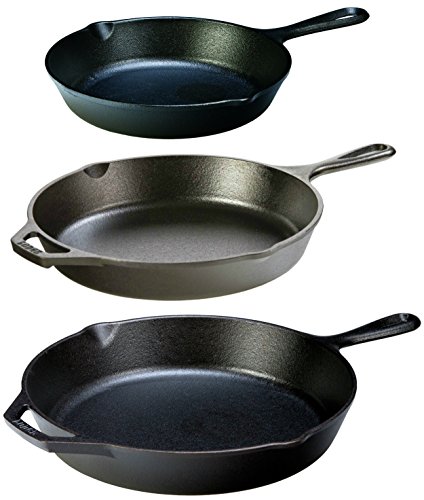
Lodge Cast Iron Baker’s SkilletLodge Cast Iron Baker’s SkilletLodge Cast Iron Baker’s SkilletLodge Cast Iron Skillet with Red Silicone Hot Handle Holder, 12-inchLodge Cast Iron Skillet with Red Silicone Hot Handle Holder, 12-inchLodge Cast Iron Skillet with Red Silicone Hot Handle Holder, 12-inchLodge Seasoned Cast Iron 3 Skillet Bundle. 12 inches and 10.25 inches with 8 inch Set of 3 Cast Iron Frying PansLodge Seasoned Cast Iron 3 Skillet Bundle. 12 inches and 10.25 inches with 8 inch Set of 3 Cast Iron Frying PansLodge Seasoned Cast Iron 3 Skillet Bundle. 12 inches and 10.25 inches with 8 inch Set of 3 Cast Iron Frying Pans


“ I earn money from purchases on affiliate links at no additionl cost to you.” Disclosure Statement