Showing posts with label grilling recipe. Show all posts

Grilling Snow Crab Legs


Grilling Snow Crab Legs
How to Grill Snow Crab Legs

There is no doubt about it, our family loves crab legs. If you like crab legs and give this method a try, you may never buy crab legs in a restaurant again.

Your local grocery store should have snow crab legs in the freezer section or seafood section of the store. Check to see if they are fully cooked, they should be, so all you really have to do is heat them up.

Grilled snow crab legs

We started off with 5.5 lbs. of snow crab legs and let them thaw. Fran melted 1/2 stick of butter and I mixed in 1 teaspoon of garlic powder and lightly brushed the crab legs on both sides.

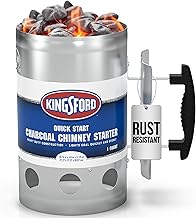
I fired up the charcoal chimney to get the coals nice and hot. You can also do this on a gas grill. I would use the medium setting for a gas grill.

 I set the hot coals about 5 or 6-inches from the cooking grates. Set the crab legs on the grill and cook for about 3 to 4 minutes per side.

Caution: It's best to have a spray bottle handy for any flare-ups, you don't want to burn the crab legs. 

Grilling Snow Crab Legs:

4 tablespoons of butter melted.
1 teaspoon of garlic powder.
4 to 5 lbs. of crab legs (enough for 4 people) or you can adjust accordingly.
More melted butter for serving.

As always thanks for stopping by and I hope you enjoy it 

Weber 7429 Rapidfire Chimney StarterWeber 7429 Rapidfire Chimney StarterKingsford Original Charcoal Briquettes, Two 16.7 lb BagsKingsford Original Charcoal Briquettes, Two 16.7 lb Bags


How to Grill Beef Shoulder Steak

how to grill beef shoulder steak

Well, we all know that grilling season has finally arrived. Last week Fran came home from a trip to the grocery store with a beef shoulder tender.

This steak was packaged already and marinaded with tangy vinegar, garlic, onion, and black pepper marinade. All I had to do was grill this steak without ruining it.

The truth be known, I've never heard of this cut of beef before so I looked it up. Here is what I discovered.

Beef tender is a cut from the shoulder and is one of the most tender cuts of beef it is very similar to a Filet Mignon but less expensive.

Fran said this is the most tender steak that I ever cooked on the grill. Who am I to argue with that? Here is how I grilled this beef shoulder petite tender.

I set my Huntington Gas Grill on the high setting. The grill was ready in about 5 minutes.

  1. I grilled the first side for exactly 4 minutes.
  2. Turned the steak over and grilled the second side for 3 minutes.
  3. I lowered the grill setting to medium after 3 minutes on the second side.
  4. Turned the steak over again, closed the lid, and grilled for 10 minutes. Until the internal temperature reached 130 degrees. 
  5. Then I let the steak rest for 5 minutes before cutting it.
This steak was a little less than one pound so your grill time may vary based on size. As long as you keep an eye on the internal temperature you'll be fine.

This method gave me a perfectly juicy, medium rare, and tender steak. I highly recommend this cut of beef, I know you won't be sorry.

As always thanks for stopping by and I hope you enjoy.

Whether you're cooking meat on the grill, in the oven, or on a stovetop it's always a good idea to have a good meat thermometer. And, a good sharp knife to cut the meat.


Easy Grilled Shrimp Recipe

Easy Grilled Shrimp Recipe
Easy Grilled Shrimp:

The weather here in Western New York finally took a turn for the good. We've had some beautiful weather the last couple of days with temperatures in the high 60's.

For us, that means it's time to get the grill fired up. We had a bag of shrimp in the freezer and Fran thought it would be better to grill it instead of cooking it in the house.

Cooking shrimp on the grill is really not difficult at all. We had the whole meal ready in about 15 minutes.

After Fran thawed and rinsed the shrimp she skewered it for the grill.


We used our flat stainless steel skewers but you can also use the wood or bamboo skewers. If you use the wood or bamboo just make sure that you soak them in water for about 10 minutes so they don't burn. We had a little less than a pound of shrimp and yielded a full three skewers or about 21 shrimp.

Now that the shrimp was ready I fired up one side of the grill and set it to the high setting. Then I melted 2 tablespoons of butter and brushed it on both sides of the shrimp. I seasoned both sides generously with Old Bay Seasoning and Garlic Powder.

Buy Old Bay Seasoning if you've never tried it before. There are so many recipes for Old Bay seasoning and it adds such a wonderful flavor to so many things.

Here is everything I used for this easy grilled shrimp:

1 lb. of shrimp (Fresh would be the best)
2 tablespoons butter melted
Old Bay Seasoning
Garlic Powder

I grilled the shrimp on the high setting on my grill for 3 minutes per side and served the shrimp over brown rice. This was a quick, easy, and tasty meal ready in under 20 minutes.

As always thanks for stopping by and I hope you enjoy.


How to Make Roasted Red Peppers

Roasted Red Pepper Recipes

How to make Roasted Red Peppers

My cousins, Jim and Carmie are as passionate as I am about preserving old family recipes and creating new ones. This easy Roasted Red Peppers Recipe is just one example.

 If you've read some of my previous posts you'll see that I've called on them before to help clarify an old recipe.

Not many people can do this outside on their grill in January, but they live in Arizona and the temperature was 80 degrees.  Much warmer than here in Western New York. Following is their simple process of roasting Red Peppers for our enjoyment.

Roasted Red Peppers by Jim and Carmie

We have been making our own ROASTED PEPPERS for over 40 years and finally decided to write down our process and capture it on film as best as possible.

First, we start with a bushel of red bell or pimento peppers. You can do 3 or 4 peppers or as many as you feel comfortable with. It’s simple, all you need is your gas grill.

 Place the peppers on the grill with the grill set on high (no need to wash them) and then cook until they're burnt and blistered.

 Place the cooked peppers in a large pot and keep covered. Continue until all the peppers are cooked.
Next, you’ll need news paper, a small bowl of water, and a large bowl. Lay the news paper out on a table. The table can be uncovered or if you prefer you can use an old table cloth. (We use an old table cloth.)

 Start by peeling the skin from the peppers, then open the peppers and remove the stem, seed pod, and all the seeds. Then tear the pepper into large sections. One to three sections and place in the large bowl. 
make roasted red peppers
(We have found that dipping the pepper into a bowl of water prior to peeling makes the process easier and that two people makes this easier also – one peeling and the other deseeding and tearing into strips.) Be careful during this process as the juice from the peppers will be hot.
roasted red pepper recipe
After peeling, deseeding and tearing all the peppers into strip’s we divide them into one-quart ziplock storage bags and add a heaping teaspoon of chopped garlic to each bag. 

The peppers will yield their own oil and as you bag them the oil will transfer automatically. Lay the bags flat on a cookie sheet and freeze.
preserving roasted red peppers
 Keep frozen until ready to serve. Thaw either in a microwave or allow them to come to room temperature.

 They are great by themselves, as a side dish or in a sandwich. Season to your taste with salt and pepper when serving.

The bushel of peppers we used contained 68 peppers and yielded 13-quart bags. The whole process took about 2 ½ to 3 hours.

Check out these Grilled Stacked Veggies made with roasted red peppers.


As always thanks for stopping by and I hope you enjoy!

Grilled Zucchini

Grilled Zucchini and Squash
Grilled zucchini squash recipe
An easy and healthy veggie side dish to compliment any meal.  While shopping last week Fran had picked up a strip steak for me and a turkey burger for herself.

 Fran eats much healthier than I do. While I was heating up the grill and grilling the steak and burger she prepared some zucchini and yellow squash. For this easy grilled zucchini squash recipe.

Here is how she did it:

Sliced the zucchini and squash length wise about ¼ inch to ½ inch thick.

Brushed olive oil on both sides.

Seasoned with some Italian seasoning.

Then layered with fresh grated Parmesan cheese.

After the steak and turkey burger finished cooking on the grill, I took the zucchini and squash slices and placed them directly on the grill surface on the medium setting.

Quickly grilled these for about a minute per side, just enough to show the grill marks, you don’t want to over cook them, as they will turn out too soft and mushy.

They came out perfect and made a tasty veggie side dish. Quick and easy is the way that I like it.

Here is another great idea for grilled veggies, one of my earlier posts: Grilled Stacked Veggies, this one you can really make a meal out of.

As always thanks for stopping by and I hope you enjoy!

Grilled Rosemary Ranch Chicken

Grilled Rosemary Ranch Chicken


This is another one of our summer grilling favorites. Our daughter Jamie found this grilled rosemary chicken recipe and has been making this for a couple of years now.

This was part of our 4th of July weekend menu, along with our Grilled Leg of Lamb, and I couldn’t resist posting it. Here is the recipe that Jamie uses for this delicious grilled chicken:


The chicken breasts are cut into about 1” cubes and marinated overnight. Of course, Jamie did all of the work all I had to do was Skewer the chicken and grill it to perfection.

Chicken marinated and on skewers
Marinated overnight and on the skewers
 I had my Huntington Gas Grill set on the medium setting, and grilled the chicken for about 10 minutes turning the skewers frequently.

It turned out to be juicy and packed full of flavor, as this recipe always is. If you’re going to have guests over for a cookout, you’ll for sure impress them with this recipe. This Rosemary Ranch Chicken will disappear very quickly, and your guests will be asking for the recipe. I can honestly say this is a must add to your summer grilling list.

As always Thanks for stopping by and I hope you enjoy

Grilled Lamb

best grilled lamb recipe

Best Grilled Lamb Recipe:

I was bound and determined to make this grilled lamb leg recipe as part of our 4th of July weekend this year.  We grew up in Western Pennsylvania where lamb on the rod is very popular, but that is not the case here in Western New York.

Lamb on the rod is the leg of the lamb cubed up and grilled on skewers, and best served with Syrian Bread, garlic sauce, peppers, and onion sauce. All of which I will tell you how we made.

My daughter picked up two boneless 3-pound legs of lamb packages at Sam’s Club and asked the butcher to cube it up for grilling on skewers. You can do this yourself just trim the fat and cut it into nice 1-inch pieces. 

I marinated the lamb in Italian salad dressing and placed it in the refrigerator overnight.  We also made the garlic sauce and peppers and onion sauce the day before.


grilled leg lamb marinade
Marinade with Italian Salad Dressing
 Easy Garlic Sauce Recipe:
 
10 cloves of fresh garlic
16 oz. sour cream
1 tablespoon lemon juice
1 tablespoon oil

Add all these ingredients into a blender or your food processor, we used our NutriBullet to do this, and mix until it is liquid, then refrigerate it overnight.

How to make the Peppers and Onion Sauce:

2 medium-sized onions (Diced)
2 16 oz. jars of hot or mild pepper rings (I used one hot and one mild)
1 tablespoon oil

Mix in a large bowl and refrigerate overnight.


easy garlic sauce recipe
Pepper and onions and garlic sauce
 Time to cook the lamb, I skewered the lamb and seasoned it with salt, pepper, and garlic powder. I set the grill on the medium setting and grilled it for about 12 to 15 minutes turning the skewers frequently. I also switched the skewers around to avoid hot spots on the grill.


grilled boneless leg lamb

Now off of the skewers and onto a plate, I used a two-prong fork to push the lamb off of the skewers. You can have the two sauces on the side or I like to spoon both sauces over my lamb, add a slice of the Syrian Bread for dipping and enjoy. Click here to get the recipe for the Syrian Bread.

You might also like my: Southwestern Grilled Chicken Breasts

As always thanks for stopping by and I hope you enjoy it.

“ I earn money from purchases on affiliate links at no additionl cost to you.” Disclosure Statement

X