Garlic Bread Sticks

Garlic Bread Sticks
Now that the weather is cooler I guess it's okay to fire up the oven and do some baking. I was in the mood for some of my homemade pizza so I decided to make some. The recipe for the dough that I use will yield me three 12 inch pizzas, I only made two and thought I would make some of these garlic bread sticks.

These are so easy to make as just a great snack, or if you're in the mood for garlic bread to go with that pasta you're making for dinner these garlic bread sticks will be perfect. You can find the recipe for the dough here, remember this recipe will yield three pizzas so if you only want to make the bread stick you'll want to reduce it accordingly.

Okay here is how I did this: 

I greased a small 13 x 9-inch pan and spread the dough. I used one pound of dough because I wanted to make sure it wasn't thin after I spread it out. I set this aside for about 30 minutes to let the dough rise just a little more. While waiting, finely mince two cloves of garlic.

Then with my pizza cutter, I cut 1-1/2 inch pieces across the width of the pan, this yielded nine pieces. Now brush the top lightly with olive oil, add the garlic, some salt, and pepper to taste, Italian Herb Seasoning, and top off with Romano cheese.

Bake this on the middle rack in your oven at 450 degrees for 15 minutes until the top is golden brown, then cut up the middle after they come out of the oven this will give you 18 nice garlic bread sticks to enjoy.

Norpro Wood Pastry/Pizza RollerNorpro Wood Pastry/Pizza Roller

To roll out my dough I use my Norpro Pastry roller. This is such a handy tool to have in the kitchen. I use this for all of my doughs and pastries.

Here is all that you need to make Garlic Bread Sticks:

1 pound of dough
2 cloves of garlic
Italian Seasoning
Olive oil
Romano cheese
Salt
Pepper

Make these as a snack or serve with any meal, as always I hope you enjoy Thanks for stopping by.

Apple Crisp

Apple Crisp out of the oven

I had some apples left over from my previous post-Sam's Apple Pie. I was all set to make some more pie crust for a second pie, but my wife said: "why don't you make an apple crisp instead". I took her advice and made this simple yet delicious dessert. This apple crisp is great served warm, with whip cream or ice cream.

Here is what I used to make the crisp topping:

1 cup all-purpose flour
1 cup brown sugar (packed)
1/4 teaspoon baking powder
1/4 teaspoon baking soda
1/2 cup butter, melted
1 cup Quaker Oats

I loaded all of this into my KitchenAid mixing bowl, set the flat beater in place, and turned it on low speed for about one minute. This mixed up very nicely until it was crumbly.

This was really enough for a 9x13 inch pie plate but I didn't have that many apples left over, so I used another 9-inch pie plate. I put the apples in the pie plate and then packed on the crisp topping, as I had more than enough.

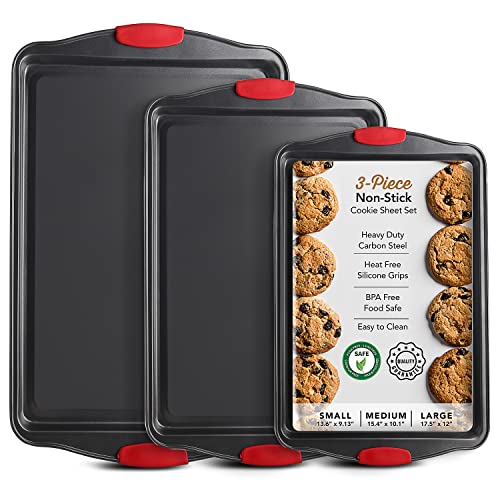
I set the oven to 350 degrees and baked it for 45 minutes, I also set the pie plate on a cookie sheet just in case of any spills.

As Always Thanks for stopping by and I hope you enjoy.

Sam's Apple Pie

apple pie on a plate

Every fall season I get an itch to bake an apple pie, so I decided to go ahead and bake one of my favorites. I call this one Sam's Apple Pie, actually, apple pie is great any time of the year, it just seems fitting when the apples are in season.

I started off by making the pie crust, and since I'm no expert I did this according to my KitchenAid instructions and recipes.

Here is what you need for the pie crust:

2-1/4 cups of all-purpose flour
3/4 teaspoon salt
1/2 cup shortening, well chilled
2 tablespoons of butter or margarine, again well chilled
5 to 6 tablespoons of cold water

I added the flour and salt into my mixing bowl, then attached the flat beater and turned it on low for about 10 seconds.
I cut the shortening and butter into small pieces, added them to the flour, turned on low speed for about one minute until I saw the mixture starting to form little clumps.
Keeping the mixer on low speed I added the cold water one tablespoon at a time until the pie crust formed into a ball.
I cut it into two equal pieces, wrapped it and put it in the refrigerator while I prepared the apples.
Pie crust
My pie crust ready to be cut in half
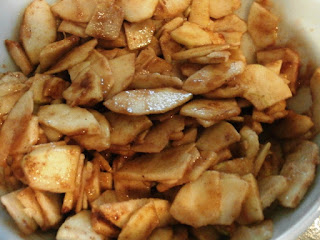
Now that my pie crust was made it was time to get the apples ready. I used five nice sized Granny Smith apples. I peeled, cored and sliced my apples and placed them in a large bowl. I'm not that particular, I sliced the apples thin but they didn't have to be all the same size. This is enough pie crust for a bottom and top of a 9-inch pie plate.

Once the apples are in the bowl here is what you need:

2 tablespoons lemon juice
3/4 cup of white sugar
1/4 cup brown sugar
1/4 teaspoon salt
2 tablespoons flour or cornstarch (I used flour)
1 teaspoon nutmeg
1 teaspoon cinnamon

Add all of these on top of the sliced apples and mix well using a large spoon. Now that the apples are mixed place them in the refrigerator while you roll out the pie crust.
apples mixed in a bowl
Mixed apples in the bowl


Next, I rolled out my pie crust between two pieces of wax paper and carefully lined the bottom of a 9-inch pie plate. Make sure you press it firmly to the bottom and sides, of the pie plate to work out any air bubbles.
pie crust lined in pie plate
Pie crust in pie plate
Next, I added 4 to 5 cups of the sliced seasoned apples into the pie plate, make sure you get the juice from the bottom of the bowl.
apples in pie plate
Now I added the top, and cut about a three-inch cross in the center, and one-inch cross at every point and one in between. This allows the steam to release.
top added to pie
I lightly brushed the top with milk and sprinkled sugar and cinnamon on top. Place the pie on a cookie sheet just in case there are any spills, and mine always does, so it's best to be safe.

Time for baking instructions:

Pre-heat oven to 450 degrees
Cover the top of the pie with tin foil, and bake at 450 degrees for 15 minutes
After 15 minutes remove the tin foil, lower the oven to 375 degrees
Continue to bake for another 45-50 minutes
pie out of the oven
 Just out of the oven
 I could have really got away with three Granny Apples for this pie, as I had some leftover. So enjoy my Apple Crisp that I made with the leftover apples.

Well, it may not be the prettiest pie or win any contests, but it is oh so good. As always thanks for stopping by and I hope you enjoy.

Easy All Purpose Dough

Easy All Purpose Dough


This is quick and easy dough, and if you are in the mood for pizza here is my homemade pizza recipe, or my ever to delicious pepperoni bread. But you may want to use this dough for some great snacks like garlic rolls, breadsticks, and what about that oh so famous fried dough. The kind you buy at your local county fairs, you know the one with sugar all over it.

Here is what you need:

2 packages of active dry yeast
2-1/4 cups of warm water
1 tsp salt
1 tsp sugar (optional) I don’t use the sugar, you may prefer to use it
3 tbsp of Crisco or oil (I sometimes use light olive oil)
5 to 6 cups of all-purpose flour

Here is all you need to do:

  1. In a measuring cup add the yeast to the warm water. Let this stand until you see some bubbles.
  2. In a large bowl or your KitchenAid mixing bowl add the flour, salt, and oil
  3. Make a well in the flour and pour in the warm water and yeast.
  4. Now start to mix, or place your dough hook and turn on your stand mixer
  5. You want to mix until the dough is nice and smooth and not too sticky.
  6. Cover and let the dough rise for 1 hour or more.
  7. After the dough rises, punch it down and divide it up for whatever you are making.
I get three nice 12” or 14” pizzas from this recipe depending on the thickness of your pizza.

flour salt and oil in the mixing bowl
Flour salt and oil in my KitchenAid  mixing bowl

pizza out of the oven
Two pizzas out of the oven

As always thanks for stopping by and I hope you enjoy 


KitchenAid Artisan Series 5-Qt. Stand Mixer with Pouring Shield - Imperial BlackKitchenAid Artisan Series 5-Qt. Stand Mixer with Pouring Shield - Imperial BlackKitchenAid Artisan Series 5-Qt. Stand Mixer with Pouring Shield - Imperial BlackBaking Sheet Set, 3-Piece Cookie Sheet Set with Silicone Handles, Steel Baking Pans Set, Durable Baking Sheets for Oven, BPA Free Cookie Sheets for Baking Nonstick Set, Sheet Pan - Black Baking PanBaking Sheet Set, 3-Piece Cookie Sheet Set with Silicone Handles, Steel Baking Pans Set, Durable Baking Sheets for Oven, BPA Free Cookie Sheets for Baking Nonstick Set, Sheet Pan - Black Baking PanBaking Sheet Set, 3-Piece Cookie Sheet Set with Silicone Handles, Steel Baking Pans Set, Durable Baking Sheets for Oven, BPA Free Cookie Sheets for Baking Nonstick Set, Sheet Pan - Black Baking PanGorilla Grip Large Pizza Cutter Wheel, 9 Inch, Sharp Stainless Steel Blade, Rust Resistant, Comfort Handle, Thumb Guard Protection, Slice Thick or Thin Pizzas, Pie Crust, Pastries in Seconds, GrayGorilla Grip Large Pizza Cutter Wheel, 9 Inch, Sharp Stainless Steel Blade, Rust Resistant, Comfort Handle, Thumb Guard Protection, Slice Thick or Thin Pizzas, Pie Crust, Pastries in Seconds, GrayGorilla Grip Large Pizza Cutter Wheel, 9 Inch, Sharp Stainless Steel Blade, Rust Resistant, Comfort Handle, Thumb Guard Protection, Slice Thick or Thin Pizzas, Pie Crust, Pastries in Seconds, Gray


Mummy Dogs a Halloween Favorite

Mummy dogs


Halloween is right around the corner, so I thought I should share a fun food to make with the kids. Halloween mummy dogs are also great if you are planning a party this year for Halloween.

You need a couple of things like a package of hot dogs, and a roll of Pillsbury Crescent Rolls, I used the butter flake ones.
Here are your simple ingredients one package of your favorite hot dogs and a roll of Pillsbury Crescent Rolls.
Unwrap the crescent rolls as you know they look something like a triangle.
Now all you have to do is cut them into strips, and then wrap them around the hot like you are wrapping a mummy. Oh, so you never wrapped a mummy before? Just go ahead and start wrapping, make sure you leave some room at the top to add a little hat. The kids have so much fun wrapping these and waiting to add the mustard eyes.

Oh, I almost forgot, after they are wrapped, place them on a cookie sheet and bake at 350 degrees for about 15 minutes.

Now you and the kids can enjoy your creation, these will really be a big hit at your Halloween party.

As always thanks for stopping by and I hope you enjoy.

Don't forget your Halloween Party Supplies

Caramel Cup Cookies

Caramel Cup Cookies

With the holidays soon approaching I thought that I should share one of my favorite cookies, of course, you certainly don’t have to wait for the Holiday season to make these.

 Caramel cup cookies are a sure thing any time of year; they are a perfect fit for any gathering or party.

They are not that difficult to make, so you don’t have to be a pastry chef to make these. We can now use these Kraft Caramel Bits, so you don't have to take the plastic wrap off of the caramels what great idea.

Let’s start off by making the pastry dough:

Here is what you need:
  • 1 (8oz. package) cream cheese
  • 1/2 lb. butter (2 sticks)
  • 3 cups flour
  1. Combine all of the above ingredients in a large mixing bowl
  2. You can use a hand mixer, your KitchenAid Stand Mixer, or mix it by hand. Mix until you have a nice smooth dough.
  3. Pinch off small portions of the dough and roll into a 1-inch ball. 
  4. Then set them into a mini muffin pan and gently flatten.
  5. We have a great little tool called the mini tart shaper to press the dough and form the cups
  6. Bake these at 350 degrees for about 12 to 15 minutes, and then set them aside to cool.

    This dough is really easy to work with. This mini tart shaper makes it easy to form the cups. I always make the pastry cups first and while they cool I melt the caramel.

    Now for the Filling:
    • 1 lb. caramels, we use Kraft (don’t forget to unwrap the caramels)
    • 1/2 cup of Carnation evaporated milk.
    1. Add the caramels and milk to a double boiler and melt over medium heat, or you could use your microwave.
    2. Add the caramel filling to the pastry cups and let cool.
    At this point there are some options:

    • You can sprinkle some coarse salt over the caramel to make a salted caramel cup.
    • Top them off with some whipped cream
    • You could also make a light frosting
    This year I decided to change it up a bit. I made half salted caramel and the other half I left plain so we could add some whipped cream on top later. Or, just enjoy these plain. If you would like to make a frosting for them the recipe is below.

    What you need to make the Frosting:

    • 1/2 cup white sugar
    • 1/3 cup evaporated milk
    • 1 cup of shortening
    • 1 tsp. vanilla extract
    1. Beat all of the above ingredients together until you have nice creamy frosting.
    2. Add the frosting using a pastry pouch.
    This should yield about 48 cookies, and that’s enough for me. We need to make a second batch for everybody else.

    As always thanks for stopping by and I hope you enjoyed my recipe.

    Wilton Perfect Results Premium Non-Stick Mini Muffin Pan & Mini Cupcake Pan, 24-Cavity, SteelWilton Perfect Results Premium Non-Stick Mini Muffin Pan & Mini Cupcake Pan, 24-Cavity, SteelWilton Perfect Results Premium Non-Stick Mini Muffin Pan & Mini Cupcake Pan, 24-Cavity, SteelFox Run Tart Tamper, WoodFox Run Tart Tamper, WoodFox Run Tart Tamper, Wood


    “ I earn money from purchases on affiliate links at no additionl cost to you.” Disclosure Statement

    X