Crispy Eggplant Caprese Stacks

 Summer is the perfect time to enjoy fresh vegetables right from the garden. One of our favorites this time of the year is these crispy eggplant caprese stacks. Fresh eggplants, tomatoes, basil and mozzarella. These are simple and perfect for any occasion.

These are on the menu at a local restaurant we frequent. Fran ordered them last week, but they were out of the eggplant. She immediately called our daughter Jamie and said, we are making these tomorrow, and we did. Enjoy the recipe.

Crispy Eggplant Caprese Stacks

Eggplant Caprese Stacks Ingredients:

2 medium-sized eggplants (Peeled and sliced to 1/4-inch thick)

2 or 3 tomatoes (sliced 1/4-inch thick)

8 oz. mozzarella (sliced 1/4-inch thick)

Fresh basil leaves

Balsamic glaze

Ingredients for Frying the Eggplants:

2 cups or more of flour

4 large eggs (beaten)

2 cups or more of seasoned bread crumbs

Olive oil or vegetable oil for frying

Instructions for frying:

  1. Add the flour, and bread crumbs into two shallow dishes, and the beaten eggs into a bowl.
  2. Coat the eggplant slices in the flour, then dip them into the eggs, and then coat them in bread crumbs. 
  3. Place the breaded eggplant slice on a cookie sheet lined with parchment paper.
  4. Prepare a frying pan with oil and heat to 350 to 375 degrees.
  5. Fry the eggplant slices until they are golden brown on both sides.
  6. Place them on a cookie sheet lined with paper towels.

Building the Eggplant Stacks:

Start with the first eggplant slice, then a slice of tomato, next a slice of mozzarella, and then fresh basil leaves. Repeat this 3 times for a complete stack. Top off the stacks with another slice of tomato and fresh basil leaves.

Drizzle the stacks with balsamic glaze and serve.

Slicing Eggplant

Slice the eggplant into 1/4-inch slices

Tomatoes and Mozzarella

Slice the tomatoes and mozzarella and set aside

Preparing the Eggplant

Coat the eggplant slices in flour then egg, and then coat with bread crumbs

Frying Eggplant

Fry the eggplant slice until golden brown on both sides.

Fried Eggplant

Fried eggplant slices on a paper towel ready to build the stacks. I like eating the eggplant just out of the fryer with a little salt and pepper.

Why You'll Love This Recipe:

Healthy and Light: Packed with fresh vegetables, this dish is both nutritious and satisfying.

Easy to Make: With a few simple steps, this is ready in no time.

Versatile: Serve it as an appetizer, side dish, or even a main course.

Flavorful: The combination of eggplant, juicy tomatoes, creamy mozzarella, and fresh basil is simply delicious.

Easy Crusty Italian Bread

 There is something truly magical about the aroma of freshly baked bread throughout the house. And when it comes to Italian cuisine, few things are as iconic and satisfying as a loaf of crusty Italian bread. This culinary delight is so simple to recreate at home.

Easy Crusty Italian Bread

This crusty Italian bread is perfect for dipping in olive oil mixed with savory Italian seasoning, serving it alongside your favorite pasta, or simply enjoying it all on its own with butter.

Ingredients:

  • 4 cups of all-purpose flour
  • 1 Package of Active dry yeast or rapid-rise yeast
  • 1-1/2 cups warm water
  • 1 teaspoon salt
  • 1 tablespoon olive oil
  • 1 teaspoon sugar
Instructions:

If using the active dry yeast, combine it in a small bowl with the warm water and let it sit for about 5 minutes until it becomes foamy. (If using the rapid-rise yeast just combine it with the flour.)


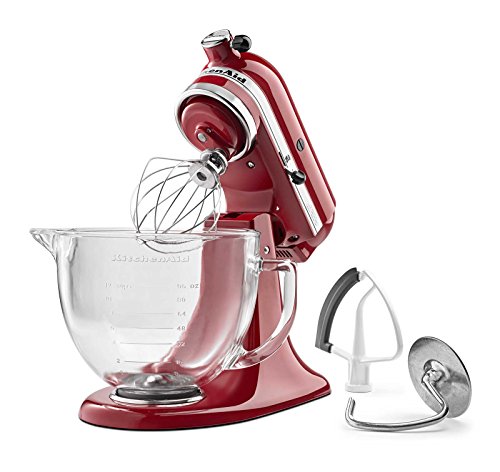
I used my KitchenAid Stand Mixer. Combine the flour, salt, olive oil, and sugar in the mixing bowl. Add the yeast and water mixture and mix on low speed using the dough hook. Mix until the dough forms, remove the dough to a floured surface, and knead a few times. If the dough is too sticky add a little more flour, but not too much.


If you are mixing by hand, combine the dry ingredients in a large bowl. Make a well in the center and pour the yeast mixture and olive oil in the middle. Mix with a wooden spoon or your hands until the dough forms.


Lightly coat the dough with oil, place it in a large bowl, and cover. Let it rise for 1 to 2 hours.


After the dough has risen, gently press down and shape it into an oval. Or, you can divide the dough into two small loaves. 


Place the shaped dough on a parchment-lined baking sheet or a lightly greased baking sheet. I baked mine in my 10-inch cast iron skillet. cover and let it rise for another 30 minutes.


Preheat the oven to 450 degrees while the dough is rising. Once the oven is preheated, place a small pan with one cup of hot water on the lower rack. The steam will help create a crispy crust.


Just before baking, use a sharp knife to make 2 shallow slashes on the surface of the dough. This helps the bread expand while baking.


Bake for 20-25 minutes until it's golden brown and sounds hollow when tapped on the bottom. Allow the bread to cool on a wire rack for 30 minutes before slicing.

Crusty Italian Bread

Here is my crusty Italian bread just out of the oven in my 10-inch cast iron skillet. So, roll up your sleeves, gather some ingredients, and get ready to savor the taste of Italy.

KitchenAid KSM105GBCER 5-Qt. Tilt-Head Stand Mixer with Glass Bowl and Flex Edge Beater - Empire RedKitchenAid KSM105GBCER 5-Qt. Tilt-Head Stand Mixer with Glass Bowl and Flex Edge Beater - Empire RedKitchenAid KSM105GBCER 5-Qt. Tilt-Head Stand Mixer with Glass Bowl and Flex Edge Beater - Empire RedLodge 10.25 Inch Cast Iron Pre-Seasoned Skillet – Signature Teardrop Handle - Use in the Oven, on the Stove, on the Grill, or Over a Campfire, BlackLodge 10.25 Inch Cast Iron Pre-Seasoned Skillet – Signature Teardrop Handle - Use in the Oven, on the Stove, on the Grill, or Over a Campfire, BlackLodge 10.25 Inch Cast Iron Pre-Seasoned Skillet – Signature Teardrop Handle - Use in the Oven, on the Stove, on the Grill, or Over a Campfire, Black


Peas and Meatballs Soup

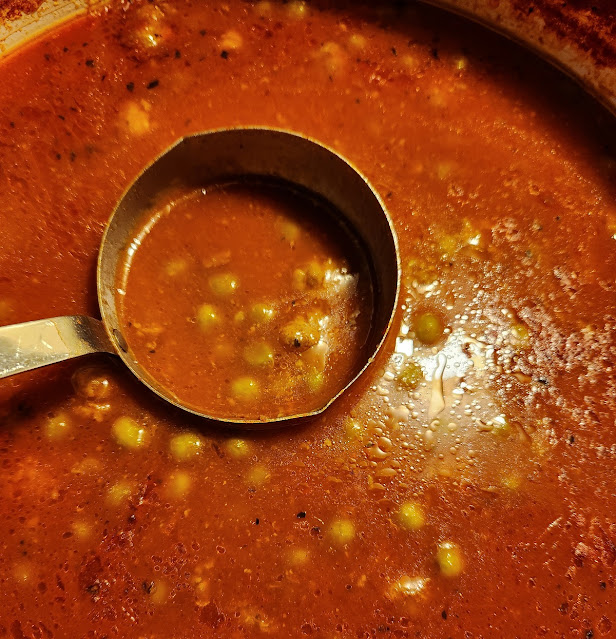
 Looking for a hearty soup to warm you up on a chilly day? This tomato-based peas and meatball soup perfectly fits a cold day.

Peas and Meatballs soup

My cousin Jimmy and his wife Carmie are just as passionate about preserving old family recipes as I am.

My cousin sent me this recipe about a year ago, and honestly, I wasn't that impressed. But Jimmy was persistent and insisted that we try this soup. We finally gave in and gave this recipe a try, and we're so glad we did. 

It was so good especially served it with fresh Italian bread. This recipe makes a large enough pot of delicious soup to have leftovers for another day.

We come from an Italian family and have many favorite recipes from our parents and grandparents. I never remembered this soup from our family, but this is a recipe that Carmie grew up with. Carmie's mother Anne made this soup and Carmie carries on the family tradition of peas and meatballs soup.

Ingredients for Meatballs:

  • 1 lb. of ground beef
  • 1/4 cup seasoned bread crumbs (moistened with water or milk to form a paste)
  • 1 egg
  • 1 tablespoon parmesan cheese
  • 1/2 teaspoon of oregano
  • 1/2 teaspoon of basil
  • 1/2 teaspoon parsley
  • 3/4 teaspoon pepper
  • 3/4 teaspoon salt
  • 2 teaspoons chopped garlic
  • 1/4 cup oil for frying

Ingredients for Soup:

  • 2 (15-ounce) cans tomato sauce
  • 2 (15-ounce) cand of regular sweet peas undrained
  • 4 cups of water
  • Salt and pepper to taste
Directions:

  1. Moisten the bread crumbs then add to ground meat. Add the egg and mix well.
  2. Add the remaining seasonings (except the oil) and mix thoroughly.
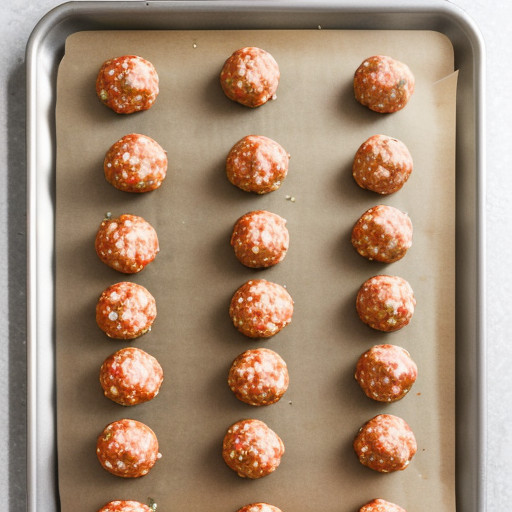
  3. Form miniature meatballs (as for wedding soup) about the size of a marble.
  4. Fry the meatballs in the oil until they are brown and cooked through.
  5. In a large saucepan place the the meatballs with the oil they were cooked in and all other ingredients.
  6. Bring to a full boil, then reduce the heat to a slow simmer and cook until the sauce thickens. (About 1 and a half to 2 hours)
  7. Serve with fresh Italian bread.

Measballs for soup

The photo above shows the size of the meatballs. You could make them a little smaller than this. You can also bake the meatballs in the oven, but you won't get the added flavor from frying them in the soup.

More recipes on my blog from my cousins Jimmy and Carmie:

Canning and Preserving EggplantsCanning and Preserving EggplantsHow to Make Roasted Red PeppersHow to Make Roasted Red Peppers


“ I earn money from purchases on affiliate links at no additionl cost to you.” Disclosure Statement

X