How to Preserve Hot or Sweet Peppers

Preserving hot peppers


Get your gardens ready and be sure to plant plenty of hot and sweet banana peppers. If you don’t plant a garden you can buy a plentiful supply of peppers at any local farmers market. This is an easy wat to preserve hot peppers without canning.

I like hot peppers on pizza, sandwiches, and even in salads. This is a simple brine, and it's so easy to make, for preserving hot and sweet peppers so you can enjoy them all year long.

We especially enjoy finding the hot banana peppers, and cutting them into rings. I pack the peppers and seeds tightly into every jar. Add you garlic and seasoning, then pour in the brine. Top off with olive oil and close the tightly.

In about two weeks you'll be enjoying tasty hot peppers for whatever you choose to put them on, it’s that easy to preserve hot peppers without canning.

 Now here is all that you need to make the brine:

·  1/2 white vinegar to 1/2 water (equal amounts) we used 4 cups of each

Now add these ingredients to the jars:

·  1 tsp of salt
·  1/2 tsp. of Oregano or Italian seasoning
·  3 cloves of Garlic, per one jar
· Olive oil (we use light olive oil)

Instructions To Preserve Hot Peppers:
  1. Boil the brine for 25 minutes, and then let it cool
  2. While the brine is cooling, cut the hot peppers into rings, about 1/4" or more  (Be sure to wear gloves)
  3. Add the salt and oregano to the bottom of each the jar
  4. Pack the peppers tight into the canning jars (you can use pint or quart jars)
  5. While you're packing add cloves of fresh garlic (we added 3 per jar)
  6. Pour the cool brine into the jars to cover the peppers. Just enough to cover the tops.
  7. Add the 2 tablespoons of oil on top of the brine
  8. Seal the jar and give it a few shakes to mix it up well.
  9. Wait two weeks before using
  10. Enjoy!!!

Preserving hot peppers
Here are the simple ingredients for the brine


Preserving hot peppers
Cut your peppers into rings and pack them tightly in the jars

 Tip: After you empty your jars of these amazing peppers save the garlic in the jar. Now you can use the garlic for cooking.


As always thanks for stopping by and enjoy.

Stuffed Peppers with Jasmine Rice


Stuffed peppers ready for the oven


This is one of our favorite recipes especially when the growing season is coming to an end; the peppers are so fresh picked right out of the garden. If you don’t have a garden you can buy some really nice peppers at a farmers market, or the grocery stores will usually carry fresh produce locally grown.

Stuffed peppers with jasmine rice is a quick and easy meal for your family, or if you’re going to entertain friends for dinner.

You can prepare these ahead of time and just pop them in the oven just before your friends arrive.  These stuffed peppers served with a salad makes a complete meal for your family or friends.


A tip from my daughter, she uses the jasmine rice because it’s sticky and holds the mixture together very well.


Ingredients:

2 lbs. of ground beef
1 29 oz. can tomato sauce
½ cup seasoned bread crumbs
2 eggs
½ cup Parmesan/Romano cheese
1 tsp. garlic powder
1 tsp. onion powder
3 tbs. Worcestershire sauce
2-1/2 cups white jasmine rice

Instructions:

  1. Cook the rice according to the package instructions
  2. In a large bowl, combine the ground beef, bread crumbs, eggs, cheese, garlic powder, onion powder, Worcestershire sauce and mix together well, set this aside.
  3. In a small pot cook the tomato sauce until it comes to a boil and then turn it down to simmer. (Optional, you can add some Italian seasoning if you like)
  4. Cut the tops off of the peppers and remove all of the seeds, rinse them with cold water.
  5. Par boil the peppers, just about 10 minutes, depending on the size.
  6. Stuff the peppers with the mixture, place them in a casserole dish standing up, and then pout the tomato sauce over the peppers. Place the lid on your casserole dish, or cover the peppers with tin foil.
  7. Bake at 350 degrees for 1-1/2 hours or until the center of the meat is 170 degrees, using your meat thermometer

Mixing the ground meat and rice
Mix the ground meat and rice


Stuff the Peppers
Stuff the peppers


As always thanks for stopping by and I hope you enjoy. 


Homemade Cavatelli

homemade cavatelli dough recipe


This homemade cavatelli pasta recipe has been in our family for years; I swear every time we make them they get better.

The homemade cavatelli dough is really easy to make and we enjoy spending a little extra time to have something homemade.

If you like pasta you're going to love cavatelli. There is always something special about fresh homemade pasta.

You may not know what cavatelli are. So let me explain right from Wikipedia. Cavatelli is a type of pasta. The most common meaning is small pasta shells that look like miniature hot dog buns.

homemade cavatelli recipe ingredients


Homemade Cavatelli Recipe Ingredients:

Ricotta Cheese
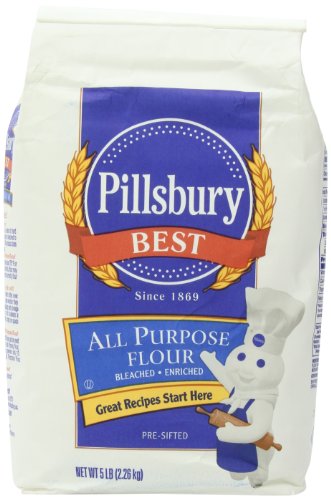
All-Purpose Flour
Salt
Egg

You can use the whole ricotta cheese but we prefer to use the part skim.

Mixing in the kitchenaid stand mixer

Here is the Recipe for homemade cavatelli:

2 1/2 to 3-Cups of flour
1-pound of ricotta cheese (You buy ricotta in 15 oz. containers) this is okay
1-Egg
1-Tsp of salt

Combine all ingredients in the bowl, set your KitchenAid on the lowest speed and let it work until the dough binds together.

You'll probably have to take it out of the bowl and work it with your hands until it's smooth.
If you don't have a KitchenAid stand mixer that's okay.

You really don't need one. You just have to mix the dough with your hands. Just work the dough until it all comes together and it's smooth and forms a ball. Don't forget to wash your hands first!


Here you see the dough formed into a ball.
This recipe yields 2 lbs. and we call this one batch of cavatelli. I don't know why but that's what we call it.

Place the dough under a bowl


Now cover this with a bowl and let it rest for about 1/2 hour. While you’re waiting you could mix up the second batch.

The dough rolled into 1/2 inch logs


Now you'll want to spread some flour out onto a cutting board or your counter. Form the dough into one large log, as you see in the picture.

Then cut 1/2" slices which you will then roll into smaller 1/2" logs. Roll them in the flour because you don't want the dough to be wet.

As you can see in the picture here, I have made three batches. We like to make cavatelli for some family events.

Cranking out the cavatelli


Attach the cavatelli machine to your counter. Cover a cookie sheet with wax paper and spread some flour over it.

Start feeding the logs and crank out those little beauties onto a floured cookie sheet.
Keep adding some flour to the rollers of the machine so they don't stick.

 If adding flour doesn't prevent them from sticking, just let the logs set a while, as they are too wet.

Pictured here is our grandson Bobby cranking out the cavatelli. He was 7 years old in this picture and he is the greatest helper.

My grandmother used to make these without a machine; she would cut the logs and sort of flip them with two fingers. I never could master that so I opted for the machine, it is much faster.

cavatelli on the cookie sheet


This is what they look like ready to go in the freezer. Now just place the pan in the freezer for about 30 to 45 minutes they will be frozen.

cavatelli in the freezer bag

Fill up your freezer bag, and now you can have homemade pasta whenever you want to.

A Bakers Basket

A Bakers Basket


I would like to talk about Gift Baskets; my daughter recently went to a local school play at Southwestern Central in Western New York.

She won this beautiful gift basket, and when I saw it I just knew that had to write about it.  On the tag, they call this a Cupcake basket, but I call it A Bakers Basket. I don’t know who made this basket because I would love to give them credit. This is just such a unique gift basket.

I have a passion for gift baskets, as I made and sold them when I was out of work. I thought what a great idea if you have somebody in your family or a good friend that just loves to bake.

Gift Baskets are so versatile, and really not difficult to make at all, you can create a themed basket for any occasion. All you need to do is buy the products and supplies and you’ll be off and be creating a wonderful gift.


Bakset tag with all of the baking supplies listed
This is the tag that was on the outside of this beautiful gift basket listing all of the contents. 

If you're not sure of how to make a gift basket the following video will help you get started. Making gift baskets is creative, fun and not hard to do at all.

 So what are you waiting for? Be creative, have some fun, and make somebody happy with your beautiful creation.

As always Thanks so much for stopping by

So many options for gift basket supplies. Here are just a few.

“ I earn money from purchases on affiliate links at no additionl cost to you.” Disclosure Statement

X