Showing posts with label Appetizer/Snack. Show all posts

Guiltless Chestnuts a Nutritious Delight

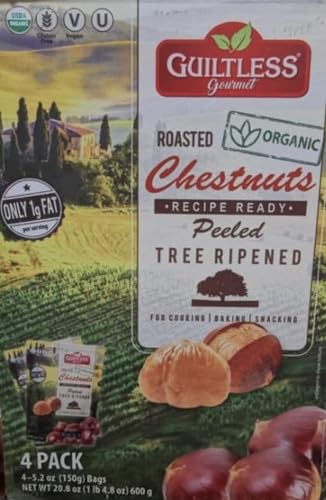
 Every Christmas Eve it's a tradition for us to roast chestnuts. I love chestnuts, but they seem to be a seasonal item in our local grocery store. This year, our local grocery store had these Guiltless chestnuts ready to eat. I wasn't willing to try these so I had to ask for the traditional chestnuts. 

Guiltless Chestnuts a Nutritious Delight


A few days after Christmas my cousin sent me a picture of the Guiltless ready-to-eat chestnuts and asked if I ever tried these. 

I called him and said it's so funny because I saw these but wasn't willing to try them. 

He proceeded to tell me, how good they were, and how easy because they were all ready peeled, and ready to eat right out of the bag.

These ready-to-eat chestnuts save you all the trouble of cutting, roasting, and peeling traditional chestnuts.

My cousin found these on sale and sent me a box to try, and he was right they are so good and easy. You don't have to worry about burning your fingers while trying to peel traditional chestnuts right out of the oven.

Chestnuts have a naturally sweet, earthy, flavor and soft, starchy texture. Chestnuts are often overlooked in favor of other nuts.

 Chestnuts have impressive nutritional benefits. They are lower in fat and calories while being rich in fiber, vitamin C, and antioxidants. Chestnuts are also naturally gluten-free.

If you insist on making traditional chestnuts then check out my post here: 

How to Oven Roast Chestnuts.

You can find guiltless chestnuts on Amazon and enjoy them all year long

Generic Guiltless Gourmet Roasted Organic Chestnuts ~ Value Pack ~ 4 packs ~ 20.8 oz totalGeneric Guiltless Gourmet Roasted Organic Chestnuts ~ Value Pack ~ 4 packs ~ 20.8 oz totalCheck the Price


Crispy Eggplant Caprese Stacks

 Summer is the perfect time to enjoy fresh vegetables right from the garden. One of our favorites this time of the year is these crispy eggplant caprese stacks. Fresh eggplants, tomatoes, basil and mozzarella. These are simple and perfect for any occasion.

These are on the menu at a local restaurant we frequent. Fran ordered them last week, but they were out of the eggplant. She immediately called our daughter Jamie and said, we are making these tomorrow, and we did. Enjoy the recipe.

Crispy Eggplant Caprese Stacks

Eggplant Caprese Stacks Ingredients:

2 medium-sized eggplants (Peeled and sliced to 1/4-inch thick)

2 or 3 tomatoes (sliced 1/4-inch thick)

8 oz. mozzarella (sliced 1/4-inch thick)

Fresh basil leaves

Balsamic glaze

Ingredients for Frying the Eggplants:

2 cups or more of flour

4 large eggs (beaten)

2 cups or more of seasoned bread crumbs

Olive oil or vegetable oil for frying

Instructions for frying:

  1. Add the flour, and bread crumbs into two shallow dishes, and the beaten eggs into a bowl.
  2. Coat the eggplant slices in the flour, then dip them into the eggs, and then coat them in bread crumbs. 
  3. Place the breaded eggplant slice on a cookie sheet lined with parchment paper.
  4. Prepare a frying pan with oil and heat to 350 to 375 degrees.
  5. Fry the eggplant slices until they are golden brown on both sides.
  6. Place them on a cookie sheet lined with paper towels.

Building the Eggplant Stacks:

Start with the first eggplant slice, then a slice of tomato, next a slice of mozzarella, and then fresh basil leaves. Repeat this 3 times for a complete stack. Top off the stacks with another slice of tomato and fresh basil leaves.

Drizzle the stacks with balsamic glaze and serve.

Slicing Eggplant

Slice the eggplant into 1/4-inch slices

Tomatoes and Mozzarella

Slice the tomatoes and mozzarella and set aside

Preparing the Eggplant

Coat the eggplant slices in flour then egg, and then coat with bread crumbs

Frying Eggplant

Fry the eggplant slice until golden brown on both sides.

Fried Eggplant

Fried eggplant slices on a paper towel ready to build the stacks. I like eating the eggplant just out of the fryer with a little salt and pepper.

Why You'll Love This Recipe:

Healthy and Light: Packed with fresh vegetables, this dish is both nutritious and satisfying.

Easy to Make: With a few simple steps, this is ready in no time.

Versatile: Serve it as an appetizer, side dish, or even a main course.

Flavorful: The combination of eggplant, juicy tomatoes, creamy mozzarella, and fresh basil is simply delicious.

Simple Caprese Salad

 This simple Caprese salad is the perfect way to use up those fresh tomatoes from your garden.

Simple Caprese Salad

Caprese Salad is an Italian favorite. Made with thick slices of fresh tomatoes, fresh slices mozzarella, and fresh basil leaves.

Topped off with extra virgin olive oil, Italian seasoning, Balsamic glaze, and salt and pepper to taste.

It is simple but oh! so delicious. Serve this salad with any meal or have it for a quick lunch. Your friends and family will be impressed.

You will want to use the fresh soft ball of mozzarella cheese for this, not the sliced mozzarella you buy in a package. 

  • Cut thick slices of the tomatoes and mozzarella. 
  • Layer them on a plate.
  • Add fresh basil leaves.
  • Drizzle olive oil and balsamic glaze, over the top.
  • Sprinkle some Italian Seasoning over the top.
  • Salt and pepper to taste.

There you go you have made the perfect Caprese Salad to serve to your family and friends.


Italian Fried Pepper and Egg Sandwich


Italian Fried Pepper and Egg Sandwich

There is nothing better than taking fresh garden peppers and frying them up with some eggs. Then, get some fresh Italian bread and make the perfect sandwich.

This was a family favorite when I was growing up. My dad would pick the fresh peppers from the garden, and my mother would fry them with eggs. 

We would get fresh Italian bread from the local bakery and make these delicious pepper and egg sandwiches.

If you don't have a garden that's okay, because this time of year most grocery stores will carry produce from local farmers. 

Sweet Banana peppers

What kind of peppers should you use to make fried peppers and eggs? I like to use these sweet banana peppers. These peppers are also great for stuffing with bread or meat stuffing. I prefer the bread stuffing.

How to make Fried Peppers and Eggs:

Wash, slice, and seed the peppers, you can leave them in slices or cube them. In a medium fry pan add some olive and one minced clove of garlic. Add the peppers, cover, and cook over medium heat until they are tender or to your liking.

In a separate bowl beat one or two large eggs. Add the eggs to the cooked peppers and mix until the eggs are cooked. Add some salt, pepper, and Italian seasoning to taste and enjoy.

If you want to spice up your fried peppers and eggs a little try adding a couple of hot peppers.

I always like using my cast iron skillet and Lodge Cast Iron is my go-to skillet.

Lodge Seasoned Cast Iron 3 Skillet Bundle. 12 inches and 10.25 inches with 8 inch Set of 3 Cast Iron Frying PansLodge Seasoned Cast Iron 3 Skillet Bundle. 12 inches and 10.25 inches with 8 inch Set of 3 Cast Iron Frying PansLodge Seasoned Cast Iron 3 Skillet Bundle. 12 inches and 10.25 inches with 8 inch Set of 3 Cast Iron Frying Pans


Homemade Restaurant - Style Salsa Recipe

 There is nothing that I like better than restaurant-style salsa. Lately, I've had a craving for chips and salsa. I've been buying it weekly at our local grocery store. Salsa and chips are a great snack and perfect to have on hand for a party or when friends stop by.

Homemade Restaurant Style Salsa Recipe

Well, I thought it was time to try my hand at making my own homemade salsa. We have a Mexican restaurant down the street from our house. We love their food but especially love their salsa. So, I did my best to try to duplicate it and I must say it was a success. 

Homemade restaurant style salsa

I used all fresh ingredients cilantro, onions, jalapeno, garlic, and fresh lime juice. 

Ingredients:

2 cans - 10 ounces each Rotel diced tomatoes and green chiles (Mild)

1 can 28-ounce whole plum tomatoes with the juice

1 bunch of fresh cilantro (about one cup)

1/2 cup white onion chopped

1 bunch of green onions (about 6 onions)

2 cloves fresh garlic

1 small jalapeno including seeds

1/2 teaspoon ground cumin

1/2 teaspoon salt

1/2 teaspoon sugar

1/2 of a whole lime, juiced

Directions:

  1. Cut the leaves from the bunch of cilantro including some of the stem.
  2. Cut 1/2 of a white onion into quarters.
  3. Cut the green onions into 3 sections.
  4. Cut the stem off of the jalapeno and cut it in half.
  5. Peeled 2 cloves of fresh garlic.
  6. I added all of the above ingredients into my KitchenAid 3.5 cup Food Chopper and pulsed it about 4 times just enough to chop everything.
  7. I put all of the chopped ingredients into a small bowl.
  8. Using my Ninja Food Processor I added 1 can of diced tomatoes and green chilies, 1/2 can of whole tomatoes, and 1/4 teaspoon of each cumin, salt, and sugar. Then, added 1/2 of the chopped ingredients. Pulse about 10 to 12 times until you get the consistency you like.
  9. Then, I added the salsa to a large mixing bowl and repeated the process for the remaining ingredients this time I squeezed the lime juice into the processor.
  10. Added the second batch to the large bowl and mixed with a spoon.
Note: I did this in two batches because my food processor is not big enough. If your food processor or blender is 12 cups or larger you can mix everything all at once. 

This is a mild salsa, if you would like medium to hot just add one or two more jalapenos.

Refrigerate the salsa for at least one hour before serving. I have to tell you it is really good after being refrigerated overnight. 

This seems like a lot of salsa, but I have to tell you it doesn't last very long in my house. If you think it's too much you can cut the recipe in half.

Sealed in a jar or plastic container the salsa will last 5 to 7 days in the refrigerator.

Thanks for stopping by and I hope you enjoy it.

KitchenAid KFC3516QG 3.5 Cup Mini Food Processor, Liquid GraphiteKitchenAid KFC3516QG 3.5 Cup Mini Food Processor, Liquid GraphiteCheck PriceNinja AMZ493BRN Compact Kitchen System, 1200W, 3 Functions for Smoothies, Dough & Frozen Drinks with Auto-IQ, 72-oz.* Blender Pitcher, 40-oz. Processor Bowl & 18-oz. Single-Serve Cup, GreyNinja AMZ493BRN Compact Kitchen System, 1200W, 3 Functions for Smoothies, Dough & Frozen Drinks with Auto-IQ, 72-oz.* Blender Pitcher, 40-oz. Processor Bowl & 18-oz. Single-Serve Cup, GreyCheck Price


Ideas for Charcuterie Board


Ideas for Charcuterie Board

Some of you might be thinking, what is a charcuterie board? Well, a charcuterie board is an assortment of cured meats, cheeses crackers, and so much more.

It's easy to impress your family, friends, and guests by preparing a charcuterie board for your next party or event. 

So, now the next question is, how do you pronounce charcuterie? I found this easy one online, (Shar-Koo-ta-Ree).

Many people think charcuterie is an Italian term, but actually, it is a French term meaning "Pork Butcher".

Our son Sammy and his wife Tricia created the board you see in the photo on our last visit to their house. They created this board in about 15 minutes. They were like watching two artists create a masterpiece.

What is on a Charcuterie Board?

  • Cured Meats
  • Cheeses (Sharp and Mild)
  • Fruits and Nuts
  • Crackers and pieces of bread
  • Soft Cheeses and dips
  • Olives
  • Jelly and Jams
  • Small pieces of bread
  • Candies
  • Veggies

You can use one board or several boards or just use plates and platters. To me, it is all bout the food. 

Charcuterie boards are very popular around the Holidays but are perfect for any party or family gathering where you need to have some delicious appetizers.

As always thanks for stopping by and I hope you enjoy it.

These Charcuterie Boards are a perfect Gift Idea

Bamboo Cheese Board with Knife & Fork Set, Wood Charcuterie Platter & Food Serving Tray for Wine Glasses, Bowls, House Warming Gift, Misoph Collection by PandPal…Bamboo Cheese Board with Knife & Fork Set, Wood Charcuterie Platter & Food Serving Tray for Wine Glasses, Bowls, House Warming Gift, Misoph Collection by PandPal…Bamboo Cheese Board with Knife & Fork Set, Wood Charcuterie Platter & Food Serving Tray for Wine Glasses, Bowls, House Warming Gift, Misoph Collection by PandPal…ROYAMY Bamboo Cheese Board Set with 3 Stainless Steel Knife, Meat Charcuterie Platter Serving Tray, Perfect Choice for Wedding Birthdays Christmas Anniversary Housewarming Kitchen Personalized GiftROYAMY Bamboo Cheese Board Set with 3 Stainless Steel Knife, Meat Charcuterie Platter Serving Tray, Perfect Choice for Wedding Birthdays Christmas Anniversary Housewarming Kitchen Personalized GiftROYAMY Bamboo Cheese Board Set with 3 Stainless Steel Knife, Meat Charcuterie Platter Serving Tray, Perfect Choice for Wedding Birthdays Christmas Anniversary Housewarming Kitchen Personalized GiftCheese Board and Knife Set - Charcuterie Board Set Unique Bamboo Cheese Board, Charcuterie Platter & Serving Tray (17.5Cheese Board and Knife Set - Charcuterie Board Set Unique Bamboo Cheese Board, Charcuterie Platter & Serving Tray (17.5Cheese Board and Knife Set - Charcuterie Board Set Unique Bamboo Cheese Board, Charcuterie Platter & Serving Tray (17.5Unique Bamboo Cheese Board, Charcuterie Platter and Serving Tray for Wine, Crackers, Brie and Meat. Large and Thick Natural Wooden Server - Fancy House Warming Gift & Perfect Choice for GourmetsUnique Bamboo Cheese Board, Charcuterie Platter and Serving Tray for Wine, Crackers, Brie and Meat. Large and Thick Natural Wooden Server - Fancy House Warming Gift & Perfect Choice for GourmetsUnique Bamboo Cheese Board, Charcuterie Platter and Serving Tray for Wine, Crackers, Brie and Meat. Large and Thick Natural Wooden Server - Fancy House Warming Gift & Perfect Choice for Gourmets


Mini Lemon Pies


Mini Lemon Pies

These little mini lemon pies make a delightful dessert or sweet little snack any time. Made with lemon curd using fresh lemons from my cousin's Arizona backyard. 

Lemon curd is so easy to make and is the perfect balance of sweet and tart. Lemon curd can be stored in the refrigerator for 2 to 3 weeks.

There are many uses for lemon curd such as, filling for cupcakes and donuts, spread it between cake layers. Spread it on scones, crackers, pancakes, and waffles. 

Making lemon curd

I started by making the lemon curd. Using a double boiler I whisked together the sugar and egg yolks. Then, added the fresh lemon juice, zest of lemon, and butter. This requires continuous stirring. 

Homemade lemon curd

This finished lemon curd placed in a bowl to cool. The complete ingredients and direction for the lemon curd and the crust will be at the end of this post.

Muffin tin lemon pies

Next, I made the dough for the mini lemon pies. You can use a pie crust recipe or even buy the pie crust already made. I used the same recipe that I make for my Pecan Cup Cookies. 

This dough is really easy to make using cream cheese, flour, and butter. I rolled the dough into one-inch balls and pressed them into the mini muffin tin using my handy Tart Tamper.

Mini lemon pie cups

After baking the mini pie cups I placed them on a rack to cool. When the cups were finally cooled and the lemon curd was chilled I filled each cup with a scoop of lemon curd using my #70 cookie scoop. About one tablespoon in each cup.

Mini Muffin Tin Lemon Pies

Lemon Curd Ingredients:

1 cup of white sugar
1/2 cup of lemon juice (4 to 5 lemons)
5 large egg yolks
1/2 cup salted butter (cold and cut into tablespoons)
The zest of 2 lemons

Lemon Curd Instructions:
  1. Add some water to the double boiler and bring it to a boil.
  2. Whisk together the sugar and egg yolks and begin to stir.
  3. Add the lemon zest and lemon juice.
  4. Continue to stir, the mixture will begin to thicken.
  5. After 10 minutes remove from the heat.
  6. Add the butter one tablespoon at a time, continue stirring until all the butter is melted and the curd is thick.
  7. Transfer to a bowl and let it cool.
Pie cup Ingredients:

3 ounces Crean Cheese (Softened)
1/2 cup butter
1 cup all-purpose flour

Pie Cup Instructions:
  1. Blend the cream cheese and butter until smooth.
  2. Add flour and mix until dough forms.
  3. Wrap and refrigerate to chill for 30 minutes.
I sprayed a mini muffin tin with Bakers Joy to prevent the cups from sticking. Roll the dough into one-inch balls and press up the sides of the muffin tin with the tart tamper. Tip: Have a little bowl of flour handy to coat the end of the tamper so the dough doesn't stick to it.

Preheat the oven to 350 degrees and bake the cups for 18 to 20 minutes until golden brown. After the cups have cooled fill each of them with a tablespoon of cooled lemon curd and enjoy.

I yielded 20 little pie cups for the dough recipe and after filling them I still had some lemon curd leftover. If you want to you can double the dough recipe.

You might also like my Fresh Lemon Hand Pies made with the same lemon curd.

As always thanks for stopping by and I hope you enjoy it.

Wilton Stainless Steel Small Cookie Scoop, SilverWilton Stainless Steel Small Cookie Scoop, SilverWilton Stainless Steel Small Cookie Scoop, SilverGood Cook 04029 Mini Non-Stick Muffin Pan, Steel, 1-7/8 in Dia x 14.6 in L x 9.3 in W x 6.8 in HGood Cook 04029 Mini Non-Stick Muffin Pan, Steel, 1-7/8 in Dia x 14.6 in L x 9.3 in W x 6.8 in HGood Cook 04029 Mini Non-Stick Muffin Pan, Steel, 1-7/8 in Dia x 14.6 in L x 9.3 in W x 6.8 in HFox Run Tart Tamper, WoodFox Run Tart Tamper, WoodFox Run Tart Tamper, Wood


Creamy Parmesan Lemon Risotto


Creamy parmesan Lemon Risotto

This creamy parmesan lemon risotto is delightful. You would expect to find risotto in a fancy Italian restaurant. Or, you could make risotto yourself.

Risotto is a rice dish from Northern Italy and can be served as an appetizer, side dish, or even a main dish. It is made from short-grain starchy rice that you can buy at your local grocery store. 

We used Arborio Rice the starch in this rice gives the Risotto that creamy consistency. Risotto is cooked in broth and you can add all kinds of your favorites like mushrooms, and veggies.

Bobby prepared a saucepan and added six cups of chicken broth to simmer while I diced the onion. In a separate pan, we started to cook the onions using extra virgin olive oil and seasoned rice vinegar. you can use white wine in place of the vinegar.

Cheesy Lemon Risotto

After the broth has simmered and onions are tender add one cup of the rice to the onions and stir in the warm broth one cup at a time continually stirring until the broth is absorbed for each cup of broth you add. 

Creamy Parmesan Lemon Risotto Ingredients:

6 cups Chicken Broth
1/3 cup seasoned rice vinegar or white wine
2 teaspoons lemon juice plus zest of one lemon
1/2 of medium Spanish onion diced
1 cup Arborio Rice
2 tablespoons extra virgin olive oil
2 tablespoons unsalted butter
1 cup of grated Parmesan cheese plus 1/4 cup for garnish

Instructions:
  1. Simmer the chicken broth in a saucepan. 
  2. In a separate pan add the olive oil, butter, vinegar, and onions.
  3. Stir and cook the onions until tender. If you are adding mushrooms or veggies add them now.
  4. Add the rice to the onions and then add one cup of broth at a time.
  5. Continue to stir until each cup of broth is absorbed before you add the next one.
  6. Continue to stir and cook the risotto until soft on the outside but firm on the inside.
Note: You may not use all of the broth. We ended up using 4 cups of the broth before our risotto was finished. This takes a little time and work but is so well worth it in the end. We yielded four servings from this recipe.

As always thanks for stopping by and I hope you enjoy it.


“ I earn money from purchases on affiliate links at no additionl cost to you.” Disclosure Statement

X