Showing posts with label homemade. Show all posts

Instant Pot Blackberry Jam


Instant Pot Blackberry Jam

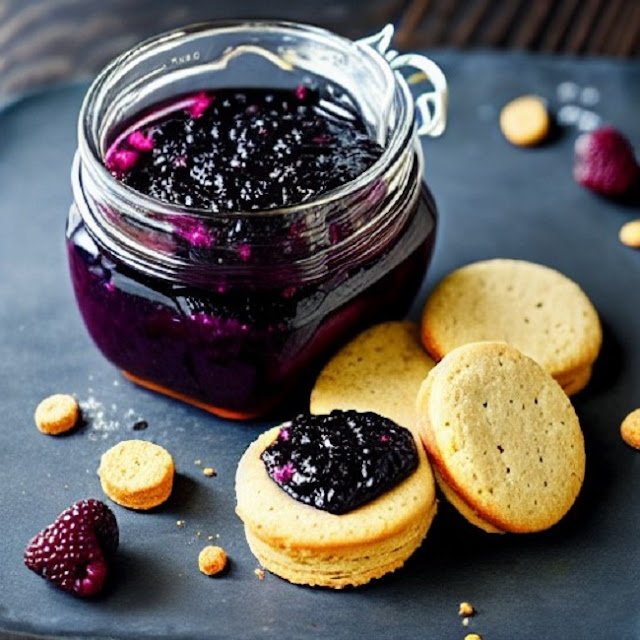
This Instant Pot Blackberry Jam is so easy to make. This sweet and tangy treat is a perfect topping for biscuits, crackers, waffles, french toast, or pancakes. 

Where ever you like a sweet and tangy jam, this is the perfect fit. Try drizzling this jam over some vanilla ice cream.

All you need is an Instant Pot and a few ingredients and in about 30 minutes you'll have a sweet and tangy jam to enjoy.

Here in Western New York, blackberries are in season from the middle to the end of July. You don't have to wait until the blackberries are in season. You can find fresh blackberries at your local grocery store.

Blackberry Jam Ingredients:

  • 6 cups of fresh blackberries (rinsed and pat dry)
  • 1 1/2 cups white sugar
  • 1/4 cup fresh lemon juice (4 tablespoons)
  • 2 teaspoons vanilla extract
  • 3 tablespoons cornstarch
  • 2 tablespoons water
Directions:

  1. Place the blackberries in the Instant Pot, and cover them with sugar, lemon juice, and vanilla. Let them set for 10 minutes. Note: Step one is very important.
  2. Place the lid on and lock it into place, and make sure sure the release valve is set on the seal.
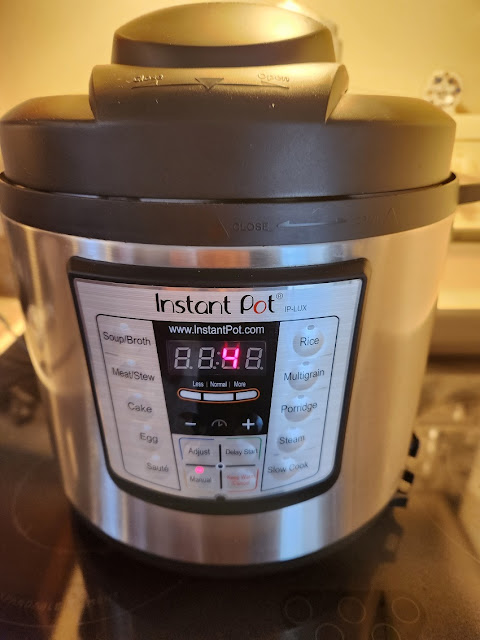
  3. Cook on manual pressure for 4 minutes.
  4. While the blackberries are cooking, mix the cornstarch and water in a small bowl. Set this aside.
  5. After the 4 minutes let the instant pot naturally release the pressure for about 10 minutes.
  6. Then carefully release the remaining pressure with the release valve.
  7. Open the lid and stir in the cornstarch and water.
  8. Continue to stir until all of the cornstarch is dissolved. 
  9. Let cool for a while and transfer to jars.
  10. Refrigerate after the jam has completely cooled.

Preparing blackberry jam

This is step one, after covering the berries with sugar, lemon juice, and vanilla wait 10 minutes. This step starts to break down the fruit and release the natural pectin in the blackberries.

Instant Pot

This only needs 4 minutes on the manual pressure setting in the Instant Pot.

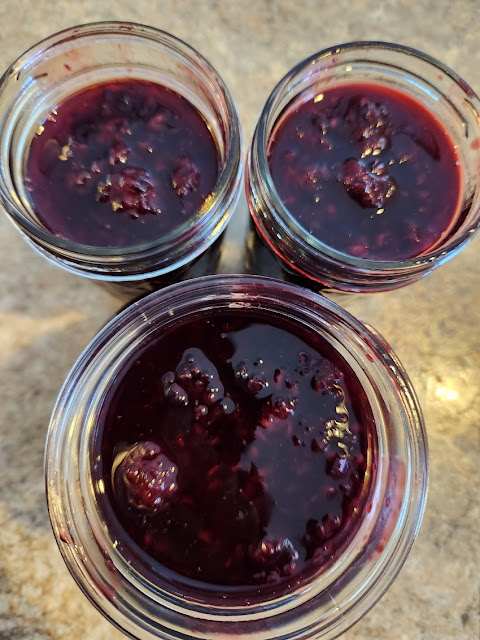
Blackberry Jam

This recipe yielded about 32 ounces of blackberry jam. I gave half of it to my daughter and grandsons. 

This jam will last about two weeks in the refrigerator. If this is too much, just cut all of the ingredients in half, but leave the cooking time at 4 minutes. You will get about 14 to 16 ounces of jam.

If you don't have an Instant Pot you can do this on the stovetop. In a covered saucepan bring the berries to a boil on high heat. Remove the lid when it starts to boil and cook for 40 to 50 minutes.

If you would like a smoother jam, use an immersion blender or potato masher to blend the jam to your desired consistency.

Thanks for stopping by and I hope you enjoy it.

Instant Pot Ultra, 10-in-1 Pressure Cooker, Slow Cooker, Rice Cooker, Yogurt Maker, Cake Maker, Egg Cooker, Sauté, and more, Includes App With Over 800 Recipes, Stainless Steel, 6 QuartInstant Pot Ultra, 10-in-1 Pressure Cooker, Slow Cooker, Rice Cooker, Yogurt Maker, Cake Maker, Egg Cooker, Sauté, and more, Includes App With Over 800 Recipes, Stainless Steel, 6 QuartCheck Price


Creamy Parmesan Lemon Risotto


Creamy parmesan Lemon Risotto

This creamy parmesan lemon risotto is delightful. You would expect to find risotto in a fancy Italian restaurant. Or, you could make risotto yourself.

Risotto is a rice dish from Northern Italy and can be served as an appetizer, side dish, or even a main dish. It is made from short-grain starchy rice that you can buy at your local grocery store. 

We used Arborio Rice the starch in this rice gives the Risotto that creamy consistency. Risotto is cooked in broth and you can add all kinds of your favorites like mushrooms, and veggies.

Bobby prepared a saucepan and added six cups of chicken broth to simmer while I diced the onion. In a separate pan, we started to cook the onions using extra virgin olive oil and seasoned rice vinegar. you can use white wine in place of the vinegar.

Cheesy Lemon Risotto

After the broth has simmered and onions are tender add one cup of the rice to the onions and stir in the warm broth one cup at a time continually stirring until the broth is absorbed for each cup of broth you add. 

Creamy Parmesan Lemon Risotto Ingredients:

6 cups Chicken Broth
1/3 cup seasoned rice vinegar or white wine
2 teaspoons lemon juice plus zest of one lemon
1/2 of medium Spanish onion diced
1 cup Arborio Rice
2 tablespoons extra virgin olive oil
2 tablespoons unsalted butter
1 cup of grated Parmesan cheese plus 1/4 cup for garnish

Instructions:
  1. Simmer the chicken broth in a saucepan. 
  2. In a separate pan add the olive oil, butter, vinegar, and onions.
  3. Stir and cook the onions until tender. If you are adding mushrooms or veggies add them now.
  4. Add the rice to the onions and then add one cup of broth at a time.
  5. Continue to stir until each cup of broth is absorbed before you add the next one.
  6. Continue to stir and cook the risotto until soft on the outside but firm on the inside.
Note: You may not use all of the broth. We ended up using 4 cups of the broth before our risotto was finished. This takes a little time and work but is so well worth it in the end. We yielded four servings from this recipe.

As always thanks for stopping by and I hope you enjoy it.


Canning and Preserving Eggplants

If you follow my blog, then you know I have a passion for preserving old family recipes. These are the recipes our grandmother's and mother's made from scratch.

Food that when you make it today brings back the fondest childhood memories. Let's face it homemade is the best and nobody makes it like our grandmothers.

My cousins, Jimmy and Carmie share the same passion for preserving these cherished recipes. Here are the recipe and instructions that have been in my cousin Carmie's family for generations.

Eggplants prepared in this way are perfect on sandwiches, or as a snack with a nice slice of Italian bread. I'm so glad Carmie has this recipe because my mother also made these and I don't have her recipe. So, here is the recipe by Jimmy and Carmie.

EGGPLANTS 

A Marcella Family Recipe 

Canning and Preserving Eggplants


Carmie and I have been making this family favorite for as long as we have been married. (Basically, I cut the EGGPLANT and then make sure the jars are sealed). It is a recipe that her mother; ANNIE taught her. For years we have been saying that we should document this recipe and process so that it will be preserved for future generations. Anyone that we know that has tried this specialty really enjoys them. Whenever we go back east, we are always reminded to pack 3 or 4 jars. 

We have always made a bushel of Eggplants when making this recipe; however, you can make 2 or 3 individual EGGPLANTS if you like. As you will see there are no critical conversions for the ingredients no matter how many you decide to make. 

The first step is to trim both ends and then peel them with a potato peeler or a paring knife. Then you will slice the Eggplant into 1/8th to ¼” thick slices. (When we first started, I attempted to cut them by hand and trying to keep them uniform was next to impossible. So, after a few years I bought a RIVAL ELECTRIC FOOD SLICER). It is now well over 40 years old and still performing well). Now, the slices are uniform and the time for this step was cut by about 60% or more.

Peel and Slice


rival electric food slicer

 So, the ingredients for day one is EGGPLANTS and SALT. As indicated, we did a bushel of Eggplants. Twenty-three in all.

 Next, the Eggplant Slices are layered in a kitchen strainer and salted with Iodized Salt between each layer. Once the strainer is full of all of the slices that have been salted we then place the strainer in a place for them to drain overnight. (A sink or tub work well) 

We place a dish or flat bowl on top of the Eggplants and then place a weight on the dish or bowl to help press the moisture from the Eggplants. (We use a gallon of oil or vinegar) The next day the strainer; that was full to the top, will now only be-half full and the slices will now be half as thick as they were original.

Pressing the water out of the eggplants overnight


 On day two you will need the following ingredients: 

1-gallon HEINZ Apple Cider Vinegar
1 ½ -gallons CRISCO Canola Oil
1 Jar 2.12 ounces McCormick Red Crushed Pepper 
1 Jar 2.6 ounces McCormick Crushed Whole Oregano Leaves 
1 Jar 32 ounces Minced Garlic 
Wide Mouth Pint Mason Jars 

To start, fill a large frying pan about half full of vinegar and bring to a slow boil. On the counter next to the stove, layout several dish towels. Start by placing several slices of Eggplant in the boiling vinegar and blanch for 30 seconds or so. 

Remove from the vinegar and lay the individual slices flat on the dish towels to drain. Once drained, place the Eggplant slices in a large bowl. Continue until all of the slices have been blanched. The slices will have a very vinegary taste at this time. 


 At this time, we fill a large saucepan with enough water to cover two mason jars when laid on their sides. Bring the water to a boil and place two jars in the water. Also, in a small saucepan, we heat enough water to cover the Mason Jar inserts.

Boiling the jars and lids

 Now for the hard part. (Just kidding) Carmie sets up a workstation with a shallow bowl, oil, oregano, red crushed pepper, and garlic. One of the jars is removed from the boiling water and placed on the shallow bowl. (Remember to place another jar into the boiling water). First, a little oil is added to the bottom of the jar, then a little garlic, a little oregano, a little red crushed pepper and then a couple of Eggplant slices. 

This process is continued until the jar is full to within approximately ¾ to ½ inch from the top of the jar. A regular dinner fork is used to keep the slices layered and flat. It also helps eliminate any air pockets that may form. 

The top of the jar is then wiped with a clean dish rag and one of the Mason Jar Lids are placed on the jar and the lid ring is installed and tightened. The jar is then placed in a draft-free area to await that wonderful sound. POP! We have found that the FOOD SAVER VACUUM SEAL MACHINE is a lot more reliable. SO, I get to help again. Using the Food Saver and the Wide Mouth Jar Attachment, I seal the jars.


 As you can tell, this is not an easy process; however, if you start with two or three Eggplants, you should not be overwhelmed. Also keep in mind that if you start small, you can eliminate the mason jar and use a small Tupper Ware Container. The process is the same except the final assembly is in the Tupper Ware Container, not the Mason Jar. 

Once opened, the jars must be refrigerated. Unopened, and if sealed properly the jars will last about two years when stored in a cool dark place. Once opened and refrigerated they still have a shelf life of 6 months or so. Twenty-three Eggplants yielded twenty-three pints. 


You might like some of our other Canning Recipes

Syrian Bread

Fresh baked Syrian Bread


This bread is a great flatbread to serve with lunch or dinner. We serve this bread with a wonderful dish called Lamb on the Rod. 

Grilled leg of lamb
Grilled Lamb served with Syrian Bread
 Where I grew up you can buy this bread in any grocery store, but not here in Western New York. Since we were having lamb on the rod I decided to make my own fresh.

So I did what anybody would do, I searched the internet, and found this recipe:


I modified it just a bit by using less yeast, I also doubled the recipe, which would have called for 3 teaspoons of yeast I used one package of dry yeast or 2-1/4 teaspoons. Sue’s recipe mixes the dough in a bread machine, but I used my KitchenAid Stand Mixer.

By doubling the recipe, I yielded one nice 12-inch flatbread and four small about 8 inches round flatbreads.

It came out perfect and was a delightful addition to our grilled lamb on the rod, so thank you. Sue Litster.

As always thanks for stopping by and I hope you enjoy it.

Why I Love My KitchenAid Stand Mixer

KitchenAid Stand Mixer

In today’s busy world we need all the help we can muster, especially in the kitchen. My KitchenAid is a real time saver for me.

I have a passion for making homemade pizza, bread, and homemade pasta. My mixer makes short work of the dough for any of these.

Just add the ingredients attach the dough hook and turn it on. I have a nice batch of fresh dough for my homemade pizza in about 5 minutes.

There is nothing like the smell of homemade baked goods coming from the oven. What did you say? You like homemade cookies; well this mixer will help cut the time to mix your favorite cookie dough or batter.

 With the time you save you could be helping the kids with their homework, or talking with a friend on phone. I love oatmeal raisin cookies, and mixing up a batch in the KitchenAid is really easy.

Here is my quick and easy pizza dough recipe:

5 1/2 to 6 cups of all-purpose flour
2 package of dry yeast
3 tablespoons of oil or Crisco
1 teaspoon of salt
2 1/4 cups of warm water

All I have to do now is put all of these ingredients into my Kitchen Aid bowl, attach the dough hook and turn it on. In about 3 minutes I have enough dough to make 2 fresh homemade pizzas.


Some Features of My Mixer

I have the one pictured it's the 6-quart Professional Mixer, and it comes with a Flat Beater, Wire Wisk, and A Dough Hook. You'll find that these tools are able to take on many tasks to assist you in the kitchen.

A batch of dough for cavatellis
Here is a fresh batch of dough for my homemade Cavatelli.


A video of the many attachments and their uses

Pepperoni Bread a Family Favorite

Pepperoni Bread on the cutting board


I enjoy family recipes passed down from generation to generation. Pepperoni Bread is another family recipe from my grandmother’s kitchen that we all loved when we were kids.

 She always used sliced pimento cheese to make this, but today I have a hard time finding pimento cheese, so you can really use any cheese that you like (slices or shredded).

This bread is really easy to make and makes a great snack or serve it with a nice salad before your main dish.

Okay let’s make some dough first; here is how you do it.

Ingredients:

·         5 to 6 cups of all-purpose flour
·         3 tbs. of Crisco or light olive oil
·         2 packages of dry yeast
·         2 ¼ cups of warm water (Not too Hot)
·         1 tsp. of salt
·         1 tsp of sugar (optional)

Instructions:  
 
1.      Dissolve the yeast in the warm water
2.      While you’re waiting add the flour, oil, salt, and sugar to a large bowl
3.      Add the water and yeast to the bowl and begin to mix. (I hope you washed your hand first)
4.      Knead until the dough is smooth and forms a ball, cover the bowl with a cloth, and let this rise for about one hour.

This dough recipe will make at least 3 Pepperoni Breads.

I use my Kitchen-Aid Stand mixer it makes the job really easy. Just add everything and attach the dough hook, and mix on low speed until the dough forms a ball.

Now get the ingredients ready to make that pepperoni bread. Here is what you need.

Ingredients:

· 1 or 2 eggs
· 1 package of sliced pepperoni (7oz. will make more than one)
· A package of sliced pimento cheese cut into 1/2-inch stripes
· A Sprinkle of paprika.

Instructions:  

  1. Crack the egg in a bowl, and beat the egg until mixed. Set this aside for later
  2. Spread the dough in a pizza pan (you don't have to go all the way to the edges)
  3. Brush the dough lightly with the beaten egg
  4. On of the dough place your slices of pepperoni, and cheese (not too much, just enough to cover)
  5. Fold the dough over 3 or 4 times, until you have a loaf.
  6. Be sure to pinch the ends of the loaf and the seam to minimize the ingredients from running out.
  7. Lightly brush the top of the loaf with the beaten egg
  8. Sprinkle some paprika on the top of the loaf.
  9. Bake at 400 degrees for 20 to 25 minutes (until golden brown)
I hope you enjoyed another family recipe, and give it a try. As always Thanks for stopping by.

KitchenAid 5-Qt. Tilt-Head Stand Mixer KSM150PSBM Artisan Series, 5 Quart, Black MatteKitchenAid 5-Qt. Tilt-Head Stand Mixer KSM150PSBM Artisan Series, 5 Quart, Black MatteKitchenAid 5-Qt. Tilt-Head Stand Mixer KSM150PSBM Artisan Series, 5 Quart, Black MatteBaking Sheet Set, 2-Piece Cookie Sheet Set with Silicone Handles, Steel Baking Pans Set, Durable Baking Sheets for Oven, BPA Free Cookie Sheets for Baking Nonstick Set, Sheet Pan - Black Baking TrayBaking Sheet Set, 2-Piece Cookie Sheet Set with Silicone Handles, Steel Baking Pans Set, Durable Baking Sheets for Oven, BPA Free Cookie Sheets for Baking Nonstick Set, Sheet Pan - Black Baking TrayBaking Sheet Set, 2-Piece Cookie Sheet Set with Silicone Handles, Steel Baking Pans Set, Durable Baking Sheets for Oven, BPA Free Cookie Sheets for Baking Nonstick Set, Sheet Pan - Black Baking Tray


How to make French Onion Soup


How to make French Onion Soup


This French Onion Soup is another home recipe that is easy to make. You don’t have to go out to a restaurant anymore to enjoy French Onion soup.

There is nothing that I liked better than going out to a nice restaurant and ordering French Onion soup as a starter to a great meal.

Here is a wonderfully easy French Onion Soup recipe that you can whip up in no time at all and enjoy this soup right at home.

French Onion Soup Ingredients:

  • ½ cup of unsalted butter
  • 5 onions (Sliced)
  • 1 clove garlic (chopped)
  • 2 Sprigs of fresh Thyme
  • 1 cup red wine
  • 2 quarts of beef broth (We use Swanson's Low Sodium)
  • 1 baguette (Sliced)
  • ¾ pound of grated provolone and asiago cheese (Option Swiss cheese)
Instructions:

  1. In a stock pot melt the butter, add the garlic, thyme, and onions, you can add just a little water if needed.
  2. Cook until the onions a caramelized, then add the wine and simmer until the wine is gone, then remove the thyme.
  3. Add the beef broth; bring to a slight boil and then turn down to simmer for about 15 minutes.
  4. Ladle the soup into oven-safe bowls. Add 2 slices of the baguette and cover with the cheese.
  5. Place under the broiler until the cheese is melted and turning brown.
 As Always Thanks for stopping by and I hope you enjoy


“ I earn money from purchases on affiliate links at no additionl cost to you.” Disclosure Statement