Baked Stuffed Portobello Mushroom Caps

Baked stuffed portobello mushroom caps

We have been making this baked portobello mushroom recipe for years. This is perfect if you have a meatless day in your menu as a complete meal served with a vegetable, and these are oh! so healthy. Or, these make a great starter to any meal.

Cheese stuffed portobello mushroom caps with goat cheese and topped off with chopped nuts, mozzarella cheese and served with a tasty tomato sauce.

So, the other day Fran picked up 3 nice portobello mushrooms and an 8 oz. package of goat cheese. We had everything else we to make these.

baked portobella mushroom recipe

First, we cleaned and rinsed the mushrooms. I poured 1/2 cup of tomato sauce in the bottom of a 9-inch x 9-inch baking pan. Then sprinkled some Italian Season in the sauce.

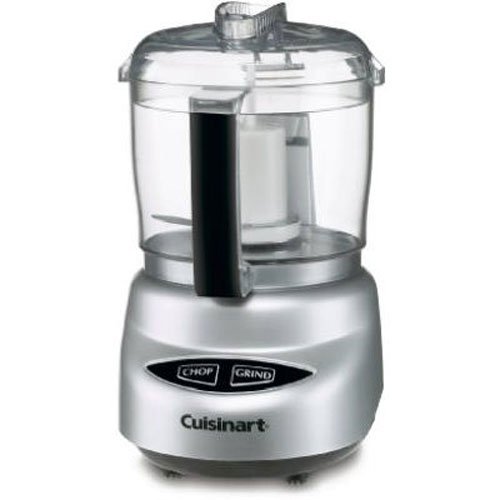
mini food processor

I chopped the nuts for the topping in my mini food processor. You can use any kind of nuts that you like, I used walnuts, sunflower seeds, and pine nuts. I just pulsed them a few times so the nuts were still course. You can also chop them finely if you like them that way.

baked portobello mushrooms goat cheese

Next, I placed them in the pan and added the goat cheese, I used a little more than a tablespoon for each mushroom. Then I sprinkled shredded mozzarella and topped them off with the chopped nuts. Bake these at 350 degrees for 30 to 40 minutes.

The ingredients that we used here would be enough to make 4 or 5 of these, any more than that you will need more goat cheese, sauce, and nuts.

Baked Stuffed Portobello Mushrooms:

3 or 4 Portobello Mushrooms
1/2 cup tomato sauce
Italian Seasoning
3 tablespoons shredded mozzarella cheese
2 tablespoons walnuts (Chopped)
2 tablespoons pine nuts (Chopped)
1 tablespoon sunflower seeds (Chopped)

As always thanks for stopping by and I hope you enjoy.

Quick Easy Blueberry Muffins

Quick easy blueberry muffins

Friday morning Fran and Jamie had some errands to run. So, that left Bobby, Tyler and me the whole morning on a rainy day.

I made some scrambled eggs for Bobby and all Tyler wanted was chocolate milk. I remembered Fran telling me that we had some blueberries in the refrigerator that needed to be used.

Since it was raining out I thought the guys would like to help me make some blueberry muffins. Tyler was more interested in building things with his Tinker Toys so Bobby and I got to work on these quick easy blueberry muffins.

To make easy blueberry muffins from scratch you only need a few simple ingredients and of course fresh or frozen blueberries. Our blueberries were fresh and we had everything else we needed. The ingredients and instructions are below to make these quick and easy blueberry muffins.

make easy blueberry muffins

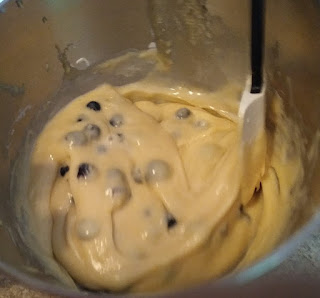
First, we made the batter using my KitchenAid Stand Mixer. Then we folded in the fresh blueberries by hand using a spatula.

easy make blueberry muffins

We sprayed a large muffin tin with Baker's Joy Non-Stick Spray and filled each one with 1/4 cup of the batter.

homemade blueberry muffins scratch

We mixed some light brown sugar with white sugar and sprinkled this on top. Then into the oven to bake for about 20 minutes at 375 degrees. We yielded 12 easy moist blueberry muffins from this recipe.

Here is what we used to make our blueberry muffins: 

1/2 cup vegetable oil
1 cup white sugar
2 large eggs
1 teaspoon vanilla
1 teaspoon honey
1/2 teaspoon salt
1 tablespoon baking powder
2 cups all-purpose flour
1/2 cup milk
1-1/2 cup fresh blueberries

Instructions:

  1. Add the oil and sugar together and begin mixing on low speed.
  2. Then add the eggs, vanilla, honey, baking powder, and salt. continue on low speed.
  3. Add the milk and one cup of flour, continue mixing for about one minute.
  4. Lastly, add the second cup of flour and continue on low speed until you have a nice batter.
  5. Then fold in the blueberries by hand with a spatula.
  6. Fill the muffins tins and sprinkle light brown sugar and sugar mixture over the tops.
  7. Bake on center rack at 375 degrees for 20 minutes until golden brown.
These easy make blueberry muffins are perfect for breakfast or just a snack. I have to tell you that these didn't last long after they came out of the oven.

As alway thanks for stopping by and I hope you enjoy.


Mini Strawberry Pies Recipe

Mini Strawberry pies recipe

Last week Fran and I were waiting to see the doctor for one of her eye appointments. Fran started talking about some healthy recipes that we should try, then she said, you know, we have some fresh strawberries you should make some mini strawberry pies.

So, somehow we went from healthy recipes to desserts. I'm not one to argue because Farn always knows best. I wanted to make sure everything in this recipe was fresh all the way to the whipped cream.


I started by making this easy strawberry pie gelatin


easy strawberry pie gelatin
Here is what I used:

9 fresh strawberries
1/2 teaspoon lemon juice
1 cup water
1-1/4 sugar
3 tablespoons corn starch

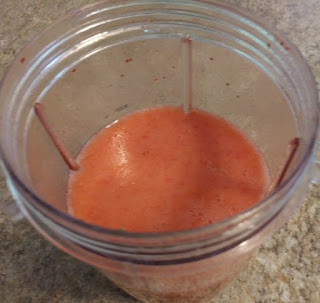
I put the 9 strawberries, lemon juice, and water into my NutriBullet to make a liquid base.

This yielded 2 cups of liquid. If you don't have a NutriBullet you can do this in a blender.


Using a saucepan on medium heat add the liquid and sugar. Bring this to a boil and add the cornstarch a little at a time, stir constantly until it becomes thick then remove it from the heat. I placed the gelatin in a bowl and put it in the refrigerator while I made the pie crust.

Easy Pie Crust Dough: 


easy pie crust dough
2-1/2 cups flour
1 cup cold butter (cut into small pieces)
1 teaspoon sugar
1/2 teaspoon salt
4 to 5 tablespoons ice cold water

I added the flour, butter, sugar, and salt into my KitchenAid mixing bowl. Using the batter attachment I mixed until crumbs formed and the butter was cut in.

Then add the ice water one tablespoon at a time until the dough forms.

I rolled the dough into a log and cut it in half, wrapped it in plastic and put it in the refrigerator.
After 30 minutes I rolled the dough out on a floured surface to 1/8-inch thick. I cut circles a little less than 4-inches. You can use a cookie cutter or whatever you have on hand.

To roll out my dough I use this handy Norpro Pastry/Pizza dough roller. I think this handy tool gives you much more control than using a rolling pin.

easy pie crust dough

I sprayed a muffin tin with Baker's Joy No-Stick Baking Spray and carefully formed the crust in the tins. Then baked these at 350 degrees for 15 minutes.

strawberry pie gelatin recipe

Fill each mini crust with a tablespoon or more of the gelatin.


I cut strawberries in half and placed them on top of the gelatin. This recipe yielded 18 nice little mini strawberry pies. I used 9 more strawberries for this plus whatever Tyler was eating while we finished these.

I topped these tasty sweet treats off with homemade whipped cream using this simple and quick recipe from Berly's Kitchen. Click the link to get this absolutely easy and creamy whipped cream recipe. While you're on their site take a look at more of their amazing recipes.

I had to hurry with this, as Tyler was eating the whipped cream by the spoon full as we topped them off.  

As always thanks for stopping by and I hope you enjoy.


Beer Battered Walleye Recipe

beer  batter walleye

Last week I hit the jackpot, my good friend Geroge from work brought me a load of wood for our Friday night campfires along with a bag of fresh Walleye Fillets.

As you probably know it really doesn't take much to get me excited. George lives out in the country in a wooded area and was kind enough to share some of his wood, he saved me some money this year.

All year long George and his son fish the Allegheny River and Chautauqua Lake for walleye and crappie. And, every year he shares their fresh catch with us.

This year I decided to make my own beer batter battered walleye recipe. You'll find the recipe for the beer batter below. But first, let me explain how I made these.

walleye fillet recipe
I first cut the fillets into smaller pieces to make them easy to handle and flip in my skillet.

After the batter was ready and with the help of my grandson Bobby we pan-fried these fillets in my 10-inch cast iron skillet.

I poured about 1/4 inch of vegetable oil into the skillet and set it to medium heat to get the oil to about 375 degrees.

We set up a station of first, a plate of flour, then the beer batter, and last a plate of Panko Seasoned Bread Crumbs.


Bobby coated the fillets with flour and put them into the batter. I took them from the batter and coated them with the bread crumbs and then into the hot oil. I cooked the fillets for 2 to 3 minutes per side. Then place them on paper towels to drain.

beer batter walleye recipe


Here is how I made the beer batter:

2 cups of all-purpose flour
1 egg beaten
1 teaspoon black pepper
1 teaspoon garlic powder
1 teaspoon salt
1 teaspoon cornstarch
1/2 teaspoon Penzeys Bangkok Seasoning
1/2 teaspoon Penzeys Ruth Ann's Muskego Ave Seasoning
1-12oz. bottle beer

I added all of the dry ingredients into my KitchenAid Stand Mixer bowl and turned it over a few times with a spatula.

Then I added the beaten egg and turned on the mixer using the whisk attachment on medium speed.  I added the beer a little bit at a time until I had a nice consistent batter.

This batter would be perfect for making beer batter shrimp, chicken strips, onion rings, and why not beer-battered mushrooms.

My daughter Jamie brought over the two chicken and fish seasonings that she wanted to try out from Penzeys. I have to tell you what a great addition they were to this batter. And, since Fran is eating much healthier than I am we cooked two of the fillets on the grill for her.

I sprayed a piece of tin foil with non-stick spray, and added a tablespoon of butter on top of each fillet. Then I sprinkled the two Penzys seasonings over the top. I wrapped them and cooked the two fillets on the grill over medium heat for about 10 minutes. These Penzeys seasonings were new to me and I will certainly use them again. Fran thought that the flavor was amazing.


As always thanks for stopping by and I hope you enjoy.

Easy Egg Breakfast Recipe

Easy egg breakfast Recipe

All research seems to point to breakfast as being the most important meal of the day. Well, that's what I've been told all of my life. I remember growing up and my dad always saying you have to eat a good breakfast and being a kid I just never knew why.

Eating healthy food for breakfast gives us the nutrients and energy we need to sustain us throughout the day. I certainly don't always eat a good breakfast every day but I know that I should.

Fran is the healthy eater in our family and in the process, she is always looking out for me. She is always coming up with some of the best healthy foods for breakfast.

She made this healthy egg breakfast the other day and I just had to tell you about it. Everything on this plate is made with fresh ingredients.

Healthy Quick Breakfast Foods:

Red and yellow bell Pepper are low in calories, and rich in vitamin C and antioxidants.

Fresh Spinach provides vitamins A, C, and K and is rich in Calcium, Iron, and Magnesium.

Fresh Mushrooms are a good source of dietary fiber.

Red Onion contains fiber and folic acid along with vitamin B.

Fresh Avocado has heart-healthy monounsaturated fat which the good fat.

Fresh Eggs contain 6 to 7 grams of high-quality protein in each egg.

Now, full disclosure here I am certainly not a nutrition expert I had to look all of this up. I just wanted to let you know that it's easy to make a healthy breakfast.

Here is how Fran Made this easy egg breakfast:

She cut up the peppers, spinach, mushrooms, and onion then cooked them in an 8-inch non-stick skillet until they were tender. Cooked the two eggs over easy (that's the way I like my eggs) and served them on top of the cooked veggies and slices of fresh avocado.

As always thanks for stopping by and I hope you enjoy.


Homemade Meat Marinade Recipe

Homemade meat marinade recipe

Sometimes we just want a juicier and more flavorful cut of meat.

This is the time when you want to use a marinade. When I'm grilling lamb on the rod I like to use a simple Italian salad dressing as a marinade.

But, for steaks, roasts, chicken, and pork I whip up this easy homemade meat marinade.


This homemade meat marinade recipe has a balance of acids, oils, and spices. The acids help tenderize and make the meat juicy while the oils and spices add flavor. I don't always use a marinade but when I do I like this recipe.

Here is the homemade meat marinade recipe:

1/4 cup olive oil
1/4 cup red wine vinegar
2 tablespoons lemon juice
2 tablespoons Dijon mustard
2 tablespoons Worcestershire sauce
2 cloves garlic minced
1 small onion minced
1 teaspoon black pepper
1/2 teaspoon salt
2 tablespoons Montreal Steak Seasoning or Italian Seasoning 

Mix all the ingredients in a large bowl place your cut of meat in a one-gallon zip lock bag or a baking dish cover and refrigerate overnight or at least 2 to 3 hours.

This should be enough for a large roast or 3 to 4 steaks. You can always cut the recipe down for smaller cuts of meat.

As always thanks for stopping by and I hope you enjoy.


How to Grill Beef Shoulder Steak

how to grill beef shoulder steak

Well, we all know that grilling season has finally arrived. Last week Fran came home from a trip to the grocery store with a beef shoulder tender.

This steak was packaged already and marinaded with tangy vinegar, garlic, onion, and black pepper marinade. All I had to do was grill this steak without ruining it.

The truth be known, I've never heard of this cut of beef before so I looked it up. Here is what I discovered.

Beef tender is a cut from the shoulder and is one of the most tender cuts of beef it is very similar to a Filet Mignon but less expensive.

Fran said this is the most tender steak that I ever cooked on the grill. Who am I to argue with that? Here is how I grilled this beef shoulder petite tender.

I set my Huntington Gas Grill on the high setting. The grill was ready in about 5 minutes.

  1. I grilled the first side for exactly 4 minutes.
  2. Turned the steak over and grilled the second side for 3 minutes.
  3. I lowered the grill setting to medium after 3 minutes on the second side.
  4. Turned the steak over again, closed the lid, and grilled for 10 minutes. Until the internal temperature reached 130 degrees. 
  5. Then I let the steak rest for 5 minutes before cutting it.
This steak was a little less than one pound so your grill time may vary based on size. As long as you keep an eye on the internal temperature you'll be fine.

This method gave me a perfectly juicy, medium rare, and tender steak. I highly recommend this cut of beef, I know you won't be sorry.

As always thanks for stopping by and I hope you enjoy.

Whether you're cooking meat on the grill, in the oven, or on a stovetop it's always a good idea to have a good meat thermometer. And, a good sharp knife to cut the meat.


“ I earn money from purchases on affiliate links at no additionl cost to you.” Disclosure Statement

X