Caramel Apple Pizza Recipe

Caramel Apple Pizza Recipe

I just love trying new recipes and, I love pizza so, so I thought, why not try a fruit pizza. I know that fruit pizza is nothing new but, this is the first time I've ever made it.

I had a couple of fresh Granny Smithe apples in the refrigerator so I decided to make this caramel apple pizza. And, what a wonderful sweet treat it is. This is perfect hot out of the oven with a scoop of vanilla ice cream. Oh! doesn't that sound good?

First I made my standard pizza dough. While the dough was rising I peeled and cubed two Ganny Smith apples.

cinnamon apple pizza

 The recipe and measurements are all below. I melted the butter in a medium saucepan. 

Then add the apples and all other ingredients into the pan.

Stir together until it comes to a slight boil then you can remove it from the heat. 


Apple Caramel Pizza

Next, I greased an 11-inch x 17-inch pizza pan. 

Spread the dough and brush it with 1 tablespoon of melted butter before pouring the apple mixture.


I baked this at 450 degrees on the center rack of the oven for 15 minutes. I melted Kraft Caramel Bits and drizzled it over the top. Then mixed my white icing made with powdered sugar and milk and drizzled it over the caramel.

Here is what I used for the dough:

3-1/2 cups all-purpose flour
1-1/2 tablespoons Crisco or vegetable oil
1-1/4 cup lukewarm water
1 package dry yeast

Add the warm water into a mixing bowl then add the yeast. When the mixture begins to bubble add the oil.

Now, add the flour and begin mixing until you have a nice firm ball of dough. I always use my KitchenAid Stand mixer for this part. Cover and set the dough aside to let it rise. About one hour until it doubles in size.

For the Apple Topping:

2 Granny Smith Apples (peeled and cubed)
4 tablespoons butter melted
1/4 cup brown sugar
1/4 cup white sugar
2 tablespoons cinnamon
1/2 teaspoon All Spice
1/2 Teaspoon Nutmeg
1 tablespoon vanilla
1/4 cup milk

Melt the butter in a medium saucepan, add the apples and the remaining ingredients. Stir over medium heat until it boils then remove it from the heat.

The Caramel:

1/4 cup Kraft Caramel Bits
1 tablespoon Milk

In a microwave-safe bowl melt for 30 seconds at a time. Stirring in between, I did this three times for a total of 90 seconds. This gave me a nice smooth caramel to drizzle.

The White Icing:

2 cups powdered sugar
4 tablespoons milk

I whisked this in a small bowl until it was nice and creamy. Then drizzle it over the caramel.

Vietnamese Cinnamon Ground By Penzeys Spices 1.7 oz 1/2 cupVietnamese Cinnamon Ground By Penzeys Spices 1.7 oz 1/2 cup

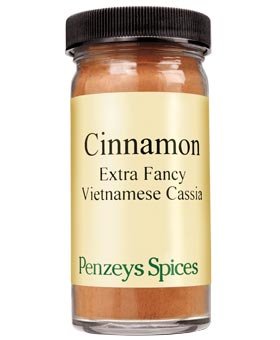
This Penzeys Vietnamese Cinnamon is the best we've ever used. It is extremely aromatic and so flavorful and sweet. You only need to use about 2/3 of what any recipe calls for.

Mix this with some white sugar and enjoy it on your toast, hot cereal, or waffles. For amazing pancakes add some of this to the batter. This also is a perfect addition to your coffee or hot chocolate.


Kraft, Caramel Bits, 11oz Bag (Pack of 3)Kraft, Caramel Bits, 11oz Bag (Pack of 3)


Here is another favorite we like to use when baking. These Kraft Caramel Bits really come in handy during the Holidays.

 No need to unwrap your caramels anymore these are perfect for baking and ready to use right out of the bag.

Norpro Wood Pastry/Pizza RollerNorpro Wood Pastry/Pizza Roller

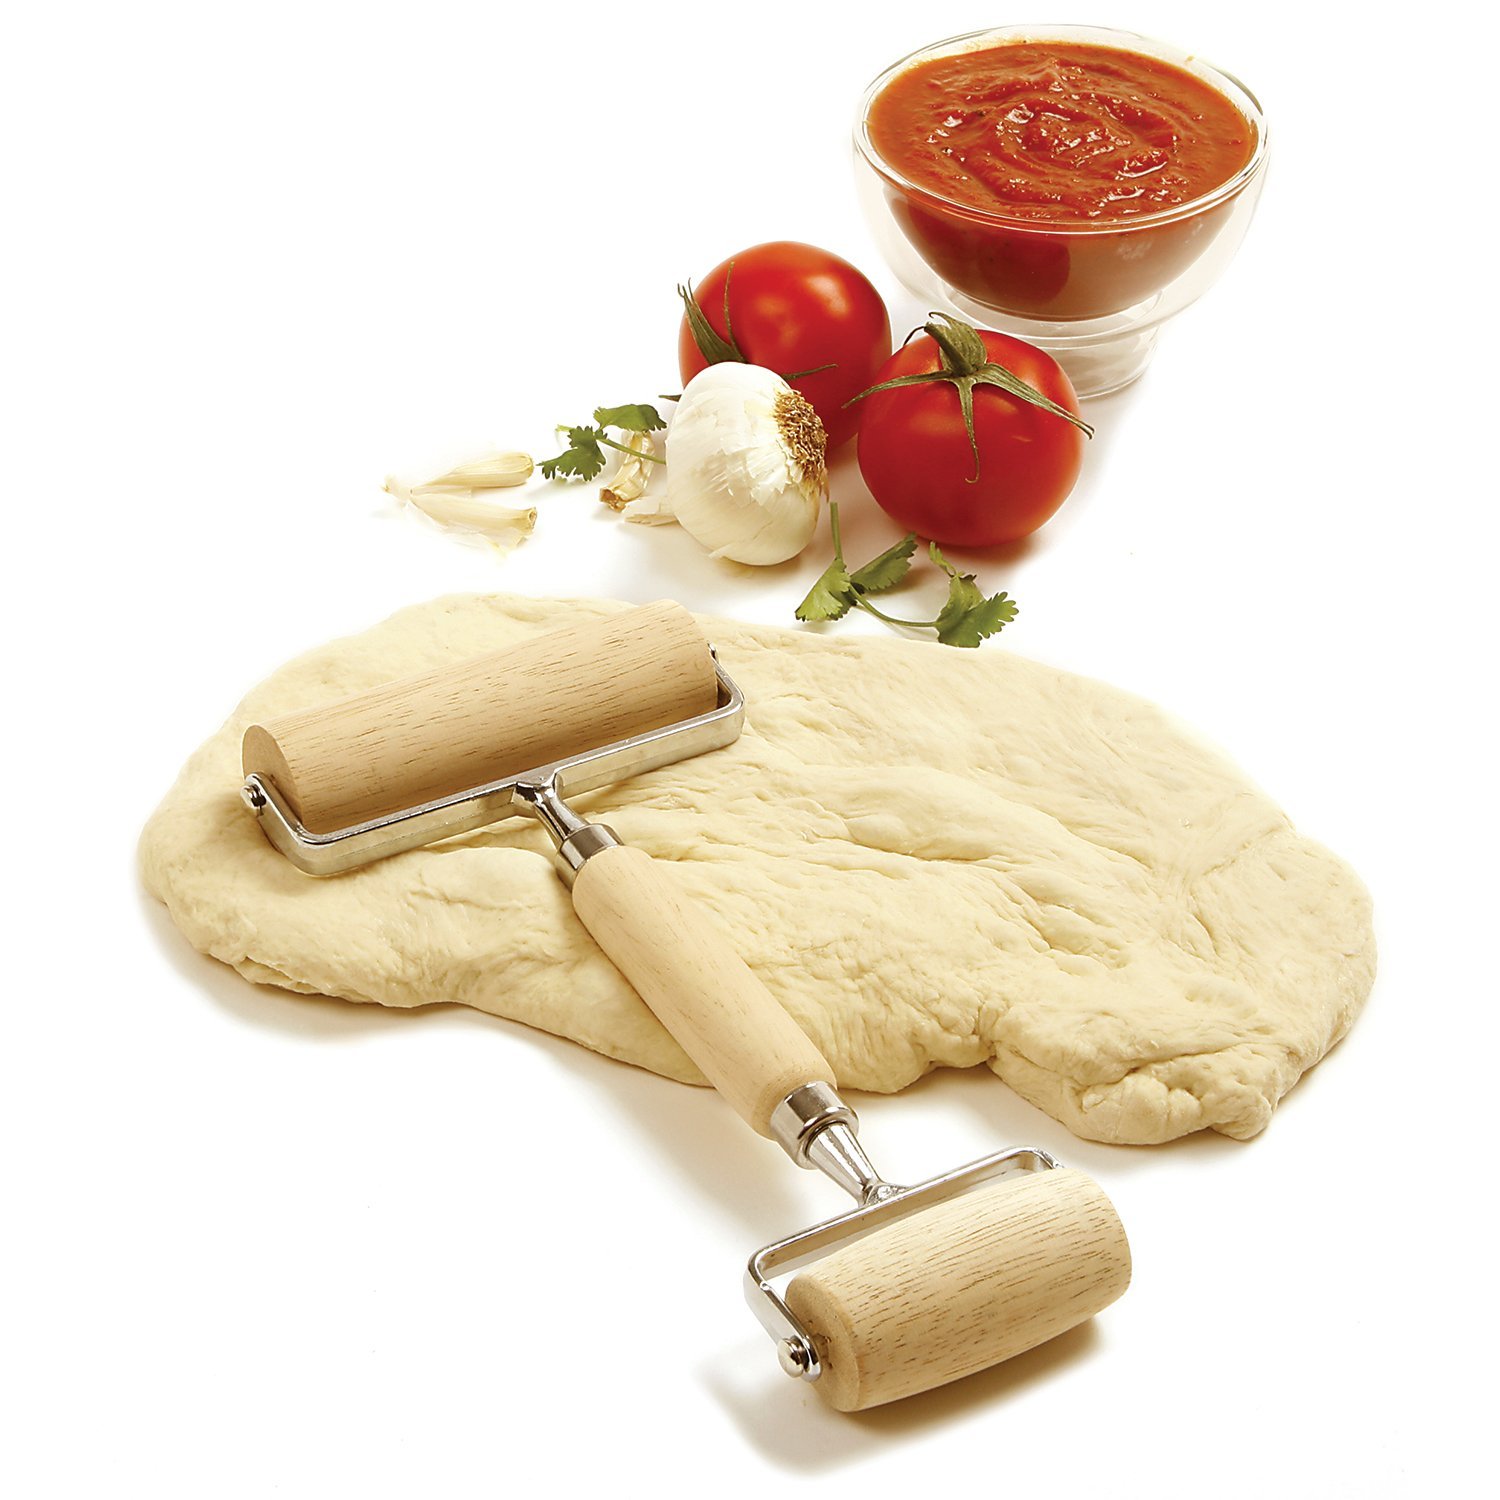
And, let's remember one of my favorites. The Norpro Pastry and Dough Roller. This little kitchen gadget works wonders with pastry and pizza dough.

I've had this little tool for years and, it makes rolling out the dough so easy. Especially pizza dough. The small end is contoured which really helps get to dough right to the edge of the pan.

As always thanks for stopping by and I hope you enjoy.

Oven Roasted Pumpkin Seeds

Oven roasted pumpkin seeds

Well, It's that time of year again and the fall season is once again here. This means that I get to make and enjoy one of my favorites once a year snacks, oven roasted pumpkin seeds.

Jamie and boys came over last night for our annual pumpkin carving night of fun. We carved up four pumpkins and reaped a whole lot of pumpkin seeds.

Do you know? There is plenty of nutrition in roasted pumpkin seeds? They are high in fiber, contain heart-healthy magnesium, rich in Zinc to support your immune system, helps improve blood sugar levels, increase your HDL good cholesterol, and so much more.

Every year I take the extra time to save and roast our pumpkin seeds. These make such a wonderful snack and can be flavored so many different ways. I like my pumpkin seeds lightly coated with olive oil and sea salt.

Easy Roasted Pumpkin Seeds: Here is how I make them
  1. First, rinse and clean off the excess pulp from the seeds. I use a colander and cold water.
  2. Spread them out on cookie sheets and let them dry overnight. (Don't load too many on one cookie sheet).
  3. The next day transfer the seeds to a mixing bowl, and add 2 tablespoons of olive oil and mix with a spoon.
  4. Spread the seeds out on a cookie sheet again and season them with sea salt to your taste.
  5. Bake on the center rack at 350 degrees for 20 to 25 minutes until they are golden brown.
Let the pumpkin seeds cool for about 10 minutes and then enjoy a healthy snack. Oh! I just love this time of year.

As always thanks for stopping by and I hope you enjoy.

Two Simple Ingredients for Perfect Roasted Pumpkin Seeds

Healthy Easy Breakfast Muffins

Healthy easy breakfast muffins

This easy breakfast muffin recipe is just a great idea for a quick on the go breakfast.  They're also perfect to serve if you're having friends over for a little brunch.

Recently our granddaughter had a birthday, and Sammy wanted to have a little brunch for the kids and adults. The party was a princess theme and he also served little finger sandwiches using a crown cookie cutter set.

The cookie cutter set consisted of a castle, crown, and a slipper. The kids really had fun with the little sandwiches. I'm sorry that I didn't get a picture of those.

Fran and Sammy made these easy breakfast muffins the night before. So, all we had to do the next day was warm them up and serve.

Here is what we used to make these breakfast muffins:

Pillsbury pie crust
Hormel bacon crumble
Cheddar cheese
Frozen Spinach (Thawed drained and chopped)
Egg Beaters (With a little milk added)

Healthy breakfast muffin recipe


Take your muffin tin and spray it with non-stick spray.

Layout the pie crust and cut using a 2-1/2 inch cookie cutter. You want just enough to fit in the bottom of the muffin tin.

They yielded 12 cutouts out of one 9-inch pie crust. Then picked up and rolled out what was left to yield 6 more.

This may vary based on how close you cut them I would say you should at least get 15.


easy breakfast quiche muffins
Now you're ready to fill them up. This is one tin made with bacon crumbles and cheddar cheese.

Just drop in some bacon crumbles, then add some cheddar cheese and top off with the egg beaters.

You can use real eggs if you like just beat them with some milk and you're ready to go.

The first photo is spinach and cheddar cheese. The options here are endless. You can use whatever veggie you like in these muffins.

I would love mushrooms and cheddar cheese. Or, how about green peppers and cheese.


Oh, I almost forgot. Bake these at 350 degrees for 15 to 20 minutes, let them cool about 10 minutes before taking them out of the muffin tin. You can make these and freeze them and just pop in the microwave for a quick breakfast on the go.

As always thanks for stopping by and I hope you enjoy it. 


Fun Halloween Treat Ideas

Fun Halloween Treat Ideas

Here is a couple of easy Halloween treat ideas that the kids and even the adults will love. These Reese cup bats and chocolate mini donut spiders are not only fun but so easy to make.

 Every Halloween our grandsons go trick or treating in our neighborhood. So, we always try to have some fun treats. There is no recipe or cooking involved you just need the treats and some time to assemble these tasty sweet treats.

Fun easy Halloween Treats: Here is what you need:

Reese Cups (Full size)
Oreo Cookies
Pretzels (Large Thin)
Chocolate mini donuts
Edible candy eyes
Edible dab-n-hold adhesive

Let us make the spiders first:

With a sharp knife cut the large loops of the pretzels where they meet the middle. This is not a perfect process so, you're going to waste some of them.

Now very carefully press four pretzel loops per side into the mini donuts. Ten glue on the candy eyes using Wilton Dab-N-Hold Edible Adhesive. And, that is it you've made a mini donut spider.

Now for the Reese Cup Bats:

First, separate the Oreo cookies scrap the icing off of one side or you can eat that one and keep on going.

Again using a sharp knife cut the Oreos in half. These will be your bat wings. This is also not perfect  you're going to waste some, which is great because you get to eat them.

Use the edible adhesive the attach the Oreo halves to the Reese Cups and do the same for the eyes. Oh!! How easy these are to make and so much fun. I'm sure they will disappear quickly.

As always thanks for stopping by and I hope you enjoy.


Moist Easy Zucchini Bread

moist easy zucchini bread

With a few simple ingredients and not much time, you can enjoy this moist east zucchini bread. Yes. it's that time of year again the Fall where we enjoy the fresh harvest from our gardens.

My friend George gave some beautiful fresh zucchini from his garden. So, I did some digging and found my mother's easy recipe for zucchini bread.

The thing about zucchini bread is that it's really versatile, there are many options to add all of the things you enjoy. For example, chopped walnuts, chocolate chips, raisins, or just about any fresh fruit that you like.

Moist zucchini bread recipe
As always I used my KitchenAid Stand Mixer for this recipe. I used my flat batter attachment to beat the eggs, oil, vanilla, and sugar together.

I mixed the flour, salt, baking powder, baking soda, and cinnamon in another bowl.

Then I added the dry ingredients to the mixer and mixed until I had a nice creamy batter.

Next, I added the grated zucchini and continued mixing until it was all mixed in. This is the time you would add any of the options that I mentioned above.


easy homemade zucchini bread
I greased two 9-inch x 5-inch bread pans with Baker's Joy non-stick spray. I use this spray for all of my muffins and they never stick.

I preheated the oven to 325 degrees and baked these for 50 minutes until a knife came out of the center clean.

Let them cool for 20 to 30 minutes and they will pop right out of the pan.

If you would like the bread to be a little higher then use 8-inch x 4-inch bread pans.

Ingredients for quick easy zucchini bread:

3 cups all-purpose flour
1 teaspoon salt
1 teaspoon baking soda
1 teaspoon baking powder
1 tablespoon ground cinnamon
3 eggs
1 cup vegetable oil
2-1/4 cups white sugar
2 cups grated zucchini
Add any of the options that you like


As always thanks for stopping by and I hope you enjoy

Grilled White Potatoes

Grilled white potatoes

The other day Fran came home from the grocery store with a really nice Rib-eye steak for the grill. There is nothing that I like better than steak and fries, or sometimes a baked potato.

This time I decided to try something a little different. I made these grilled white potatoes with butter, garlic, parmesan cheese, and served them with sour cream and fresh chives.

These turned out to be the best-grilled potatoes that I ever made, and they were a perfect side for my Rib-eye steak.

First, I washed the potato then sliced it to about 1/2-inch to 3/4-inch thick. I cut the slices in half and skewered them on my flat metal skewers.

Then, I melted 3 tablespoons of butter and brushed it on both sides of the potatoes. I fired up the grill with the setting on medium.

I sprinkled both sides with Parmesan cheese, garlic powder, McCormick Montreal Steak Seasoning, salt, and pepper.

Grilled potato wedges recipe

I grilled these for 15 minutes on one side, then turned them over and grilled for another 10 minutes. After they came off of the grill I brushed on the remaining melted butter and served these with sour cream and fresh chives. The result was, the outside was nice and crispy and the inside was tender and so delicious.


As always thanks for stopping by and I hope you enjoy


“ I earn money from purchases on affiliate links at no additionl cost to you.” Disclosure Statement

X