Showing posts with label snacks. Show all posts

Easy Pepperoni Roll Recipe

Easy Pepperoni Roll Recipe

This easy pepperoni roll recipe is so quick and easy to make.

 Serve these as a snack, lunch or even have them for dinner.

These pepperoni rolls are a smaller version of our Pepperoni Bread.

Many times when our grandmother made pizza, she would make some pepperoni bread. This was always a treat for the family.

You can make your own dough or pick up some fresh dough at the grocery store.

Here is our recipe for Easy All-Purpose Dough.  


For the pepperoni rolls, I made today I just picked up 2lbs. of fresh pizza dough from Wal-Mart. I already have pepperoni and cheese in the refrigerator at home.

Easy Pepperoni Roll Recipe:


Easy Pepperoni Rolls

I started off by peeling the skin from the pepperoni and slicing the whole stick. Of course, you can buy the pepperoni already sliced. I like to use the sticks and slice it myself.

Pepperoni roll recipe


I used Yellow cheese, but you can use whatever kind of cheese you like. I cut about 6 slices of cheese into strips. Then, I cut the pepperoni in half.

Best pepperoni roll recipe

I rolled some dough out on a floured surface to about 8-inches around. Place some pepperoni and then some cheese. Fold over 2 opposite ends about 1/2-inch and then roll them up into a small loaf. They don't have to be the same size or perfect. Oh, I almost forgot to tell you to make sure you seal ends by pressing the dough together.

Easy Pepperoni Roll Recipe: Ingredients

2 lbs. of Dough
1 Stick pepperoni
6 or 7 slices of your favorite cheese

I yielded 8 pepperoni rolls from the 2 lbs. of dough. I placed them on a greased cookie sheet and baked them at 400 degrees for 20 minutes or until they are light brown.

As always thanks for stopping by and I hope you enjoy it.
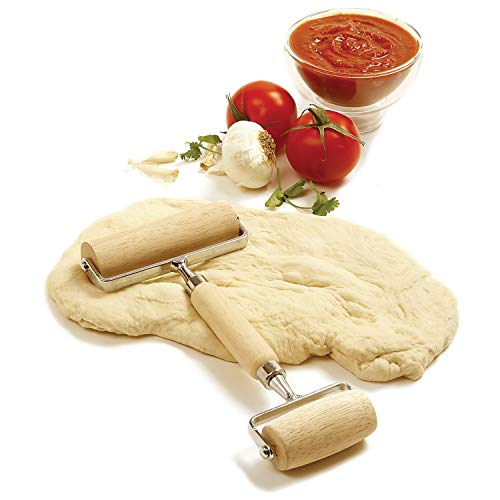

Overnight Oatmeal Breakfast Parfait

Overnight Oatmeal Breakfast Parfait

This overnight oatmeal breakfast parfait is the perfect breakfast for people on the go. Or, just sit down and enjoy this with your first cup of coffee.

I like a good breakfast but when I'm working I never seem to find the time to make myself breakfast. I usually grab a Greek yogurt and eat it when I get to work but that never seems to be enough.

So I tried this overnight breakfast parfait with oatmeal, Greek yogurt, and fresh fruit. This really fills me up and holds me over until lunchtime.

Overnight Oatmeal Breakfast Parfait: Ingredients

1/2 cup Quaker old-fashioned oats
1/2 teaspoon cinnamon (I recommend Penzeys Vietnamese Cinnamon)
1/3 cup almond milk or, (regular milk)
1 strawberry diced
1/4 cup fresh berries or, (frozen)
1 container 5.3 oz. plain Greek Yogurt

Make these in a 16 oz. glass, mason jar or, what I use is a 16 oz. Ziploc container with the screw on lid. This makes these so convenient to just grab and go.


Overnight Oatmeal Breakfast Parfait: Let's Make One

  1. First I put in the oatmeal and then added the cinnamon and stirred together. 
  2. Next, I added the almond milk and stirred again.
  3. Then add the diced or sliced strawberry.
  4. I spooned in the yogurt over the top and smoothed it out.
  5. Then topped it off with the berries. (Or fruit of your choice)
  6. Close the lid or cover your jar and refrigerate overnight.
In the morning you'll have a perfectly delicious healthy breakfast to sit and enjoy or take with you to work.

This is another simple recipe that is so versatile. You can use any kind of fruit that you like. Between the oatmeal and the plain Greek yogurt, this is packed with 21g of protein. Or, you could add some nuts for even more protein.

Moist Easy Zucchini Bread

moist easy zucchini bread

With a few simple ingredients and not much time, you can enjoy this moist east zucchini bread. Yes. it's that time of year again the Fall where we enjoy the fresh harvest from our gardens.

My friend George gave some beautiful fresh zucchini from his garden. So, I did some digging and found my mother's easy recipe for zucchini bread.

The thing about zucchini bread is that it's really versatile, there are many options to add all of the things you enjoy. For example, chopped walnuts, chocolate chips, raisins, or just about any fresh fruit that you like.

Moist zucchini bread recipe
As always I used my KitchenAid Stand Mixer for this recipe. I used my flat batter attachment to beat the eggs, oil, vanilla, and sugar together.

I mixed the flour, salt, baking powder, baking soda, and cinnamon in another bowl.

Then I added the dry ingredients to the mixer and mixed until I had a nice creamy batter.

Next, I added the grated zucchini and continued mixing until it was all mixed in. This is the time you would add any of the options that I mentioned above.


easy homemade zucchini bread
I greased two 9-inch x 5-inch bread pans with Baker's Joy non-stick spray. I use this spray for all of my muffins and they never stick.

I preheated the oven to 325 degrees and baked these for 50 minutes until a knife came out of the center clean.

Let them cool for 20 to 30 minutes and they will pop right out of the pan.

If you would like the bread to be a little higher then use 8-inch x 4-inch bread pans.

Ingredients for quick easy zucchini bread:

3 cups all-purpose flour
1 teaspoon salt
1 teaspoon baking soda
1 teaspoon baking powder
1 tablespoon ground cinnamon
3 eggs
1 cup vegetable oil
2-1/4 cups white sugar
2 cups grated zucchini
Add any of the options that you like


As always thanks for stopping by and I hope you enjoy

Taralli - Italian Mini Bagels or Pretzels

Taralli Italian Bagels in a basket
Italian Taralli Cookie Recipe

While I’m still in the mode of dusting off old family recipes, I found this Italian Taralli cookie recipe that my mother made every year around Easter. I have no idea of the significance of this recipe to Easter, so if anybody has an answer feel free to leave a comment.

These are also called taralli Italian pretzels or taralli Italian cookies, but I always called them mini bagels.

All I know is that whenever she made these tasty snacks they didn’t last very long and I was always begging for more. So I had to give this a try, and I wasn’t disappointed, the smell and taste quickly brought me back to my childhood.

There are many variations of this tasty Italian snack from sweet to savory. Our recipe is on the savory side using fennel seed, and black pepper. If you type a search for Taralli you will find many different recipes, I’ve never tried any of the sweet ones maybe next time.

Okay here is what I used for these mini bagel appetizers:

1 package dry yeast
1 cup warm water (not too hot)
½ cup olive oil
½ cup dry white wine (room temperature)
1 teaspoon salt
1 tablespoon fennel seed
1 tablespoon black pepper

How I did this:

Add the flour, salt, pepper, and fennel seed to a large mixing bowl, and mix these dry.  Dissolve the yeast in the warm water add to the flour along with the dry wine and olive oil. Knead until the dough is smooth if the dough is too sticky just add a little more flour. Now set the dough aside to rest for 30 minutes.

 
After 30 minutes I divided the dough into two equal pieces, and cut off small pieces and rolled a small log about 5 inches long, then connected the two ends to make a small bagel shape. This yielded 54 small tasty Taralli. The amount may vary based on the size you make; they don’t all have to be the same size unless you’re a perfectionist.
Start a pot of water and bring it to a roaring boil. I dropped 10 at a time into the water, they will sink to the bottom and come right back to the top. I removed them with a slotted spoon and placed them on a clean cloth.

Now it’s time to bake them, I preheated the oven to 325 degrees. Place them on cookie sheets with parchment paper and baked two sheets at a time, one on the middle rack and one on the top rack for 30 minutes. Then switched them and baked for another 20 minutes until they were golden brown.

These things are great to snack on all day long, pour yourself a nice glass of wine and enjoy these taralli Italian cookies. I’m sure the sweet version will be great with coffee or tea.

As always thanks for stopping by and I hope you enjoy.

Easy All Purpose Dough

Easy All Purpose Dough


This is quick and easy dough, and if you are in the mood for pizza here is my homemade pizza recipe, or my ever to delicious pepperoni bread. But you may want to use this dough for some great snacks like garlic rolls, breadsticks, and what about that oh so famous fried dough. The kind you buy at your local county fairs, you know the one with sugar all over it.

Here is what you need:

2 packages of active dry yeast
2-1/4 cups of warm water
1 tsp salt
1 tsp sugar (optional) I don’t use the sugar, you may prefer to use it
3 tbsp of Crisco or oil (I sometimes use light olive oil)
5 to 6 cups of all-purpose flour

Here is all you need to do:

  1. In a measuring cup add the yeast to the warm water. Let this stand until you see some bubbles.
  2. In a large bowl or your KitchenAid mixing bowl add the flour, salt, and oil
  3. Make a well in the flour and pour in the warm water and yeast.
  4. Now start to mix, or place your dough hook and turn on your stand mixer
  5. You want to mix until the dough is nice and smooth and not too sticky.
  6. Cover and let the dough rise for 1 hour or more.
  7. After the dough rises, punch it down and divide it up for whatever you are making.
I get three nice 12” or 14” pizzas from this recipe depending on the thickness of your pizza.

flour salt and oil in the mixing bowl
Flour salt and oil in my KitchenAid  mixing bowl

pizza out of the oven
Two pizzas out of the oven

As always thanks for stopping by and I hope you enjoy 


KitchenAid Artisan Series 5-Qt. Stand Mixer with Pouring Shield - Imperial BlackKitchenAid Artisan Series 5-Qt. Stand Mixer with Pouring Shield - Imperial BlackKitchenAid Artisan Series 5-Qt. Stand Mixer with Pouring Shield - Imperial BlackBaking Sheet Set, 3-Piece Cookie Sheet Set with Silicone Handles, Steel Baking Pans Set, Durable Baking Sheets for Oven, BPA Free Cookie Sheets for Baking Nonstick Set, Sheet Pan - Black Baking PanBaking Sheet Set, 3-Piece Cookie Sheet Set with Silicone Handles, Steel Baking Pans Set, Durable Baking Sheets for Oven, BPA Free Cookie Sheets for Baking Nonstick Set, Sheet Pan - Black Baking PanBaking Sheet Set, 3-Piece Cookie Sheet Set with Silicone Handles, Steel Baking Pans Set, Durable Baking Sheets for Oven, BPA Free Cookie Sheets for Baking Nonstick Set, Sheet Pan - Black Baking PanGorilla Grip Large Pizza Cutter Wheel, 9 Inch, Sharp Stainless Steel Blade, Rust Resistant, Comfort Handle, Thumb Guard Protection, Slice Thick or Thin Pizzas, Pie Crust, Pastries in Seconds, GrayGorilla Grip Large Pizza Cutter Wheel, 9 Inch, Sharp Stainless Steel Blade, Rust Resistant, Comfort Handle, Thumb Guard Protection, Slice Thick or Thin Pizzas, Pie Crust, Pastries in Seconds, GrayGorilla Grip Large Pizza Cutter Wheel, 9 Inch, Sharp Stainless Steel Blade, Rust Resistant, Comfort Handle, Thumb Guard Protection, Slice Thick or Thin Pizzas, Pie Crust, Pastries in Seconds, Gray


How to make Homemade Pizza

Homemade Pizza right out of the oven


This mouth-watering homemade pizza recipe is handed down from my grandmother. My grandma Liz made the best pizza in the world. Whose grandmother didn't?

When I was a kid and knew she was making pizza I would make a dash for her house, which was easy because she only lived two blocks away.

Oh, the wonderful smell and the anticipation of waiting for it to come out of the oven. This is my recipe for homemade pizza; it's probably not as good as my grandmother's but close and besides it's homemade what more could you ask for?

Here is what you need to make the dough:

· 2 pkg. active dry yeast
· 2-1/4 cups of warm water, not too hot
· 1 tsp salt
· 3 tbsp of Crisco or oil
· 5 to 6 cups of all-purpose flour

This is how you make the dough:
  1. In a measuring cup, add the yeast to the warm water and let it stand.
  2. In a large bowl or your KitchenAid mixing bowl, add the flour, Crisco or oil, salt.
  3. By now the yeast should have mostly dissolved in the water. So pour it into the bowl with the flour.
  4. Mix by hand, or set your KitchenAid mixer on the low setting using the dough hook
  5. Mix until the dough is smooth, and let the dough rise for one hour
This will yield about 3 pizzas 12” to 14” depending if you like thick crust or thin. I like thin crust.

Mixing the dough in my kitchenaid stand mixer
Mixing the dough in my KitchenAid


Now we can make the sauce:

· 2 Can (28Oz.) of crushed tomatoes
· 2 or 3 tbsp of light olive oil or vegetable oil
· 1 glove of garlic Finley chopped (you can also add garlic powder)
· 1 Tsp. of oregano or Italian Seasoning
· 1 Tsp. salt - a little pepper

I like to cook my sauce first. Pour the tomatoes into a 1-quart pot, add all of the ingredients. Stir and bring to a boil, not a roaring boil, as soon as you see it start to bubble turn off the burner.

Pizza sauce cooking on the stove
My pizza sauce on the stove


Preheat your oven the 450 degrees, spread the dough in your pizza pan, add your sauce, and sprinkle some Italian seasoning and Romano cheese. I bake two pizzas at a time for about 20 minutes, one pizza on the middle rack and one on top. After 9 or 10 minutes switch the racks.

Now you'll notice that I don't have any other topping on my pizza because this is the way my grandmother made it and I like it this way. 

The greatest thing about pizza is that there are so many toppings. Here are some that I do like to add sometimes:

Pepperoni, Mushrooms, Italian Pork Sausage, Anchovies (not my favorite), Green Peppers, Hot Peppers, Mozzarella Cheese. To add your toppings shorten your bake time by about 2 minutes, take them out and add your favorite topping, and put them back in the oven for 2 minutes.

As always Thank you for stopping by, and I hope you enjoyed my recipe.


KitchenAid KSM3311XAQ Artisan Mini Series Tilt-Head Stand Mixer, 3.5 quart, Aqua Sky BlueKitchenAid KSM3311XAQ Artisan Mini Series Tilt-Head Stand Mixer, 3.5 quart, Aqua Sky BlueKitchenAid KSM3311XAQ Artisan Mini Series Tilt-Head Stand Mixer, 3.5 quart, Aqua Sky BlueBaking Sheet Set, 3-Piece Cookie Sheet Set with Silicone Handles, Steel Baking Pans Set, Durable Baking Sheets for Oven, BPA Free Cookie Sheets for Baking Nonstick Set, Sheet Pan - Black Baking PanBaking Sheet Set, 3-Piece Cookie Sheet Set with Silicone Handles, Steel Baking Pans Set, Durable Baking Sheets for Oven, BPA Free Cookie Sheets for Baking Nonstick Set, Sheet Pan - Black Baking PanBaking Sheet Set, 3-Piece Cookie Sheet Set with Silicone Handles, Steel Baking Pans Set, Durable Baking Sheets for Oven, BPA Free Cookie Sheets for Baking Nonstick Set, Sheet Pan - Black Baking Pan


“ I earn money from purchases on affiliate links at no additionl cost to you.” Disclosure Statement

X