County Fair Fried Dough

County Fair Fried Dough

Last week as a Birthday gift for Fran and an early Birthday gift to me Sammy and Tricia got us a new 6 Quart Professional KitchenAid Stand Mixer.

Needless to say, I was delighted. We use our current 4.5 Quart KitchenAid constantly. For the longest time, I've wanted to upgrade to the larger machine and now I have it.

I just couldn't wait to mix up some of my Easy all-purpose dough in my new KitchenAid. So, I mixed up a batch and made some pizza.

I only made a couple of small pizzas so I would have some dough left over to make some fried dough.

County Fair Fried Dough:  

You don't have to wait for that annual county fair to have this sweet little treat. These are so easy to make and the perfect little snack. You can make your own dough or just pick up some fresh dough at your local grocery store.

making fried dough

I pulled off a handful of dough and then shaped it into as close to a circle as I could get. These are about 4 to 5 inches across.

Fried Dough

Using my 8-inch cast iron skillet I poured about 1/2-inch of vegetable oil into the bottom. I set the heat to medium and heated the oil to about 350 degrees.

Once the oil is hot they only take about 20 seconds per side to cook. If the oil is too hot they'll brown too fast and not cook on the inside.

Sugar Cinnamon Fried Dough

In a separate dish, I mixed 1/2 cup of white sugar and 1 tablespoon of cinnamon. I used Penzeys Vietnamese Cinnamon it's a favorite of ours.

Out of the skillet and into the sugar and cinnamon coating on both sides. Then place them on another dish lined with paper towels.

Let them cool for about 10 minutes before eating. Now you can enjoy county fair fried dough any time of the year.


As always thanks for stopping by and I hope you enjoy.

Easy Homemade Ravioli Recipe

Easy Homemade Ravioli Recipe

When it comes to Italian food there is nothing like this easy homemade ravioli recipe. Ravioli are so versatile because there are so many options for the filling.

We happened to be visiting Sammy and as luck would have it he was in the process of making ravioli. This was a great opportunity to capture the process and post it.

The filling that Sammy had ready was ricotta cheese, sausage, and spinach. This is one of the many fillings you can use for ravioli.

Filling with ricotta cheese, sausage, and spinach:

1 lb. (16 oz.) ricotta cheese
1/2 lb. Italian bulk sausage (cooked, crumbled and cooled)
1 egg
2 cups chopped spinach (fresh or frozen)
1 clove minced garlic (Optional)
salt and pepper to taste

In a small frying pan cook the sausage. Break it up as fine as possible while cooking. Let the sausage cool before mixing with the ricotta cheese.

Mix the ricotta cheese, spinach, garlic, egg, and salt and pepper in a mixing bowl. Now add the cooled sausage and mix well. Cover and refrigerate while you make the dough.

The Dough:

4 cups all-purpose flour (more if needed)
4 eggs
1 tablespoon olive oil
1/2 teaspoon salt

We use our KitchenAid Stand Mixer for this. Add the flour, olive oil, and salt into the mixing bowl. Add one egg at a time mixing on low speed. Do this until a ball of dough forms, then knead it by hand on a floured surface. Let the dough rest for 30 minutes.

If you don't have a stand mixer you can mix the dough by hand. Mound the flour onto a clean surface. Use your fingers starting in the middle of the mound to create a well. Add your eggs, oil, and salt to the middle and work in the flour. Knead by hand until the dough is formed.

Tip: If the dough is too dry add a teaspoon of water or more as needed. Or, if the dough is too wet add a little more flour.

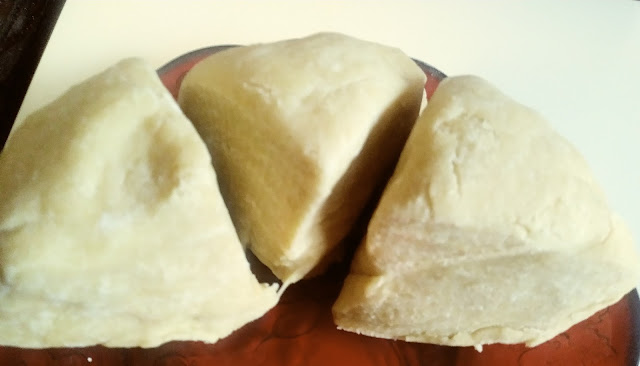
Ravioli Dough

Getting ready to roll the dough. Cut the dough into four equal sections. I know, here you only see three that's because Sammy has one in the roller.

Easy Homemade Ravioli Recipe: Rolling the Dough

Rolling ravioli dough


Using the pasta attachment for the KitchenAid. Take one section and begin on a wider setting running the dough through. Then, move the dial to thinner settings and then to the thinnest setting. Make sure you don't have any tears or holes in the dough.

Again if you don't have a KitchenAid or a pasta machine get out the rolling pin. Take one section of dough and on a floured surface roll into a circle as thin as you can without holes or tears in the dough. Cut about 4-inch strips.

Filling Ravioli

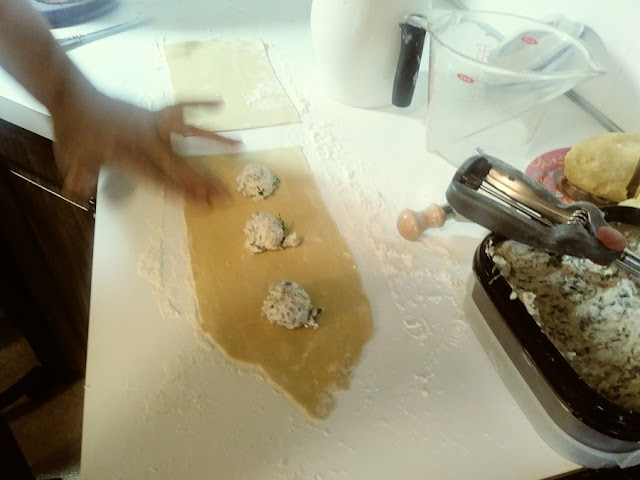
Lay the strip of dough on a floured surface and cut it in half. Sammy used a 1-1/2 tablespoon scooper to place the filling onto the dough. With two fingers, Sammy spreads a little water on both halves of the dough.  The water helps stick the dough together.

Form the ravioli

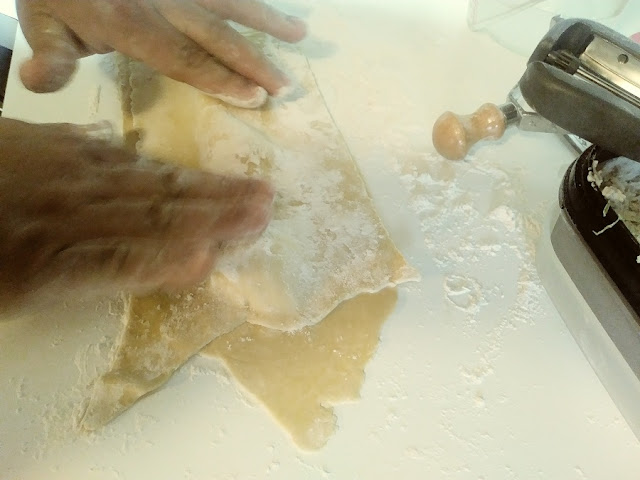
Place the second half of the dough over the filling. Lightly press around the filling to form the ravioli.

Cutting the ravioli

Now Sammy centers this handy ravioli cutter over the filling and firmly presses to cut out the ravioli.  Tip: If you don't have one of these handy cutters just use a mason jar you'll have the same tasty ravioli only it will be round.

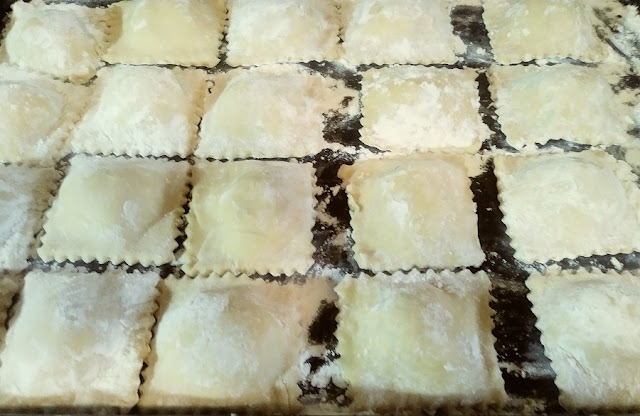
Finished Ravioli

After cutting the ravioli carefully pull the extra dough away. Roll out the extra dough into another strip and make more.

Sammy yielded about 30 delicious ravioli from this recipe.

As I said, in the beginning, there are so many options for ravioli fillings here is our typical ricotta cheese filling recipe.

Ricotta Cheese Filling:

1 lb. ricotta cheese
1 egg
1/4 cup parmesan cheese
2 tablespoons parsley
1 clove garlic minced (optional)
salt and pepper to taste


As always thanks for stopping by and I hope you enjoy

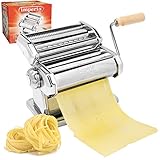
Some Handy tools for making Easy Homemade Ravioli

Easy Chocolate Crinkle Cookies

Easy Chocolate Crinkle Cookies

We haven't made these easy chocolate crinkle cookies for a couple of years. So, this year Fran found the recipe and we decided to add this one to our Holiday cookie list.

These are so easy to make and oh-so-good. They're crisp on the outside and soft and chewy on the inside. Who doesn't love chocolate? The chocolate flavor is to die for.

You can find many recipes to make these easy chocolate crinkle cookies using a cake mix or brownie mix. We prefer this easy-to-make homemade recipe.

Here is what you need: 


2 cups white sugar
4 eggs
2 teaspoons vanilla
2 teaspoons baking powder
1/2 teaspoon salt

How to make easy chocolate crinkle cookies:

We always use our KitchenAid Stand Mixer. But, you can mix this in a medium bowl using a hand mixer.

First mix together the cocoa powder, white sugar, and vegetable oil. Then beat in the eggs one at a time then, mix in the vanilla.

Add the flour, salt, and baking powder to the cocoa mixture. Mix this until a dough is formed. Then cover and refrigerate for four hours.

make chocolate crinkle cookies

Roll the dough into one-inch balls and coat with powdered sugar.

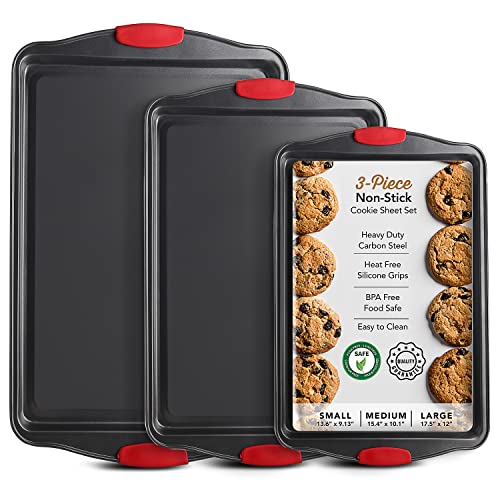
Place them on a cookie sheet lined with parchment paper. I'm not so perfect so some of mine were a little bigger. 

I preheated the oven to 350 degrees and placed them on the center rake. Bake for 10 to 12 minutes.

Since I made some a little larger than one inch I baked for about 14 minutes.

Leave these on the cookie sheet for a minute or more then you can move them to a rack to cool.


As always thanks for stopping by and I hope you enjoy it.

KitchenAid Artisan Series 5-Qt. Stand Mixer with Pouring Shield - Imperial BlackKitchenAid Artisan Series 5-Qt. Stand Mixer with Pouring Shield - Imperial BlackKitchenAid Artisan Series 5-Qt. Stand Mixer with Pouring Shield - Imperial BlackWilton Stainless Steel Small Cookie Scoop, SilverWilton Stainless Steel Small Cookie Scoop, SilverWilton Stainless Steel Small Cookie Scoop, SilverBaking Sheet Set, 3-Piece Cookie Sheet Set with Silicone Handles, Steel Baking Pans Set, Durable Baking Sheets for Oven, BPA Free Cookie Sheets for Baking Nonstick Set, Sheet Pan - Black Baking PanBaking Sheet Set, 3-Piece Cookie Sheet Set with Silicone Handles, Steel Baking Pans Set, Durable Baking Sheets for Oven, BPA Free Cookie Sheets for Baking Nonstick Set, Sheet Pan - Black Baking PanBaking Sheet Set, 3-Piece Cookie Sheet Set with Silicone Handles, Steel Baking Pans Set, Durable Baking Sheets for Oven, BPA Free Cookie Sheets for Baking Nonstick Set, Sheet Pan - Black Baking Pan


Pineapple Bow Tie Cookies

Pineapple Bow Tie Cookies

These pineapple bow-tie cookies have been on our Holiday cookie list since I was a little guy. And, that was a long time ago. I found my mother's old handwritten recipe for these and just had make them this year.

We made the dough according to her recipe but it turned out to be a failure. I just could not work with the dough. So, Fran suggested a cream cheese dough and it worked beautifully.

Pineapple Bow Tie Cookies: Dough

8 oz cream cheese (softened)
8 oz butter (softened)
1/2 teaspoon Vanilla
3/4 cup powdered sugar
2-1/2 cups flour

In my KitchenAid stand mixer, I mixed the cream cheese and butter starting at low speed and then switching to high speed to make sure the two ingredients were creamed together.

Turning the mixer to medium speed add the powdered sugar and vanilla. Then, add the flour and mix until the dough is formed. Divide the dough into two equal sections, wrap, and refrigerate for one hour.

Pineapple Bow Tie Cookies: Filling

20 oz can crushed pineapple
1/4 cup white sugar
2 tablespoons cornstarch

Combine in a medium saucepan. Cook over medium heat while stirring until the pineapple thickens. Then remove from heat.


Roll the dough to 1/8-inch thick and cut into 2-inch squares. Place 1/2 teaspoon of pineapple in the middle of each square. Fold opposite corners together and press.

Tip:  To make sure the cookies don't open up while baking use some of the pineapple juice or just a little water to hold corners together.

Place them on a cookie sheet lined with parchment paper about 2 inches apart. Sprinkle a little sugar over them and bake at 375 degrees for 8-10 minutes. Dust with powdered sugar right out of the oven.

These cookies are fun and easy to make. They're also very versatile because you can use any fruit filling that you like.

We made some with raspberry jam right out of the jar. This recipe yielded us about 60 or more cookies. Perfect to dress up your Holiday table.

Raspberry Bow Tie Cookies

As always thanks for stopping by and I hope you enjoy it.

KitchenAid Artisan Series 5-Qt. Stand Mixer with Pouring Shield - Imperial BlackKitchenAid Artisan Series 5-Qt. Stand Mixer with Pouring Shield - Imperial BlackKitchenAid Artisan Series 5-Qt. Stand Mixer with Pouring Shield - Imperial BlackBaking Sheet Set, 3-Piece Cookie Sheet Set with Silicone Handles, Steel Baking Pans Set, Durable Baking Sheets for Oven, BPA Free Cookie Sheets for Baking Nonstick Set, Sheet Pan - Black Baking PanBaking Sheet Set, 3-Piece Cookie Sheet Set with Silicone Handles, Steel Baking Pans Set, Durable Baking Sheets for Oven, BPA Free Cookie Sheets for Baking Nonstick Set, Sheet Pan - Black Baking PanBaking Sheet Set, 3-Piece Cookie Sheet Set with Silicone Handles, Steel Baking Pans Set, Durable Baking Sheets for Oven, BPA Free Cookie Sheets for Baking Nonstick Set, Sheet Pan - Black Baking Pan


Healthy Banana Strawberry Smoothie

Healthy banana strawberry smoothie

This healthy banana strawberry smoothie is just one of the many you can enjoy for breakfast, lunch, or a snack during the day.

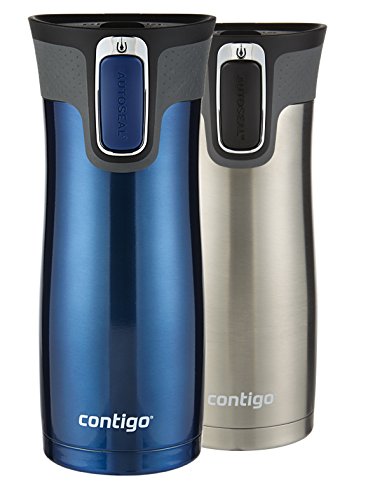
This is a great way to start your day if you want an easy and quick breakfast. And, if you happen to be in a hurry just pour it into a travel mug and take it with you.

If you're looking for an easy way to improve your health and nutrition without giving up all the flavorers you enjoy. Consider trying some easy fruit and vegetable smoothies.

You can achieve more energy, better sleep, and even weight loss by making juices and smoothies a part of your everyday life.


What is the difference between juicing and smoothies?

Let's start with Juicing: Juicing extracts the juice or liquid from the fruits and vegetables, thus leaving the peels and pulp behind. There are many types of juicers or extractors on the market today. Full disclosure here, I don't own a juicer or extractor so I can't tell you how delicious the juices are.

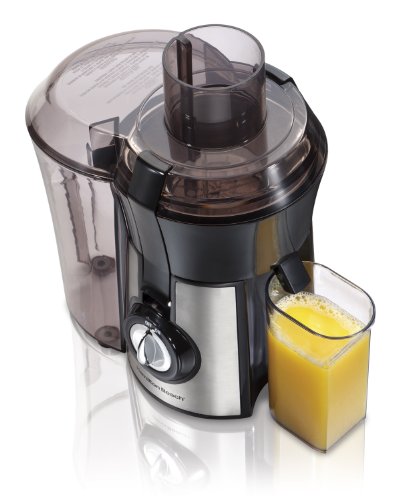
If you're looking for a juicer extractor here are some popular choices.

 Smoothies: You can easily make delicious smoothies using a high-speed blender. So, when you make a smoothie you're drinking all of the pulp and fiber contained in the fruit or vegetable.

 Juicing and smoothies are both healthy and good for you. But. if you want more fiber in your diet then smoothies are certainly the better choice.

For healthy and delicious smoothies here are some high-speed blender choices.

Now, I'm not a health expert or a nutritionist by any means. This information is easily found with a little research.

We own and use the Nutri Bullet High-Speed Blender to make so many different types of delicious and healthy Smoothies. Smoothies are always made with a base. It might be water, milk, or yogurt.

Healthy Banana Strawberry Smoothie
Fruit smoothie recipe

This is one that I made for Tyler a couple of weeks ago as he was home sick from school and spending the day with me.

Jamie asked to make sure that he was drinking plenty of liquids. So I asked him if he wanted a fruit smoothie.

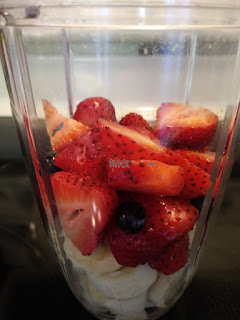
I cut up one banana, and five strawberries, and as a bonus, I added about 10 blueberries.

For the base, I used Almond Milk. After adding the fruit I poured the almond milk to the max line on the cup.

Then I added the blending attachment set it into the Nutri Bullet and turned it on for about 15 seconds or more.

Tyler drank to the whole smoothie and then ate some more strawberries just for good measure.

As always thanks for stopping by and I hope you enjoy.

Take your breakfast on the go with a travel mug

Crescent Roll Pizza Bites

Crescent Roll Pizza Bites

Last week Jamie brought the boys down to the village to have their pictures taken for the Holidays. The studio just happens to be right around the corner from our house.

So, while Jamie stayed at the studio to pick out the best pictures, the boys took a walk to our house. Being the grandparent that I am I, of course, want to feed the kids.

I like as much homemade as possible but, sometimes you just have to be creative. We had some Pillsbury Crescent Rolls in the refrigerator. I asked the boys if they wanted to me make some crescent roll pizza bites.

We had everything we needed the crescent rolls, a small jar of pizza sauce, black olives, pepperoni, and some mozzarella cheese.


I rolled out the crescent rolls on the counter while Bobby sliced the black olives.

Tyler broke up the mozzarella into smaller pieces since it was in slices.

Then, we added a tablespoon of pizza sauce on each crescent roll.

There were eight altogether so we made four with olives and cheese and the other four with pepperoni and cheese.

Then we rolled them up and tucked them in the corners. Place them on a cookie sheet and bake at 350 degrees for about 10 minutes.

These crescent roll pizza appetizers make a perfect quick treat if you have some guests stopping in for lunch or a quick snack. The kids enjoyed them down to every last one.

As always thanks for stopping by and I hope you enjoy

“ I earn money from purchases on affiliate links at no additionl cost to you.” Disclosure Statement

X