How to make Hot Dog Chili

Hot Dogs with chili sauce 
Hot Dogs with chili sauce

If you are a fan of a good old-fashioned hot dog with chili, then this recipe is just what you need. I grew up in a small Western Pennsylvania town, where hot dogs are a staple.

There were several hot dog shops around town, each specializing in its own chili sauce. We moved away from our hometown, and it turns out that hot dogs with chili are one of the foods we miss the most. Now we have a recipe to make our own that reminds us of home.

There are so many garnishes for hot dogs, but I like mine with mustard, onion, and chili. Sometimes I add a nice thin slice of dill pickle on top, and it's oh-so-good.

Ingredients:

  • 1 Pound of ground beef
  • 1 small onion chopped very fine
  • 1/4 tsp cumin
  • 1 tsp paprika
  • 1 1/2 tsp chili powder
  • 1 tsp cayenne pepper
  • 3/4 tsp allspice
  • 1/4 tsp sage
  • 1/2 tsp oregano
  • Sprinkle in some garlic powder and salt (just a little)
Instructions:
  1. In a medium saucepan brown all of the ingredients
  2. Add 1 cup of water
  3. Add 2 tablespoons of cracker meal
  4. Cook for 1 hour
Give it a try and enjoy a nice chili dog. It's a simple recipe and you could even make it ahead and freeze it for later. 

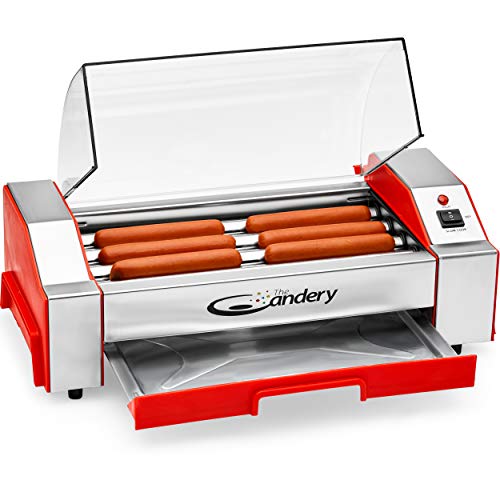
Rachael Ray Cityscapes Nonstick Frying Pan/Skillet, 12 Inch - Sea Salt GrayRachael Ray Cityscapes Nonstick Frying Pan/Skillet, 12 Inch - Sea Salt GrayRachael Ray Cityscapes Nonstick Frying Pan/Skillet, 12 Inch - Sea Salt GrayThe Candery Electric Hot Dog Roller - Sausage Grill Cooker Machine - 6 Hot Dog Capacity - Household Hot Dog Machine for Children and AdultsThe Candery Electric Hot Dog Roller - Sausage Grill Cooker Machine - 6 Hot Dog Capacity - Household Hot Dog Machine for Children and AdultsThe Candery Electric Hot Dog Roller - Sausage Grill Cooker Machine - 6 Hot Dog Capacity - Household Hot Dog Machine for Children and Adults


Homemade Tomato Sauce For Pasta

Sauce and meatballs simmering on the stove

What's best on your favorite pasta? Of course your favorite tomato sauce, we have a simple tomato sauce recipe three generations deep.

Growing up in our house, every Sunday was pasta day. My mother would start the sauce in the morning and it would simmer for hours, filling the house with such a magnificent aroma.

My dad would go to church, and on his way home he would stop at the local bakery and pick up 2 loaves of fresh Italian bread. We would cut the first loaf, take a slice and dip it into the sauce that has been simmering all morning.

To this day when we make our sauce it fills the house with that same magnificent aroma, which brings back fond memories of my childhood.

Pictured here are our Sunday pot of sauce and meatballs simmering on the stove. After the sauce has cooked for a while it will begin to thicken.  I still like to take some fresh Italian bread and cover it with the sauce, just like when I was a kid. It is Oh!!! So good.

Let's start with the Ingredients for the Meatballs:
  • 1 lb. of ground beef
  • 2 large eggs
  • 1/4 cup of grated Romano cheese
  • 1 cup of seasoned breadcrumbs
  • 1 clove of garlic, minced (you can add more garlic if you like)
  • A few sprigs fresh of parsley, and basil, chopped really fine
  • If you're using dry use a 1/2 tsp. of each
  • Light olive oil: enough to cover the bottom of the pan
  • Sprinkle salt, pepper, and garlic powder to taste
Now the Ingredients for the Tomato Sauce:
  • 2 - 28 oz. cans of crushed tomatoes
  • 2 - 6 oz. cans of tomato paste
  • 2 - 28 oz cans of water
  • A few sprigs of parsley and basil chopped really fine
  • If you're using dry use a 1 tsp. of each or season to your taste
 Now for the Instructions:

  1. Cover the bottom of a 12" fry pan with olive oil and turn on medium heat. Add some minced garlic and parsley.
  2. Mix all ingredients together, and form your meatballs, add them to the frying pan. Cook until the outside of the meatballs are golden brown. Turning them often.
  3. While the meatballs are frying prepare your sauce
  4. Add tomatoes, tomato paste, water, and seasonings in an 8-quart pot, stir all ingredients together, and turn on medium heat. When the meatballs are cooked, place them in sauce, along with the grease from the frying pan
  5. Bring sauce to a boil, stirring frequently, so the sauce doesn’t stick to the bottom of the pot.
  6. Let the sauce cook for 2 to 3 hours on medium heat, stirring frequently, again we don't want the sauce to stick to the bottom of the pot.
  7. As sauce thickens turn to a simmer for 30 more minutes. Keep stirring.
Prep Time: 30 minutes
Total Time: 3 to 4 hours or longer
Serves: 1 lb. of pasta, 4 to 6 people with some left over to freeze

This is not a quick recipe, this sauce takes time as it cooks to perfection.

Now meatballs are a staple when it comes to tomato sauce and pasta day.
Some other options to add to your sauce are Italian sausage or a nice chuck roast. Actually, you can make all of them. Cook your sausage and brown the chuck roast the same as you would the meatballs.

They all add a unique flavor to the sauce, and the meat is so tender and delicious when cooked in the sauce all day.

My mother would always make meatballs and a chuck roast. Oh, how I remember that wonderful smell filling the whole house.

A plate of rigatoni and meatballs
Oh now doesn't this look delicious?


As always thanks for stopping by and I hope you enjoy it!
     

    Rosanna Pasta Italiana Pasta Bowls Set of 4,White, 8.25Rosanna Pasta Italiana Pasta Bowls Set of 4,White, 8.25Rosanna Pasta Italiana Pasta Bowls Set of 4,White, 8.25


    Veggie Bars a Party Favorite

    Easy Veggie Bars

    Make these quick easy party snacks for your next party

    This recipe is one of our all-time favorites, it's so popular and such a big hit at picnics, parties, and Holiday gatherings. These are one of the best veggie snacks you'll ever have and are so simple to make.

     Even I can do it, there are so many options for all of your favorite fresh veggies, you can top this with whatever you desire or whatever you're in the mood for.

    My daughter and wife have been making these for years for all of our family events, and no matter where we take them, everybody gives this treat the thumbs up.

    Pictured here are the veggie bars my daughter made for the 4th of July, with broccoli, cauliflower, red and yellow peppers. Aren't they just so colorful?

    The options for these easy veggie bars are endless, you can add as little or as much fresh veggies as your heart desires. I'm not so sure about the cream cheese mixture, but for sure the fresh veggies are very healthy.


    What you need for these easy veggie snacks:
    Veggie Options All Finley Chopped about one cup each:
    • Green, Red, and Yellow Peppers
    • Broccoli
    • Cauliflower
    • Black Olives
    • Carrots
    • Mushrooms
    • Onion
    • Tomato
    Here is how to make your veggie snacks:
    1. Spread the crescent rolls out onto a 17" x 11" pan and pinch the sections together
    2. Bake the crescent rolls at 350 degrees for about 10 minutes or until the top is golden brown, set the pan aside and let them cool
    3. Mix the cream cheese, ranch dressing, mayonnaise, and sour cream in a mixing bowl, whip until it is nice and creamy
    4. Spread the mixture over the cooled crescent rolls evenly
    5. Press your choice of veggies into the cream cheese mixture and top off with the shredded cheddar
    6. Place the veggie bars in the refrigerator for a couple of hours. 
    7. After they're cooled cut them into 2 or 3-inch squares and serve
    As always thanks for stopping by and I hope you enjoy it.

    Make short work of slicing your veggies with one of these handy kitchen tools

    Steak Salad

    Steak Salad

    This steak salad is sure to please even the biggest of appetites. Steak salad is simply thin slices of steak seared on high heat and served over a bed of your favorite greens and veggies. I like adding french fries and heating up the dressing for my steak salads.

    What a quick and easy meal to prepare, and it offers everything on one plate. Your greens, veggies, meat, and potatoes, what more could anybody ask for.

    I've made this with New York strip steak, but I have to tell you I like it better with a nice Rib-Eye. If you don't eat steak try your favorite seafood or chicken. Steak salad is a wonderful meal made fresh to order or easily made from leftovers.


    INGREDIENTS:
    • 16 oz. New York Strip or any steak of your choice, this should make 2 or 3 salads
    • Montreal steak seasoning
    • 1 bag of steak fries, or French fries found in your frozen food section. (Best is Homemade)
    • Romaine lettuce is enough for however many salads you want to make
    • 1 bunch of green onions
    • 2 or 3 nice tomatoes
    • 1 bag of shredded cheddar cheese
    • 2 or 3 hard-boiled eggs
    • Sliced or chopped green and red bell peppers
    • 1 bottle of sweet and sour or poppy seed salad dressing. Or any dressing that you prefer.
    Cut thin slices of your favorite steak and cook it on high heat for about one minute per side or to your liking. Prepare your french fries and hard-boiled eggs and build your salad it's that simple.

    Choose your favorite salad dressing and enjoy. A couple of my favorite dressings are ranch and blue cheese.

    Garlic Bread SticksGarlic Bread Sticks


    Try my easy-to-make Garlic Bread Sticks for a perfect compliment to your steak salad.


    As always thanks for stopping by and I hope you enjoy it.

    Pan Fried Fish Fillets

    Pan Fried Fish Fillets

     My good friend George gave me some fresh Crappie fillets from Lake Chautauqua. So I decided to make these Pan Fried Fish Fillets.

    George is an avid fisherman, he fishes the lake, and Allegheny River all year long. These were caught while George and his son were ice fishing this year.

    Crappie is a North American freshwater fish in the sunfish family. Crappies are known to be one of the best-tasting freshwater fish, because of their diet.

    I would have normally broiled these fillets, but George suggested; trying them pan-fried. So here is how I pan-fried these fillets to perfection.

    These fillets were very easy to make and so delicious, served with a wedge of lemon and rice to make a great meal. If you don't have a friend like George, just use your favorite fresh fish fillets.

    Pan Fried Fish Fillets: Ingredients
    Pan Fried Fish Fillets: Instructions
    1. Pour about 1/4 inch of oil into a 10 or 12-inch fry pan, and heat oil to 375 degrees on medium heat
    2. Mix 1 cup of McCormick batter with the water
    3. Once the oil is hot, dip the fillets and coat them with the batter
    4. Add them to the pan (I add 3 fillets at a time) 
    5. Fry for 3 to 5 minutes per side until fillets are golden brown.

    You might also like my Fish Broiled Cajun Style

    As always thanks for stopping by and I hope you enjoy it.

    Golden Dipt Mix Batter Beer Seafood Mix 10 Oz Pack of 3Golden Dipt Mix Batter Beer Seafood Mix 10 Oz Pack of 3Golden Dipt Mix Batter Beer Seafood Mix 10 Oz Pack of 3Lodge Cast Iron Deep Skillet, 12 inchLodge Cast Iron Deep Skillet, 12 inchLodge Cast Iron Deep Skillet, 12 inch


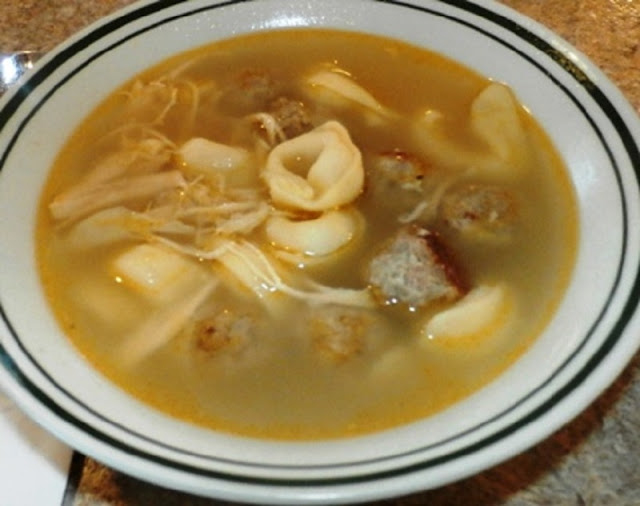
    Hearty Chicken Tortellini Soup with Meatballs


    best chicken tortellini soup recipe

    Winter is now upon us, and there is nothing better than warming up with a hearty and delicious bowl of homemade chicken tortellini soup. This soup is a favorite in our house all through the cold weather season.

    This soup is a great starter for any meal or, this soup can be a meal in itself. The soup is filled with chicken, tortellini, and meatballs,  all in this flavorful chicken broth. This soup is sure to fill you up on a cold winter day.

    This is just one of the many soups we enjoy in the cold weather season, so stay tuned for more delicious soups.


    INGREDIENTS:
       Soup:
    • 12 oz bag of Fresh or Frozen Tortellini
    • 2 Tomatoes
    • 1 bag celery
    • 1 bag carrots
    • 1 big onion
    • 2 or 3 large bone-in chicken breasts
    • Vegetable or chicken bouillon
    • 1 or 2 cans of chicken broth 
    INSTRUCTIONS:
    1. Cut up tomatoes into 4 sections each
    2. Cut onion into 4 to 6 sections
    3. Clean celery and carrots
    4. Put all vegetables and chicken breasts in a large stock pot, cover with water, and come to a boil
    5. Reduce heat and let this cook for 45 minutes to one hour
    6. While this is cooking make your meatballs
    7. Add Parmesan cheese, garlic salt, egg, breadcrumbs, and pepper to the meat and mix thoroughly
    8. Shape into small meatballs and bake in the oven at 350 degrees for 20 minutes
    9. Using another pot under a strainer drain the broth, and discard the tomatoes and onion.
    10. Cut the celery and carrots into small pieces and add to the broth
    11. Shred the chicken and add to the broth
    12. Add 2 or 3 vegetable or chicken bouillon cubes and chicken broth if more liquid is needed
    13. Add the tortellini, and return to the stove, bring to a boil until the tortellini is cooked
    14. Reduce heat and simmer for 15 minutes.
    As always thanks for stopping by and I hope you enjoy this easy chicken tortellini soup.


    Low Fat Vegetarian Enchiladas


    Vegetarian Enchiladas right out of the oven

    You can find some great enchiladas in Mexico, or you can whip up a nice lunch or dinner of low-fat vegetarian enchiladas in your own kitchen in about 30 minutes.

    So the next time you're having some friends over for margaritas, and you need to serve a nice lunch, these enchiladas will be sure to please your friends.

    This recipe is from my son Sam the Chef; he graduated from culinary school in 1997 and ever since has been coming up with all kinds of great recipes. 

    You can check out his Facebook page, Cooking with Monaco.

    If you're like me you can spice it up a bit with some hot or mild sauce, I prefer the hot.

    INGREDIENTS

    1 can of fat-free refried beans
    1/2 bag of Boca Crumbles
    1 can of mild Rotel
    1 tsp of taco seasoning
    5 whole wheat soft taco shells or tortillas
    1 small can of enchilada sauce
    1 - 8oz bag of fat-free shredded cheese

    INSTRUCTIONS

    1.  In a small pot, combine the re-fried beans, Boca crumbles, Rotel, and taco seasoning.
    2.  Heat this over medium heat until the beans are soft.
    3.  Fill each tortilla with 2 spoons full of the mixture
    4.  Roll and place in a baking dish side by side
    5.  Pour the enchilada sauce over the top and bake at 350 degrees for 20 to 30 minutes.

    Prep Time: 10 Minutes
    Cook time: 20 Minutes
    Ready In:   30 Minutes
    Serves: 2 to 3 people

    Enchiladas originated of course in Mexico, and are very popular with street vendors. There are so many varieties of enchiladas. You can fill them with beef, vegetables, chicken, or seafood.

    Sweejar Ceramic Bakeware Set, Rectangular Baking Dish Lasagna Pans for Cooking, Kitchen, Cake Dinner, Banquet and Daily Use, 11.8 x 7.8 x 2.75 Inches of Baking Pans (Red)Sweejar Ceramic Bakeware Set, Rectangular Baking Dish Lasagna Pans for Cooking, Kitchen, Cake Dinner, Banquet and Daily Use, 11.8 x 7.8 x 2.75 Inches of Baking Pans (Red)Sweejar Ceramic Bakeware Set, Rectangular Baking Dish Lasagna Pans for Cooking, Kitchen, Cake Dinner, Banquet and Daily Use, 11.8 x 7.8 x 2.75 Inches of Baking Pans (Red)Plant Boss Organic All-Purpose Plant Crumbles, 3.35 OZPlant Boss Organic All-Purpose Plant Crumbles, 3.35 OZPlant Boss Organic All-Purpose Plant Crumbles, 3.35 OZ


    How to Cut and Light your Cigar

    Cigar and matches
    First Let's Cut Your Cigar

    If you've been smoking cigars for a while, then this advice will not be new to you. Please read on and if you happen to disagree with my advice or you have something more to add, please feel free to let me know in the comment section below.

    Now that you have your premium handmade cigar in hand, what do you do? Well, the first thing to is is take a look at your newfound pleasure. At this point, there is no need to remove the cigar band.

    Removing the cigar band at this point may damage the wrapper, if you insist on removing it wait until the heat of the cigar loosens the glue.

    There are several tools to choose from to cut your cigar. The "guillotine" will make a straight line cut across the head. The "V cut" will cut a wedge into the head, and the "pierce" will punch a hole into the center of the head.

    My choice and my favorite is the guillotine, as it never fails me. I've used all of the tools to cut my cigars and always come back to my guillotine cutter. Now that's just my preference, you may very well like one of the other methods better.

    Now that you have chosen your cutting tool, take note of where the cap meets the wrapper. Do not cut past this point as you will cut into the wrapper and this may cause your beauty to unravel.

    This is where size matters, if the cut is too big it will result in excess smoke and heat and will cause a bitter taste, and your cigar will smoke too fast.

    A cut too small and your cigar will be too hard to draw on, and the taste will be ruined by an excess of tar and nicotine.

    The perfect cut will be just smaller than the diameter of the cigar. This will enhance your experience and your smoking pleasure.

    Now Let's Light Your Cigar and Enjoy
    
    Now the way you light your cigar will determine how it will burn and taste. Too much flame will cause the foot to burn and turn black and cause the cigar to have a bitter taste.
    The flame should never touch the cigar, as a matter of fact, don't even put the cigar in your mouth yet. Hold the cigar in your hand about 1/4" away from the flame turning the cigar so the heat is toasting the edge of the foot.
    You gently begin to draw when you see the smoke rising for the edge of the wrapper on the foot. Now continue to gently draw as you turn the cigar to make sure you have an even burn.


    roygra Cigar Cutter 2 Pack, Stainless Steel Double Blade Guillotine (Silver)roygra Cigar Cutter 2 Pack, Stainless Steel Double Blade Guillotine (Silver)roygra Cigar Cutter 2 Pack, Stainless Steel Double Blade Guillotine (Silver)Torch Lighter Triple Jet Flame Refillable Butane Cigar Lighter Windproof Lighter with Cigar Punch Rest Holder - Butane Not Included (Red Copper)Torch Lighter Triple Jet Flame Refillable Butane Cigar Lighter Windproof Lighter with Cigar Punch Rest Holder - Butane Not Included (Red Copper)Torch Lighter Triple Jet Flame Refillable Butane Cigar Lighter Windproof Lighter with Cigar Punch Rest Holder - Butane Not Included (Red Copper)


    “ I earn money from purchases on affiliate links at no additionl cost to you.” Disclosure Statement

    X