Raspberry and White Chocolate Cheesecake

baked raspberry white chocolate cheesecake


What a delight, raspberry white chocolate cheesecake. This makes my mouth water and taste buds tingle just saying the words.

This raspberry white chocolate cheesecake recipe is my son's creation. Sammy developed this recipe by experimenting with the ingredients and different ways to make it. He made this several times until he was satisfied with the results.

He has brought this recipe to perfection, and that makes it his own. This is a very complicated recipe so I've divided the ingredients and instructions by the three aspects of the recipe.

Don't let this scare you off, just take your time because this baked raspberry white chocolate cheesecake is oh so delicious and well worth the time.

I hope you find it easy to follow. Although time-consuming and complicated you'll be very happy when you taste this delicious dessert.

Here is what you'll need for the chocolate crust:
White Chocolate Cheesecake Raspberry Sauce:
  • 1 bag frozen or 2-3 pints of fresh raspberries
  • 1/3 cup of sugar
  • 2 tsp. of cornstarch, mixed with 1 tsp. of water
Filling:
Here is what you have to do: 
  1. For the crust: Break the graham crackers in a plastic bag, cut the butter into small pieces and add to the bag, smash until you have crumbs.
  2. Spray your pan with nonstick spray, push the crumb mixture over the bottom and up the sides of the pan.
  3. Raspberry Sauce: In a small pot add raspberries and the 1/3 cup of sugar (Save some raspberries for the garnish later)
  4. Bring to a boil for 10 to 15 minutes, strain and return mixture to the pot
  5. Heat over medium heat and mix in the cornstarch and water, keep stirring until this thickens and set aside for later use.
  6. Filling: Beat cream cheese sugar, and cornstarch in large bowl on medium speed, while scraping down the sides, beat until smooth.
  7. Beat in eggs 1 at a time until blended. Now beat in sour cream, vanilla, and melted white chocolate until blended.
  8. Pour the filling into the crust. Drop evenly spaced puddles of the raspberry sauce on top of the filling.
  9. With a sharp knife swirl through the puddles of raspberry sauce in a circular motion.
  10. Refrigerate the remaining raspberry sauce to serve later with the cheesecake
  11. Bake for 15 minutes at 350 degrees and reduce heat to 250 degrees. Bake at 250 degrees for 1 hour and 15 minutes, Until the center, jiggles
  12. Turn the oven off and leave the door closed for another hour. Remove from the oven to a wire rack and let it cool completely.
  13. After cooled remove from the pan by running a knife around the edges, and place on a serving plate.
  14. Now you can add the raspberries you saved on top for garnish. Refrigerate for 4 hours and serve.   

As Always Thanks for Stopping By and I hope you enjoy.


Here are some handy tools for your baking needs

Beef and Sausage Chili

beef sausage chili recipe


This sausage beef chili recipe is the perfect cold weather day warm-up. I’ve made chili plenty of times, and always used the standard chili kit that you find in the grocery store.

Jamie has been making this award-winning chili for a few years now. This chili recipe is amazing, and Oh so good. I thought it was time to put it all down in writing and share it with you.

This is a meal the whole family is going to enjoy.  We make this often during football season, it's a great game-day treat.

Are you ready? Here is what you need:

2 lbs. of ground beef (80/20)
1 lb. bulk Italian Sausage
2- 16oz. can of Red Chili Beans (In Medium chili sauce)
2- 16oz. can of Red Chili Beans (In Hot sauce)
2- 6oz. cans of tomato paste
2- 28oz cans diced fire-roasted tomatoes (with juice)
1 large yellow onion (chopped)
2 green chili peppers (seeded and chopped)
2 Green Bell peppers (chopped)
1 Red Bell pepper (chopped)
2 Jalapeno peppers (chopped)
10 slices cooked bacon (chopped)
½ cup beer (optional)
¼ cup chili powder
2 cloves of garlic minced
2 tsp. ground cumin
1 tsp. paprika
1 tsp. white sugar

For the garnish:

Shredded Cheddar Cheese
Sour Cream
Frito corn chips or crackers

Instructions:

  1. In a large pot, add your meat and cook it until it’s browned.
  2. Now drain the grease from the pot.
  3. Add everything else into the pot, bring this to a slight boil, and then set it on simmer.
  4. Cook this for 2 hours, adding more seasoning to your taste.
  5. Top off your hearty bowl of chili with some shredded cheddar, and sour cream for a nice cold-weather warm-up.

As always thanks for stopping by and I hope you enjoy.


Keurig One Cup Brewing System – My Review

Coffee Beans


First let me tell you, that I never review a product unless I own it and use it. At Sam's Place, you will find my honest experience with the product, good or bad.

We sure do love our coffee, and our Keurig one cup brewing system makes it easy to enjoy a nice hot cup of coffee anytime in about 30 seconds.

 Yes, we have your typical 12 cup drip coffee maker but there are many times when you just don't want to make a full pot of coffee.

We were shopping around for a Keurig one cup brewing system, but our good friend Verna beat us to it, she bought us one as a gift.

This is a great one cup brewing system and exactly what we wanted. Now we can have a single cup of coffee anytime we want to without having to make a whole pot.

 You will find so many delicious choices of K-Cups.  Keurig really knew what they were doing when they engineered the one cup system.

At the end of the day, after a full day of work, or taking care of the kids, and the house sometimes you just need to sit and relax with a good cup of your favorite coffee or tea. You can also buy hot chocolate in a K-Cup.

We’ve had our Keurig for better than 2 years now, and only had one problem. It clogged and wouldn’t make coffee.

We called the Keurig service number, and they walked us right through how to unclog the system. After that, it works as good as new.

I recommend following the cleaning frequency instructions in the manual. So if you like coffee, especially, flavored coffee, I would recommend the Keurig One Cup System.

The Keurig Brewing System along with a 40-count variety of flavored K-cups. As always Thanks for stopping by.


Keurig K-Select Single-Serve K-Cup Pod Coffee Maker, Vintage RedKeurig K-Select Single-Serve K-Cup Pod Coffee Maker, Vintage RedKeurig K-Select Single-Serve K-Cup Pod Coffee Maker, Vintage RedKeurig K-Mini Plus Single Serve Coffee Maker, with 5-inch Brewer, 6 to 12 Pounds Brew Size, K-Cup Pod and Cord Storage (Black)Keurig K-Mini Plus Single Serve Coffee Maker, with 5-inch Brewer, 6 to 12 Pounds Brew Size, K-Cup Pod and Cord Storage (Black)Keurig K-Mini Plus Single Serve Coffee Maker, with 5-inch Brewer, 6 to 12 Pounds Brew Size, K-Cup Pod and Cord Storage (Black)


How to Make Alfredo Sauce

A plate of alfredo tortellini


Alfredo sauce for your favorite pasta is really easy to make, and it’s OH so delicious. Our daughter whipped this Alfredo sauce up just the other night for this amazing Tortellini Alfredo.

I’m showing the fresh parsley as optional because our grandson doesn’t like anything green in his food. But I do recommend using parsley for this Alfredo Sauce.

This recipe will be enough for 1 pound of your favorite pasta.

Here is what you need:

1/2 Stick of butter
1 1/2 cups of Parmesan Cheese (grated)
1 cup of heavy cream
1 clove of garlic (minced)
½ cup of fresh chopped parsley (optional)

This is what you do:

  1. In a medium saucepan, melt the butter with the garlic, and then add the cream.
  2. Bring this to a simmer while stirring, and add the grated cheese.
  3. Continue to stir until you bring it to a slight boil
  4. Pour over and mix with your favorite pasta, garnish with the fresh parsley, and enjoy a simple pasta Alfredo dinner.
 As always Thanks so much for stopping by and I hope you enjoy it

Easy Light Lunch or Dinner


Mini chicken salad sandwiches and broccoli salad


This is a quick and easy idea for a light lunch or dinner, with some leftovers that you may have in the refrigerator.

I call this mini crescent roll chicken salad sandwich, with broccoli salad. If you have some leftover chicken this is a delicious way to use it up.

Make your favorite chicken salad, I like a little crunch to my chicken salad, so I add some chopped-up celery and chopped almonds.

Pick up some Pillsbury Crescent Rolls and bake them according to the package instructions. (I know that I didn’t really have to tell you that, but just in case!)

Now how to make the Broccoli Salad:

8 cups of broccoli (Chopped Very Fine)
1 cup Miracle Whip Light Dressing
6 slices of bacon (cooked and crumbled)
½ cup of red onion (Chopped Very Fine)
3 tbsp. sugar
3 tbsp. white vinegar

Mix the Miracle Whip, sugar, and white vinegar until it’s blended. Now in a large bowl add the remaining ingredients, pour in the dressing, and mix.

Refrigerate this for about one hour and it’s ready to serve. Slice your crescent rolls and fill them with that delicious chicken salad and enjoy.

As always Thanks for stopping by. I hope you enjoyed this recipe.

Pepperoni Bread a Family Favorite

Pepperoni Bread on the cutting board


I enjoy family recipes passed down from generation to generation. Pepperoni Bread is another family recipe from my grandmother’s kitchen that we all loved when we were kids.

 She always used sliced pimento cheese to make this, but today I have a hard time finding pimento cheese, so you can really use any cheese that you like (slices or shredded).

This bread is really easy to make and makes a great snack or serve it with a nice salad before your main dish.

Okay let’s make some dough first; here is how you do it.

Ingredients:

·         5 to 6 cups of all-purpose flour
·         3 tbs. of Crisco or light olive oil
·         2 packages of dry yeast
·         2 ¼ cups of warm water (Not too Hot)
·         1 tsp. of salt
·         1 tsp of sugar (optional)

Instructions:  
 
1.      Dissolve the yeast in the warm water
2.      While you’re waiting add the flour, oil, salt, and sugar to a large bowl
3.      Add the water and yeast to the bowl and begin to mix. (I hope you washed your hand first)
4.      Knead until the dough is smooth and forms a ball, cover the bowl with a cloth, and let this rise for about one hour.

This dough recipe will make at least 3 Pepperoni Breads.

I use my Kitchen-Aid Stand mixer it makes the job really easy. Just add everything and attach the dough hook, and mix on low speed until the dough forms a ball.

Now get the ingredients ready to make that pepperoni bread. Here is what you need.

Ingredients:

· 1 or 2 eggs
· 1 package of sliced pepperoni (7oz. will make more than one)
· A package of sliced pimento cheese cut into 1/2-inch stripes
· A Sprinkle of paprika.

Instructions:  

  1. Crack the egg in a bowl, and beat the egg until mixed. Set this aside for later
  2. Spread the dough in a pizza pan (you don't have to go all the way to the edges)
  3. Brush the dough lightly with the beaten egg
  4. On of the dough place your slices of pepperoni, and cheese (not too much, just enough to cover)
  5. Fold the dough over 3 or 4 times, until you have a loaf.
  6. Be sure to pinch the ends of the loaf and the seam to minimize the ingredients from running out.
  7. Lightly brush the top of the loaf with the beaten egg
  8. Sprinkle some paprika on the top of the loaf.
  9. Bake at 400 degrees for 20 to 25 minutes (until golden brown)
I hope you enjoyed another family recipe, and give it a try. As always Thanks for stopping by.

KitchenAid 5-Qt. Tilt-Head Stand Mixer KSM150PSBM Artisan Series, 5 Quart, Black MatteKitchenAid 5-Qt. Tilt-Head Stand Mixer KSM150PSBM Artisan Series, 5 Quart, Black MatteKitchenAid 5-Qt. Tilt-Head Stand Mixer KSM150PSBM Artisan Series, 5 Quart, Black MatteBaking Sheet Set, 2-Piece Cookie Sheet Set with Silicone Handles, Steel Baking Pans Set, Durable Baking Sheets for Oven, BPA Free Cookie Sheets for Baking Nonstick Set, Sheet Pan - Black Baking TrayBaking Sheet Set, 2-Piece Cookie Sheet Set with Silicone Handles, Steel Baking Pans Set, Durable Baking Sheets for Oven, BPA Free Cookie Sheets for Baking Nonstick Set, Sheet Pan - Black Baking TrayBaking Sheet Set, 2-Piece Cookie Sheet Set with Silicone Handles, Steel Baking Pans Set, Durable Baking Sheets for Oven, BPA Free Cookie Sheets for Baking Nonstick Set, Sheet Pan - Black Baking Tray


Poor Man's Pizza My Grandmother's Recipe

Gloden brown poor man's pizza


Poor Man’s Pizza, another recipe passed down from my grandmother. I really don’t know why my grandmother called this poor man’s pizza, I never asked. I learned how to make this by watching her. Although my grandmother made it best, isn't that always the case?

This is a great snack, or you can serve it with dinner because it's like garlic bread only in pizza form. This is very simple to make and if you don't want to take the time to make the dough. Just pick up a pre-made pizza shell or most stores will have dough already to use. Then it becomes very quick and easy.

So if you happen to like garlic, give this one a try. Poor Man's Pizza is great served with a nice salad and your favorite pasta dish and of course a glass of wine.

Ingredients for the Dough:

  • 5 to 6 cups of all-purpose flour
  • 2 1/4 cups of Luke warm water
  • 2 packages of dry yeast
  • 3 tbs. of oil or Crisco
  • 1 tsp. salt 
Ingredients for the Topping:
  • 2 cloves of garlic, finely chopped
  • 2 tbs. of light olive oil (or more if needed)
  • Black pepper to taste
  • Salt to taste
  • Italian seasoning to taste
  • Grated Romano cheese to taste 
Instructions: 
  1. Dissolve the yeast in the water, add oil and salt, and pour into a large mixing bowl
  2. Add flour one or two cups at a time, and mix until the dough is smooth
  3. Set the dough aside to rise for about 1 hour
  4. Grease your pizza pan with Crisco. Spread your dough in a pizza pan (you can make it thin or thick however you like it)
  5. Pour the olive oil into the middle and spread over the entire pizza with your fingers (Wash your Hands First)
  6. Spread the finely chopped garlic over the pizza
  7. Add salt, pepper, Italian seasoning, and grated Romano cheese to your taste
  8. Pre-heat oven to 450 degrees, Bake for about 10 minutes on the middle rack or until the crust is golden brown


    Spread the dough in the pizza pan, you can make it thick or thin, I really like mine thin and crispy. I use my handy Norpro pizza dough and pastry roller, it's really a big help.


    Spreading the dough in the pizza pan

    As always thanks for stopping by and I hope you enjoy it.

    KitchenAid 5-Qt. Tilt-Head Stand Mixer KSM150PSBM Artisan Series, 5 Quart, Black MatteKitchenAid 5-Qt. Tilt-Head Stand Mixer KSM150PSBM Artisan Series, 5 Quart, Black MatteKitchenAid 5-Qt. Tilt-Head Stand Mixer KSM150PSBM Artisan Series, 5 Quart, Black MatteBaking Sheet Set, 2-Piece Cookie Sheet Set with Silicone Handles, Steel Baking Pans Set, Durable Baking Sheets for Oven, BPA Free Cookie Sheets for Baking Nonstick Set, Sheet Pan - Black Baking TrayBaking Sheet Set, 2-Piece Cookie Sheet Set with Silicone Handles, Steel Baking Pans Set, Durable Baking Sheets for Oven, BPA Free Cookie Sheets for Baking Nonstick Set, Sheet Pan - Black Baking TrayBaking Sheet Set, 2-Piece Cookie Sheet Set with Silicone Handles, Steel Baking Pans Set, Durable Baking Sheets for Oven, BPA Free Cookie Sheets for Baking Nonstick Set, Sheet Pan - Black Baking Tray


    Pastry and Pizza Dough Roller

    Norpro Pastry and Pizza Roller


    Today there are so many Hi-Tech kitchen tools to choose from. Slicers, deicers, blenders, and food processors the list goes on and on.

    Norpro Deluxe Pastry and Pizza Roller take me back to the basics of kitchen tools. Something so simple that is such a huge help in the kitchen; and no electricity, you don’t even have to plug this in.

    The word deluxe in the title makes you think this is Hi-Tech, but it's just simple. If you like to bake pies, make homemade pizza, or homemade pasta this is the handiest tool you'll ever have.

    I make my own homemade pizza, and you would think by now that I could toss the dough in the air and twirl it around and then throw it in the pan. I'm sure you've seen those guys on television or those little pizza shops around town do this at one time or another.

    Well, I'm not that good, and that's why I have this handy tool. What makes this nice is that I'm spreading my dough while it's already in the pan.

    The large roller will spread the dough almost to the edges of the pan. The small side will roll the dough right to the edges, then I press the edges to form the crust.

    It's also great for pie dough and homemade ravioli. If you don't have a pasta machine to roll the pasta dough this is the tool that you'll want to have in your kitchen.

    For ravioli, roll the dough long and wide enough, then spoon in the ricotta cheese, fold the dough over, and cut the individual ravioli. Use a fork to crimp and seal the edges.


    Bobby and Tyler making pepperoni rolls 

    As always Thanks for stopping by

    KitchenAid 5-Qt. Tilt-Head Stand Mixer KSM150PSBM Artisan Series, 5 Quart, Black MatteKitchenAid 5-Qt. Tilt-Head Stand Mixer KSM150PSBM Artisan Series, 5 Quart, Black MatteKitchenAid 5-Qt. Tilt-Head Stand Mixer KSM150PSBM Artisan Series, 5 Quart, Black MatteBaking Sheet Set, 2-Piece Cookie Sheet Set with Silicone Handles, Steel Baking Pans Set, Durable Baking Sheets for Oven, BPA Free Cookie Sheets for Baking Nonstick Set, Sheet Pan - Black Baking TrayBaking Sheet Set, 2-Piece Cookie Sheet Set with Silicone Handles, Steel Baking Pans Set, Durable Baking Sheets for Oven, BPA Free Cookie Sheets for Baking Nonstick Set, Sheet Pan - Black Baking TrayBaking Sheet Set, 2-Piece Cookie Sheet Set with Silicone Handles, Steel Baking Pans Set, Durable Baking Sheets for Oven, BPA Free Cookie Sheets for Baking Nonstick Set, Sheet Pan - Black Baking TrayNorpro Marble Pastry/Pizza Roller 8.5-in.Norpro Marble Pastry/Pizza Roller 8.5-in.Norpro Marble Pastry/Pizza Roller 8.5-in.Norpro Wood Pastry/Pizza RollerNorpro Wood Pastry/Pizza RollerNorpro Wood Pastry/Pizza Roller


    Italian Peasant Soup

    A bowl of Italian Peasant soup

    We are certainly in the cold season now, and when it gets cold outside we like our soups. There is nothing better than serving your family a hearty and healthy bowl of soup.

    I like all kinds of soups, especially in the winter months, which happens to last a long time in here in Western New York.

    Here is a recipe that my we found on-line last year called Italian Peasant Soup. This is a recipe by Kim Knight of Hamburg, Pennsylvania.

    We’ve made this a few times now and I've got to tell you it is absolutely delicious, and easy to make.

    So a big Thank you to Kim Knight of Hamburg Pennsylvania for this recipe, I love this soup and hope many other people will enjoy it.


    As Always Thanks for stopping by, I hope you try Kim's recipe.

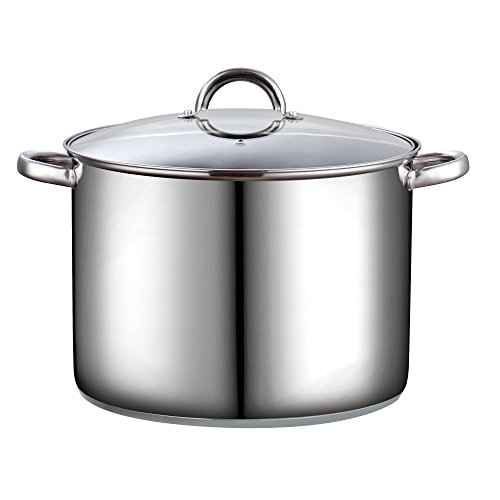
    Cook N Home 16 Quart Stockpot with Lid, Stainless SteelCook N Home 16 Quart Stockpot with Lid, Stainless SteelCook N Home 16 Quart Stockpot with Lid, Stainless SteelLallisa 5 Pcs 32 oz Ceramic Soup Bowls with Double Handle Oven Safe Soup Bowls Colorful Cute Bowls Embossed Soup Bowls Set for Cereal, Soup, Salad, Stew, Cereal, Pot Pies and PastaLallisa 5 Pcs 32 oz Ceramic Soup Bowls with Double Handle Oven Safe Soup Bowls Colorful Cute Bowls Embossed Soup Bowls Set for Cereal, Soup, Salad, Stew, Cereal, Pot Pies and PastaLallisa 5 Pcs 32 oz Ceramic Soup Bowls with Double Handle Oven Safe Soup Bowls Colorful Cute Bowls Embossed Soup Bowls Set for Cereal, Soup, Salad, Stew, Cereal, Pot Pies and Pasta


    My Review of Orgreenic Non Stick Pan

    Orgreenic 8 inch non stick fry pan


    Cooking for just two people, one of our most used cooking utensils has become our eight inch non-stick fry pan.

    We use it for eggs, omelets, grilled cheese, crepes, pancakes, and just about anything on a smaller scale.

    Of course we do have a full set of pots and pans; I'm just saying that our eight inch pan is the most used.

    So when we ruined our favorite eight inch non-stick fry pan by leaving it on the burner for hours with the burner on of course, we needed to find a new one.

    I had seen the television ads for this new Orgreenic non-stick cookware, so I figured why not give it a try.

    So I went out and bought the eight inch Orgreenic Fry Pan, and got a little education at the same time. This Non-Stick cookware is Eco Friendly, but I’m not going to give you all of the technical details, because you can read all about them on-line.

    I’m going to be 100% honest with you here, the ads say that you don’t need any oil, grease, or butter while cooking, and the food won’t stick. I seasoned the pan according to the instructions, but the first time I used it the food did stick.

    I don’t view this as a negative aspect of the product. I use just a little cooking spray and nothing sticks to this pan. I’ve read many negative reviews on this product, but on the other hand there are just as many positive reviews.

    We’ve used this pan for the last two years and it’s still like brand new. I give the Orgreenic pans Two Thumbs UP!!

    My Orgreenic pan
    This is my Orgreenic 8 inch pan after two years of use

     As always Thanks for stopping by, and your comments are welcome.

    Orgreenic Blue Hammered Cookware Collection - Non-Stick Ceramic for Even Heating | Safe for Dishwasher, Oven & StoveTop - 12Orgreenic Blue Hammered Cookware Collection - Non-Stick Ceramic for Even Heating | Safe for Dishwasher, Oven & StoveTop - 12Orgreenic Blue Hammered Cookware Collection - Non-Stick Ceramic for Even Heating | Safe for Dishwasher, Oven & StoveTop - 12Orgreenic Rose Hammered Cookware Collection - Non-Stick Ceramic for Even Heating | Safe for Dishwasher, Oven & StoveTop - 10Orgreenic Rose Hammered Cookware Collection - Non-Stick Ceramic for Even Heating | Safe for Dishwasher, Oven & StoveTop - 10Orgreenic Rose Hammered Cookware Collection - Non-Stick Ceramic for Even Heating | Safe for Dishwasher, Oven & StoveTop - 10GreenPan Paris Pro Hard Anodized Healthy Ceramic Nonstick, 8GreenPan Paris Pro Hard Anodized Healthy Ceramic Nonstick, 8GreenPan Paris Pro Hard Anodized Healthy Ceramic Nonstick, 8


    “ I earn money from purchases on affiliate links at no additionl cost to you.” Disclosure Statement

    X